See benefits & ROI →
How EW Inventory saves time and money on monthly and annual subscriptions.
Welcome
EW Inventory helps retail and inventory teams sell at the register, track stock,
manage customers, and run back-office tasks in one place. Use it on iPhone, Android,
or in a web browser (desktop or tablet).
Who this guide is for: cashiers, store supervisors, managers, and organization
admins. Some screens only appear if your plan and role allow them.
Getting started
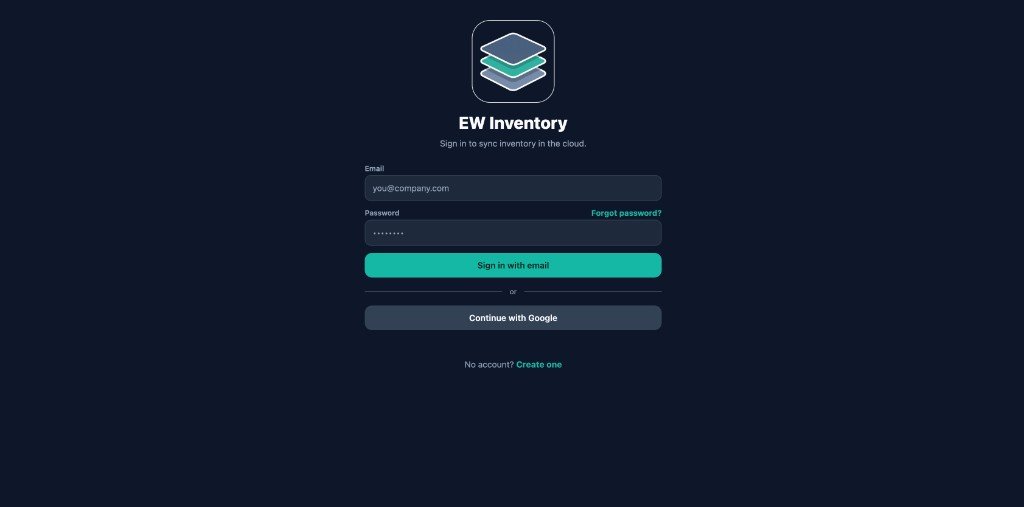
Sign in
Install the app from the App Store or Google Play, or open
https://app.ewinventory.com in your browser. Use Sign in with email
or Continue with Google. New users tap Create one to register.
Create or join an organization
After sign-in, tap Sign up if you are creating a new organization, or continue if you were invited.
Complete your profile (name, organization details) when prompted.
If an admin invited you by email, sign in with that email — you will be linked to their organization automatically after the invite is accepted.
Free trial — no credit card (new organizations)
Every new organization receives 7 days of full Premium access when you sign up —
no credit card required. You are not asked for payment details to start. During that
period you can use Catalog, Register, Sales, Customers, More, team invites, catalog CSV import, bulk
catalog price edits, custom roles (Premium), and other Premium capabilities. Complete your
organization profile first so currency and location are set correctly.
Before the trial ends: open More → Settings → Manage subscription (or
More → Subscription) to compare Starter, Standard, Pro, Premium, and Enterprise plans.
Account owners subscribe to keep access; invited team members should ask their account owner to subscribe.
After the free period ends without a paid plan, the app keeps Dashboard available but asks
you to subscribe before other workspace tabs. Invited members see reminders to contact the account owner.
Select your location (multi-site)
If your organization has multiple stores or warehouses, use the location control on the Dashboard to choose which site you are working in. Sales and stock views respect this selection.
Navigation overview
Mobile app (phone / tablet)
Six tabs along the bottom:
Tab
Purpose
📊 Dashboard
Today’s sales, low stock, shortcuts
📦 Catalog
Products, suppliers, receive stock, import
🛒 Register
Point of sale, checkout, pending invoices
🧾 Sales
Sales history, receipts, voids, ship product
👥 Customers
Contacts, lists, price lists
⋯ More
Settings, reports, expenses, admin tools
Web app (desktop)
The same areas appear in a left sidebar (Dashboard, Catalog, Register, Sales,
Customers, plus More shortcuts). The Register cart stays full width; other areas use a comfortable
reading layout.
Tip: Tap the ? icon on the Dashboard header to open in-app FAQ anytime.
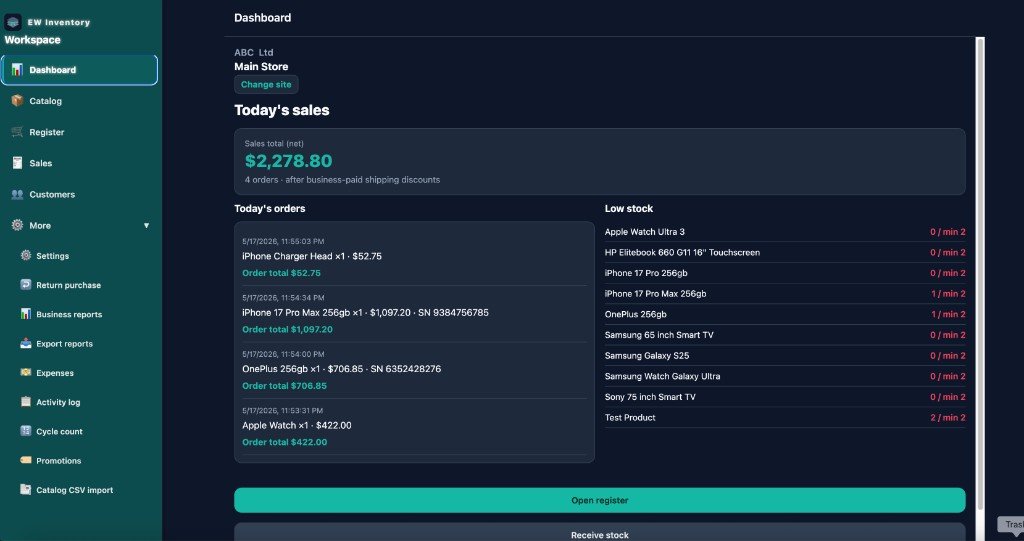
Dashboard
Your daily snapshot: today’s sales total, count of transactions, and
low-stock products. Multi-location organizations see which site is active at the top.
Open the Dashboard tab.
Review today’s sales card — tap through to Sales if you need detail.
Scroll to low-stock items; tap a product to jump into Catalog.
Use quick actions (when shown) to open Register, Catalog, or other areas.
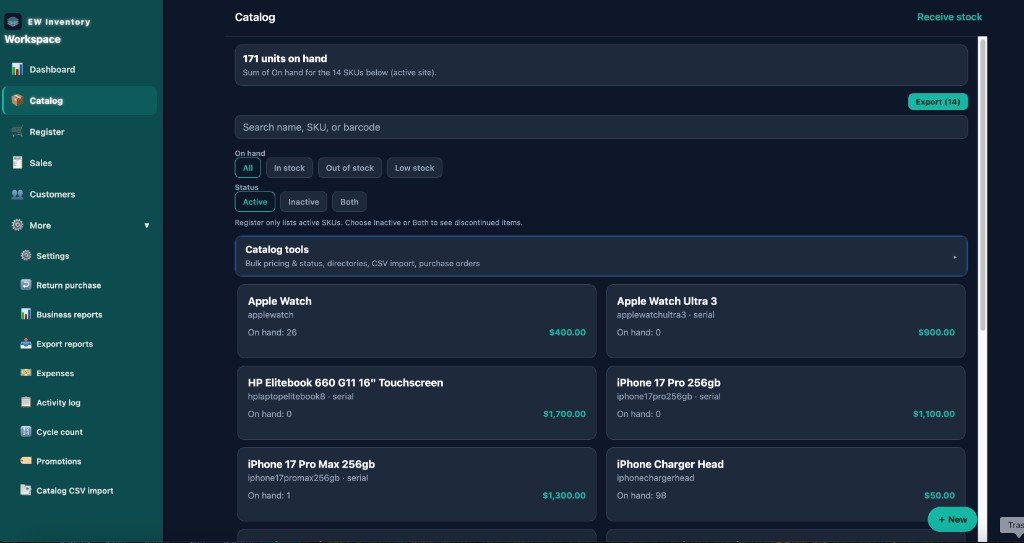
Catalog
Manage everything you sell: SKUs, costs, prices, barcodes, manufacturers, brands, and suppliers.
Product list
Go to Catalog.
Use search and filters to find products.
Tap + or Add product to create a new SKU.
On Premium plans, organization admins can use Export (filtered list) to download CSV for spreadsheets. Managers and cashiers do not see catalog export.
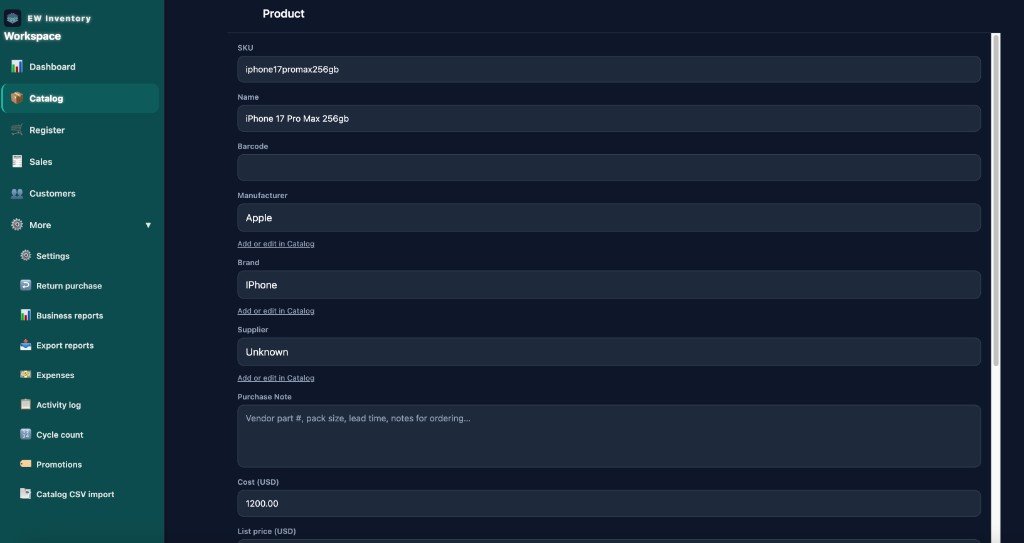
Product details
Edit name, SKU, barcode, cost, list price, tax flags, serial tracking, and images. Save before leaving the screen.
Manufacturers, brands & suppliers
Organization admins open Manufacturers, Brands, and Suppliers from catalog tools.
Managers can view manufacturers and brands (read-only); suppliers and purchase orders are admin-only.
Cashiers browse the product list only.
Purchase orders
Organization admins only. Managers and cashiers do not see purchase orders in the app.
Open Purchase order from Catalog tools.
Create a PO, add line items, and save.
When goods arrive, use Receive stock (Catalog or More) to increase on-hand quantity.
Receive stock from Catalog
Catalog includes a Receive stock screen — same workflow as More → Receive (see Receive stock section).
Register (point of sale)
Ring up sales, scan products for faster checkout, apply promotions, attach customers, and take payment.
Building a sale
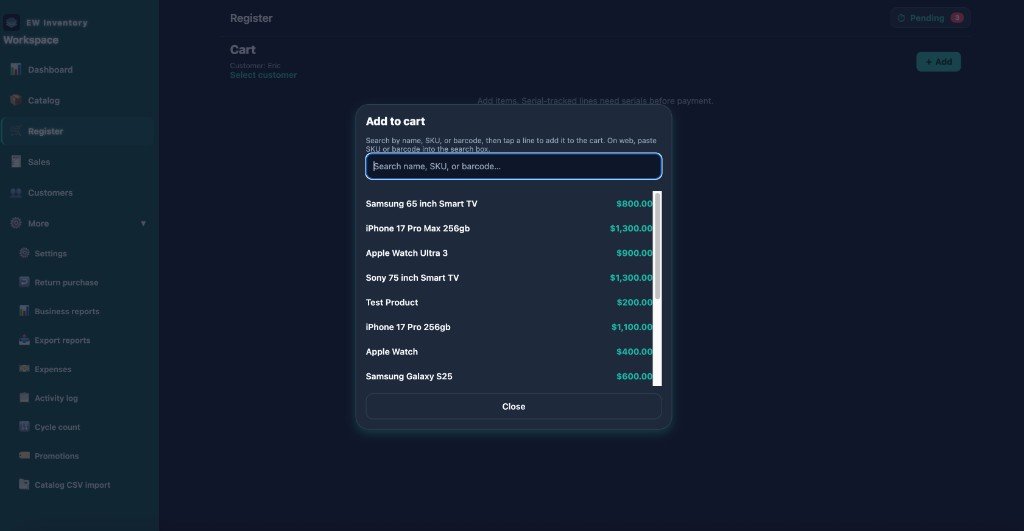
Open Register.
Add line items — search by name or SKU, tap + Add, or use barcode scanning (below).
Adjust quantity with + / − or by tapping the line.
Optional: attach a customer for pricing or history.
Tap Checkout when ready.
Barcode scanning (faster checkout)
When products have barcodes on their catalog record, scanning adds them to the cart automatically —
no extra tap on each item.
iPhone / Android: tap Scan on the Register screen (or in the
+ Add dialog) to open the camera. Each successful scan adds the matching product
to the cart.
Web (desktop): tap Scan next to + Add to turn on
USB scan mode (Scan on). Plug in a USB barcode scanner (keyboard
wedge); each scan adds the product to the cart. Tap Scan on again to turn it off.
You can still type in the search field or use + Add when a label is damaged or
the SKU is not barcoded.
Tip: Add barcode values on each product in Catalog so scans resolve
quickly at the register.
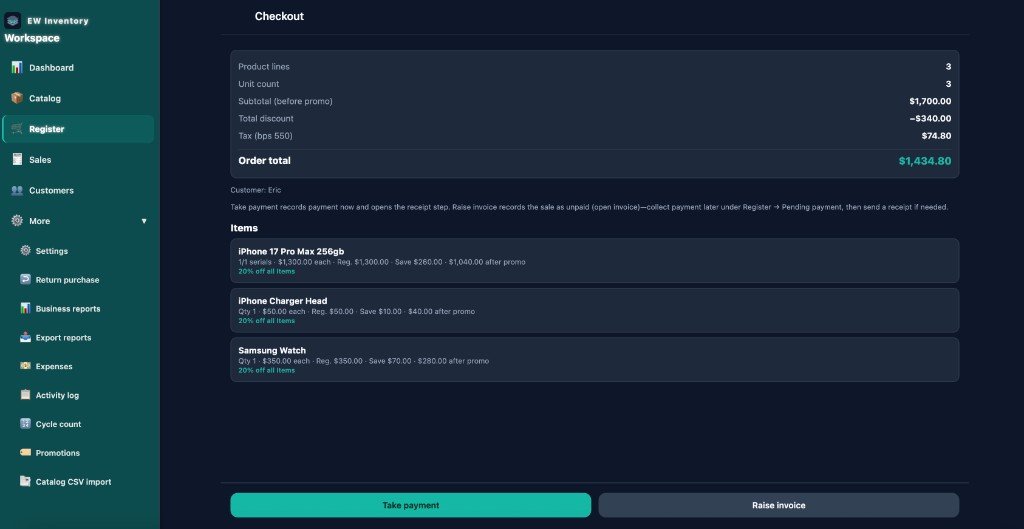
Checkout
Review totals, tax, and discounts on the checkout summary.
Choose how to finish the sale using the two buttons at the bottom:
Take payment — use when the customer is paying now.
This completes the sale as paid, records payment (cash, card, or other methods your
organization supports), and opens the receipt step so you can print, email, or share
the receipt when offered.
Raise invoice — use only when the customer has not paid yet
(for example, they will pay later or on account). This saves the sale as
pending payment (an open invoice): stock is updated, but no payment is
recorded until you collect it later. Do not use Raise invoice if the customer is paying
at the register — use Take payment instead.
After Take payment, follow the prompts to record how they paid, then finish
with print, email, or share receipt when offered.
Cashiers:Raise invoice is not available. Use Take payment when the customer pays now.
For pay-later sales, ask a manager or admin to raise the invoice. Cashiers can open Register → Pending to
take payment on open invoices but cannot void them.
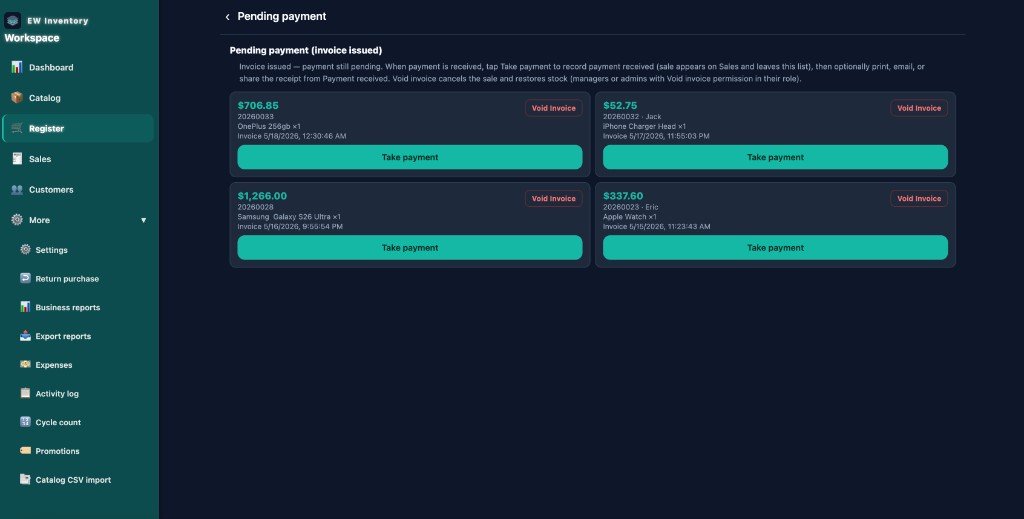
Pending payment (invoices)
Sales created with Raise invoice appear under
Register → Pending (badge on the Register header) until payment is collected.
Open a sale and tap Take payment when the customer pays.
Void open invoices only if your role allows (managers and admins; not cashiers).
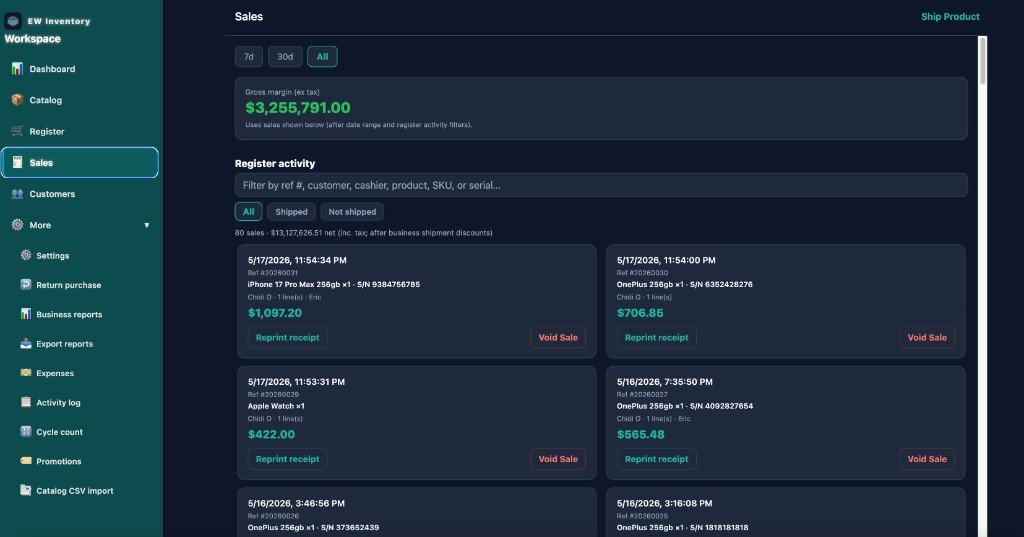
Sales
Full history of completed and open sales for your location.
Open Sales.
Scroll or filter by date to find a transaction.
Tap a sale to view details, reprint, email PDF, or share.
Void completed sales only if you are an organization admin (where enabled).
Ship product — record carrier, tracking, and shipping cost (header button or sale detail).
Reprint receipt or Void sale from a sale card when your role allows.
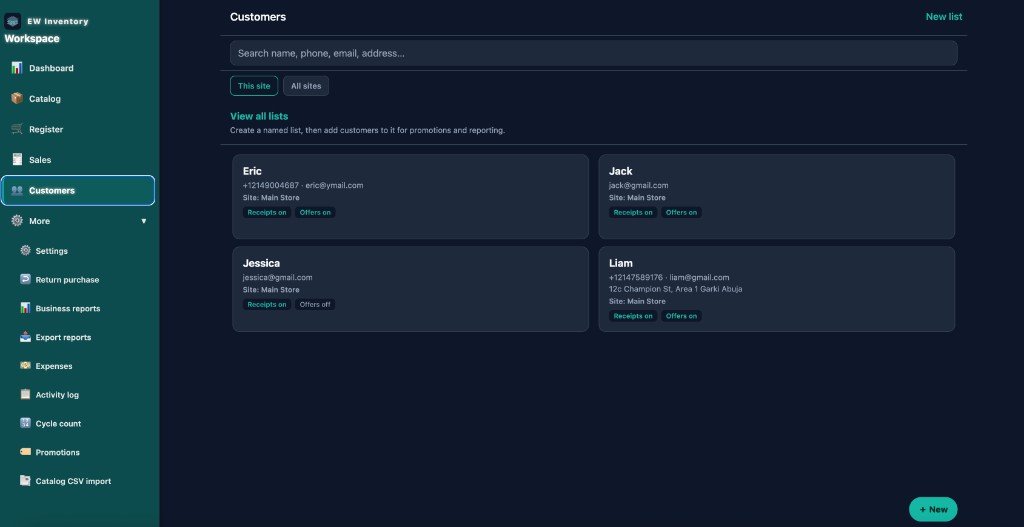
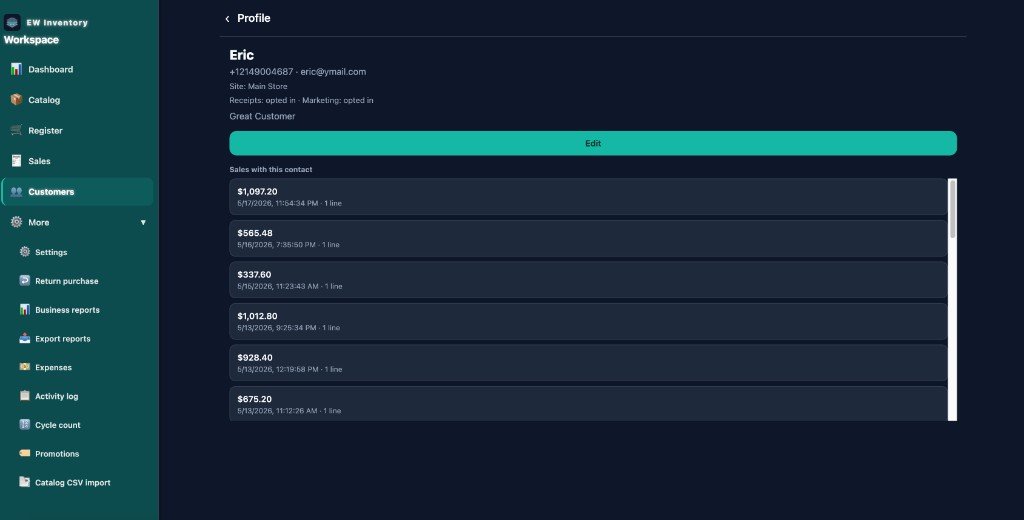
Customers
Customer list
Open Customers.
Search by name, phone, or email.
Tap a row for Profile — notes, history, and price list actions (managers and admins).
Tap + to add a new contact. Cashiers can add contacts but cannot open profiles or edit existing contacts.
Lists (groups)
Lists group customers for marketing or pricing (managers and admins). Create a list, add members, and
email or share price lists to the group when your plan supports it. Cashiers do not see customer lists.
More menu
On mobile, More is a hub of tiles. On web, the same tools appear in the sidebar
under More. Availability depends on your subscription plan and role.
Tile / link
Typical access
Settings
Everyone
Receive stock
Organization admin (More); managers may use Catalog → Receive when shown
Return purchase
Organization admin
Business reports
Organization admin
Export reports
Organization admin
Expenses
Organization admin
Activity log
Organization admin
Cycle count
Organization admin
Promotions
Organization admin
Catalog CSV import
Organization admin (Premium)
Users, Roles, Organization
Organization admin
Subscription, FAQ, About
Everyone
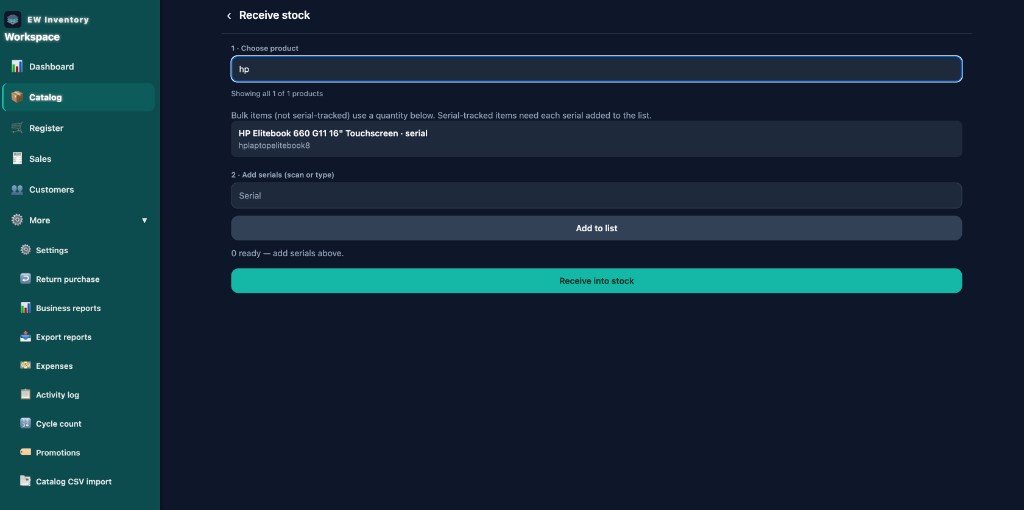
Receive stock
Increase on-hand quantity when purchase orders or transfers arrive.
Open More → Receive or Catalog → Receive stock.
Tap a product to open the receive dialog.
Enter quantity received, or scan serial numbers for serial-tracked items.
Confirm to update on-hand stock.
Scanning while receiving
Serial products: in the receive dialog, tap Scan to use the device
camera, or on web turn on Scan on for a USB barcode scanner. Each scan adds a serial
to the receive list (duplicates are ignored).
Non-serial products: enter quantity in the receive dialog, or search the product list
by name, SKU, or barcode before opening the dialog.
Reports & export
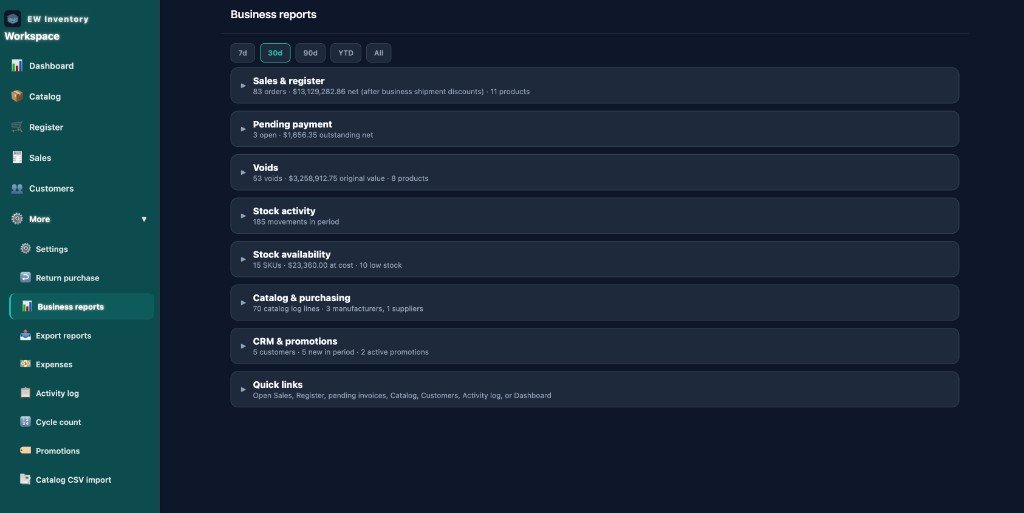
Business reports
More → Business reports — KPI-style views: sales, stock, voids, catalog, CRM, and more.
Use date ranges and filters shown on each report card.
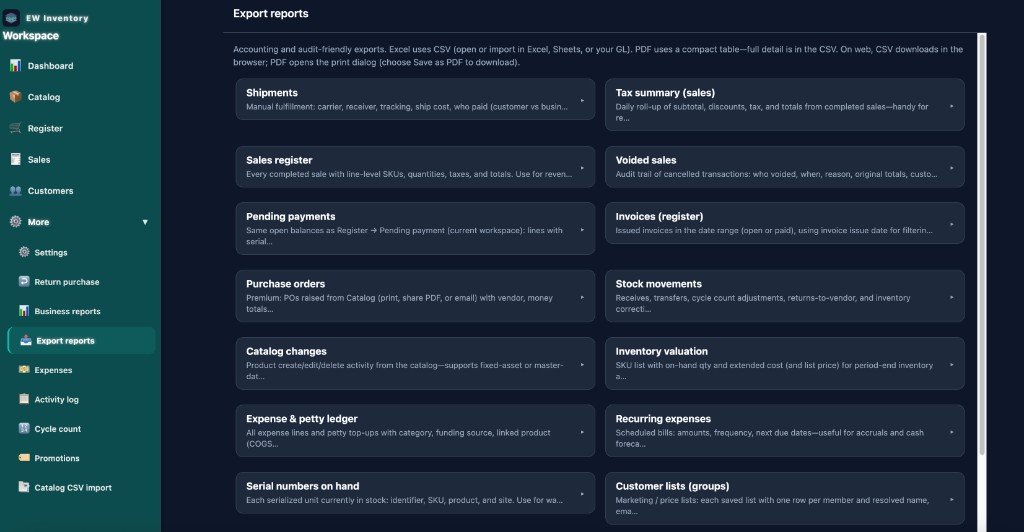
Export reports (admin)
More → Export reports — download accounting-friendly CSV or
PDF bundles for audits (sales register, tax summary, stock movements, expenses,
serial numbers on hand, and more). Organization admins only. On web, CSV downloads in the browser;
PDF opens the print dialog (choose Save as PDF).
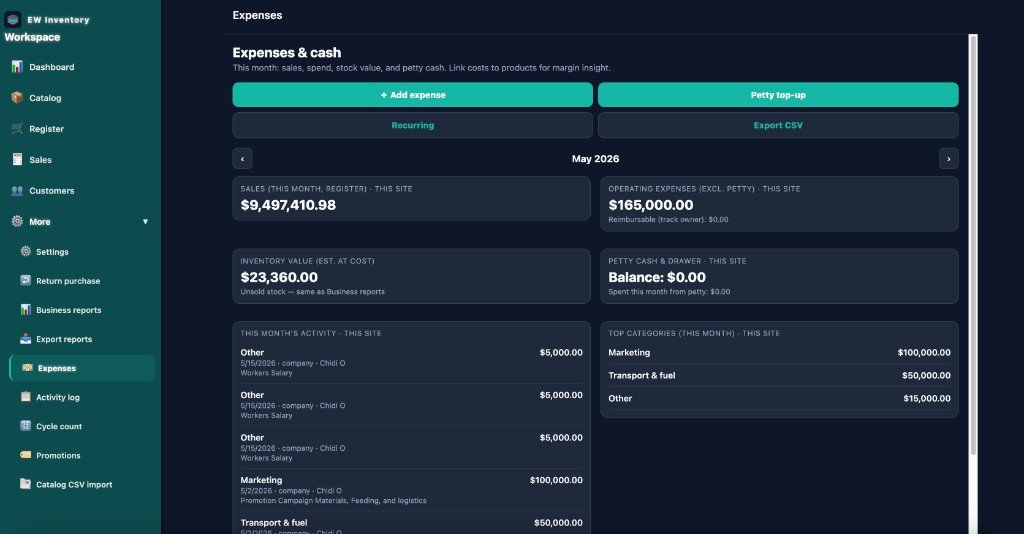
Expenses
Track cash expenses, COGS, petty cash, and recurring bills.
Open More → Expenses.
Add an expense with amount, category, date, and optional receipt photo.
Use Recurring bills (web sidebar / More) for repeating costs.
Export expense data when your plan includes reporting.
Returns, cycle count & activity log
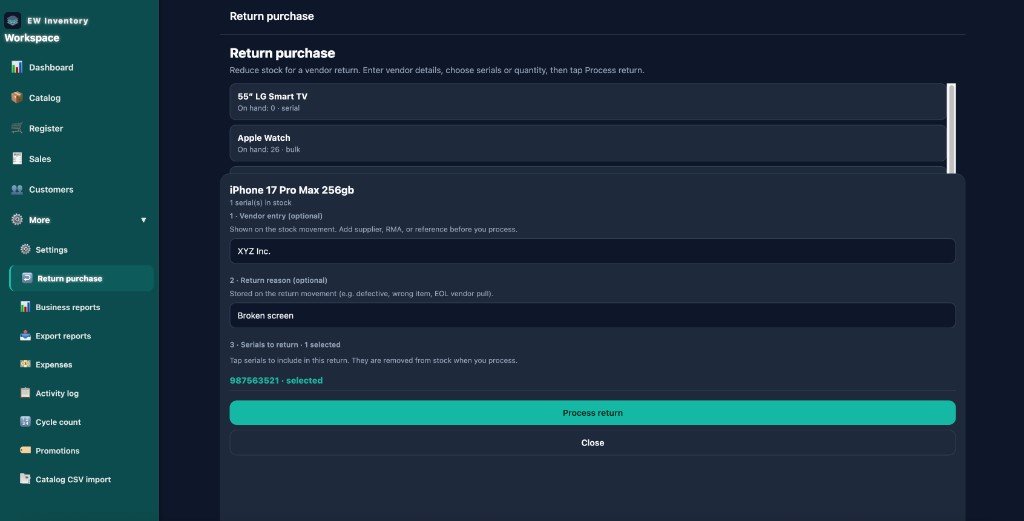
Return purchase
Send stock back to suppliers — reduce quantity and record reason (manager / Premium plan required).
Open More → Return purchase.
Select a product; for serial-tracked items, tap each serial to include in the return.
Optionally enter vendor name and return reason (stored on the stock movement).
Tap Process return to remove quantity from stock.
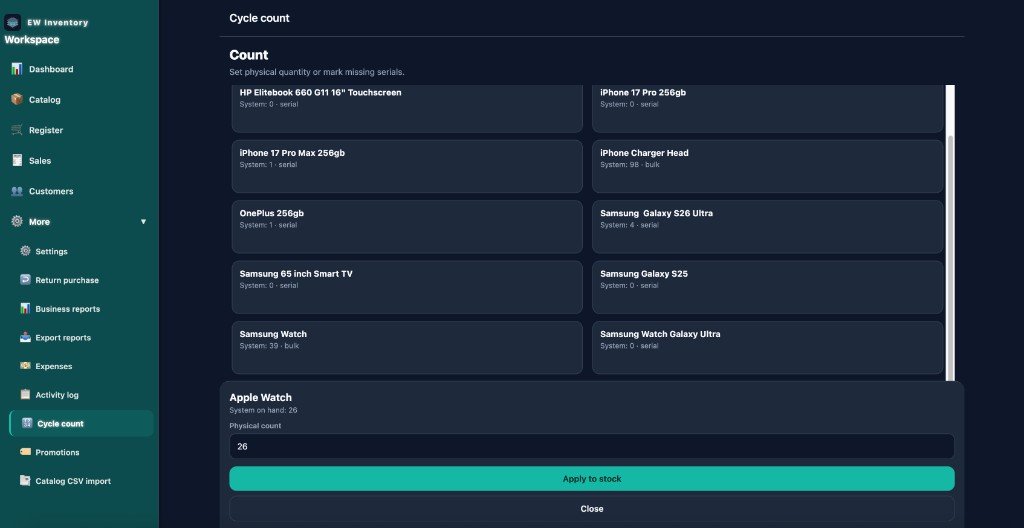
Cycle count
Open More → Cycle count.
Count physical stock per product; enter counted quantity.
Submit to adjust system on-hand to match the floor.
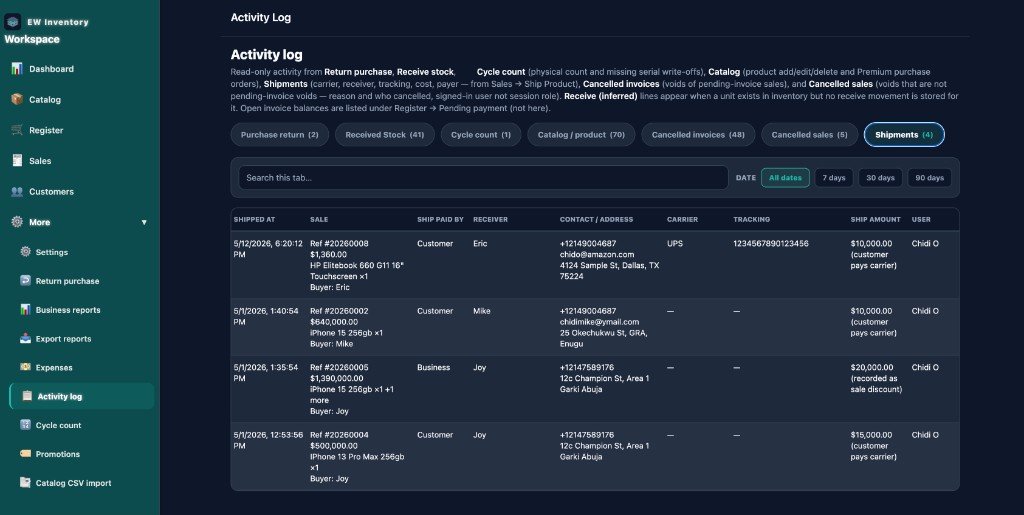
Activity log
More → Activity log — read-only audit trail: receive stock, return purchase, cycle
count, catalog changes, shipments (from Sales → Ship product), and voided sales or invoices. Use
tabs and date filters to narrow results. Open invoice balances are under
Register → Pending, not in this log.
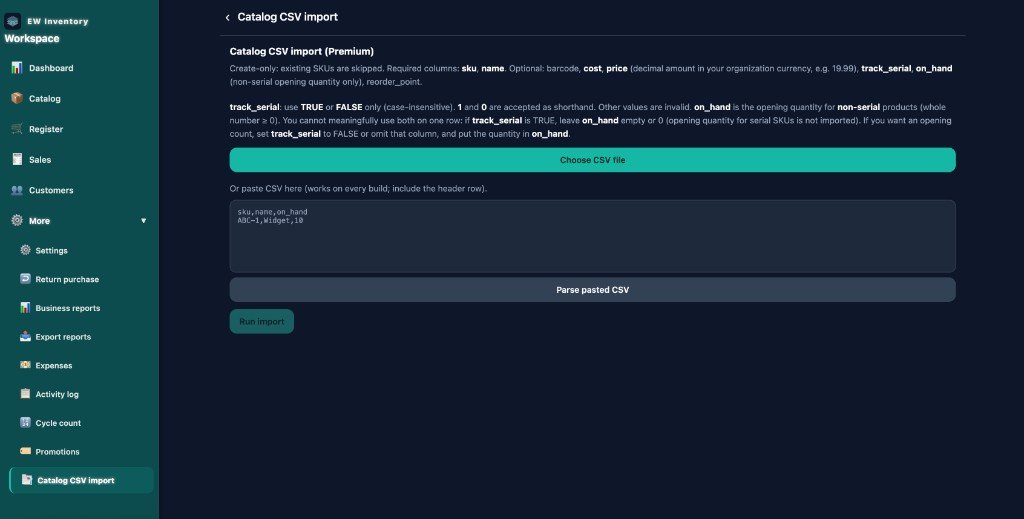
Catalog CSV import (Premium)
Bulk-create products from a spreadsheet. More → Catalog CSV import (create-only:
existing SKUs are skipped).
Download or prepare a CSV with required columns sku and name.
Upload with Choose CSV file or paste rows and tap Parse pasted CSV.
Review preview, then tap Run import.
Do not set both track_serial TRUE and on_hand on the same row. For serial
products, leave on_hand empty; receive stock after import.
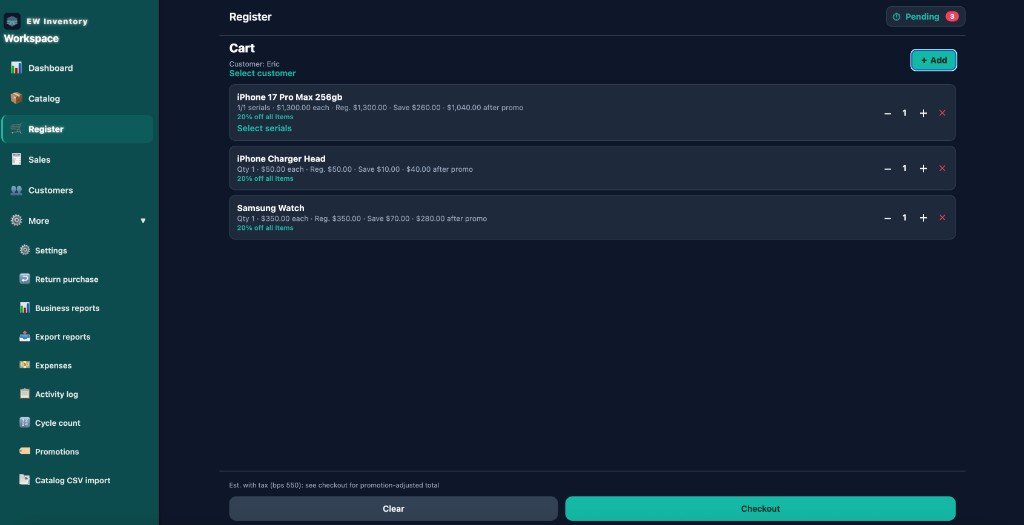
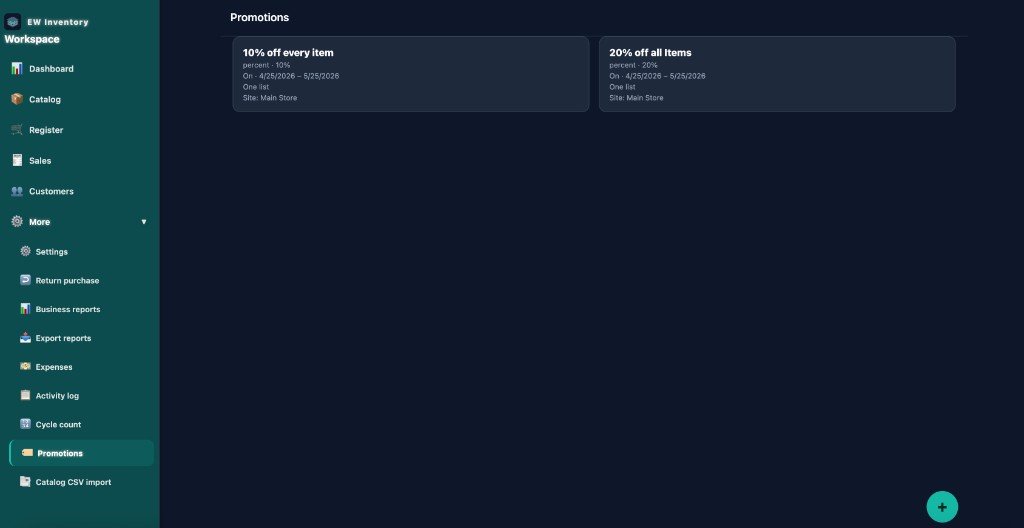
Promotions
Create deals that apply at Register checkout (percent off, bundles, date ranges — per your configuration).
Open More → Promotions.
Tap add to create a promotion; set rules and active dates.
At Register, eligible promotions apply automatically or via manual selection.
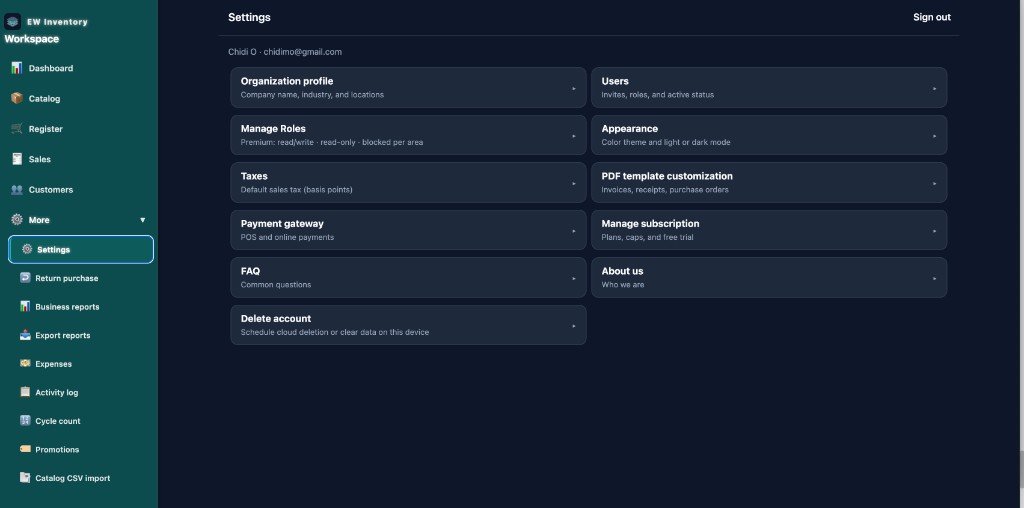
Settings & organization
Settings (all users)
Account email and profile
Sign out
Tax and display preferences (where available)
Session role / ACL profile (Premium custom roles)
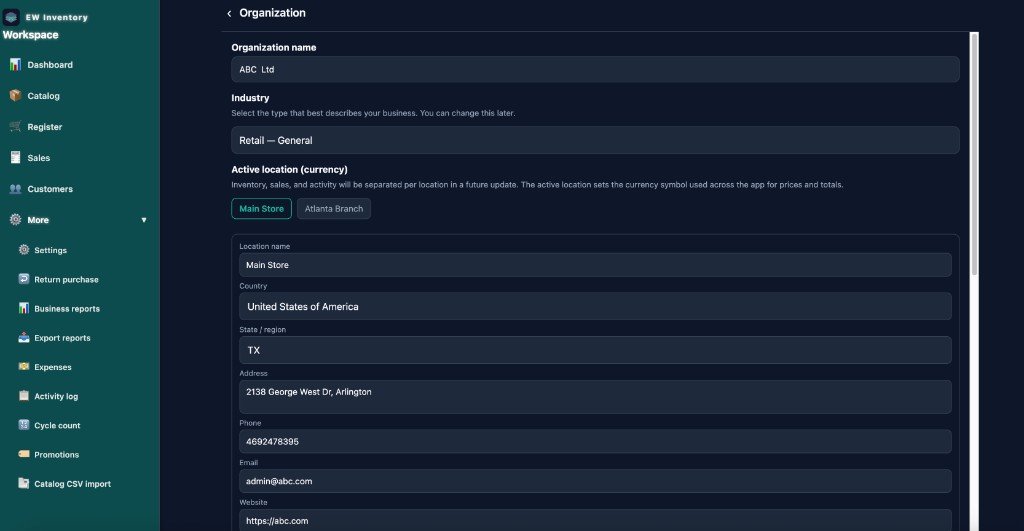
Organization (admin)
Settings → Organization profile (or More → Organization) — set business
name, industry, and each location’s address and contact details. The active location
controls which site’s inventory and sales you work in and sets the currency symbol shown on prices.
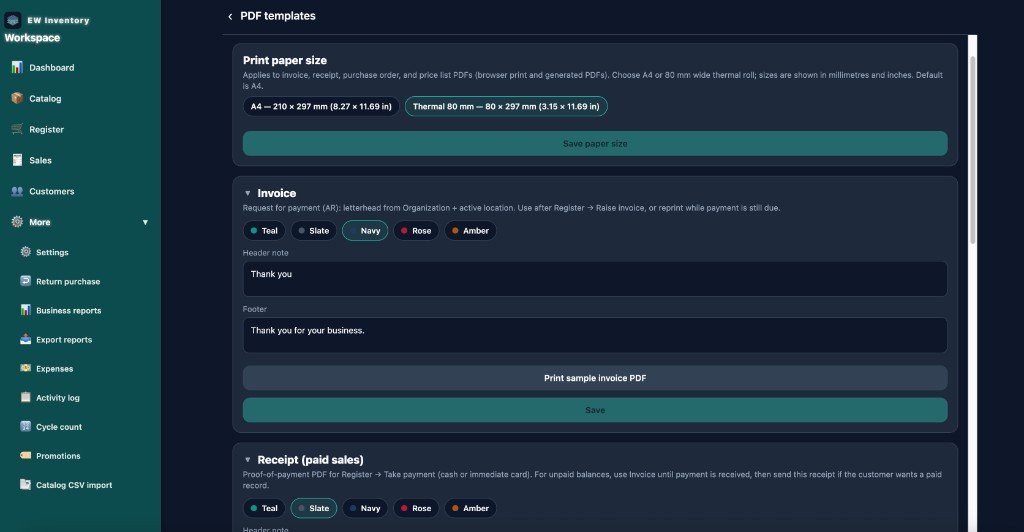
PDF templates (admin)
Settings → PDF template customization — choose paper size (A4 or thermal 80 mm),
colors, and header/footer text for documents.
Invoice — request for payment; use with Raise invoice or while payment is still due.
Receipt (paid sales) — proof of payment after Take payment; use invoice until paid, then receipt if the customer wants a paid record.
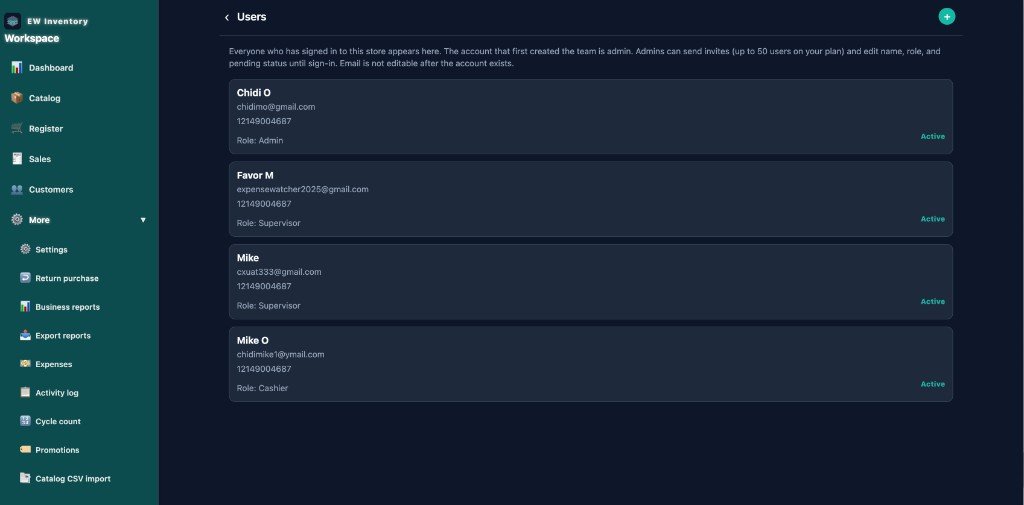
Enter email and assign a role (Admin, Manager, Cashier, or custom Premium role).
Invitee signs in with that email to join the organization.
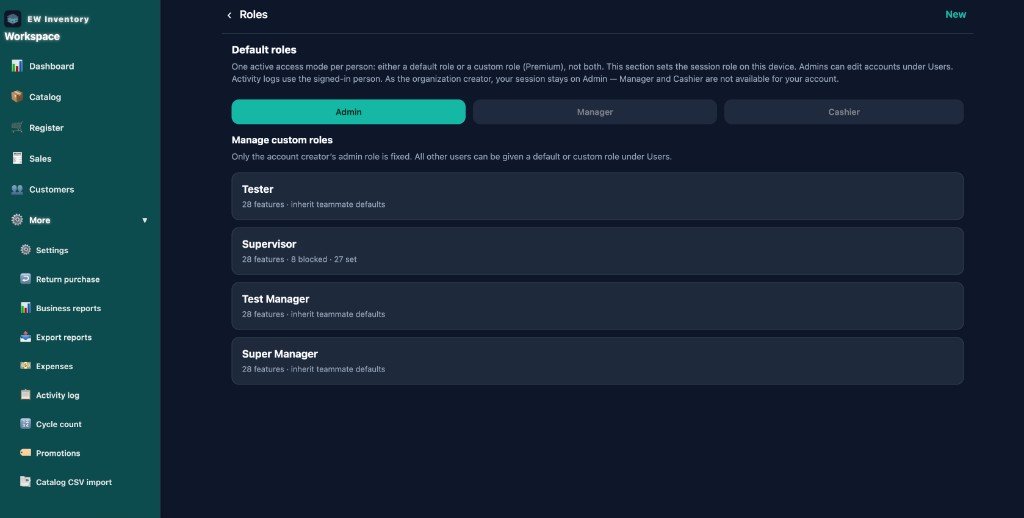
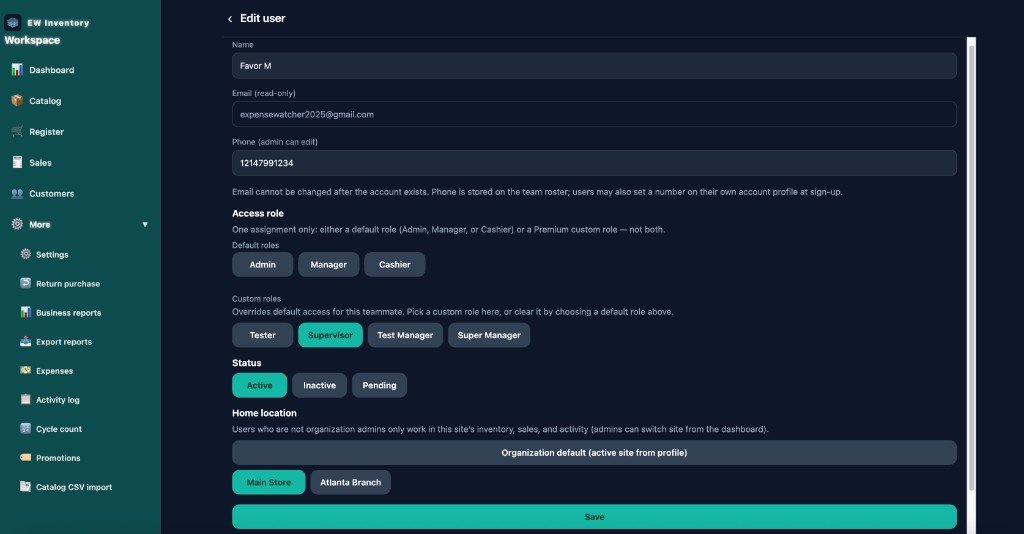
Custom roles (Premium)
Settings → Manage Roles (or More → Roles) — create roles with
fine-grained read/write/blocked permissions per area (catalog, register, reports, etc.). Each person
has one active access mode: a default role (Admin, Manager, Cashier) or a custom role, not both.
Tap New to create a custom role, or open an existing role to edit permissions.
Under Users, assign the custom role when inviting or editing a team member.
Organization admins: on the Roles screen, tap View what each default role can do for the built-in Admin, Manager, and Cashier permission list.
Edit a user
Tap a user in the list to change name, phone, role, status (Active / Inactive / Pending), and home location (which site they work in).
Note: What you see depends on your assigned role and plan. If a tab or menu item is missing, ask your organization admin.
Admins can compare built-in roles using View what each default role can do on the Roles screen.
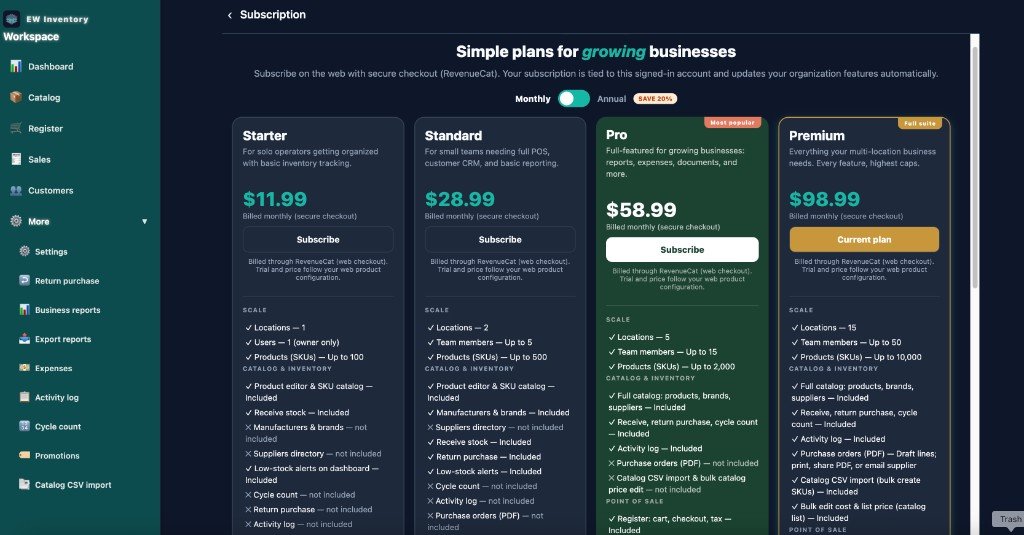
Subscription
Settings → Manage subscription (or More → Subscription) — compare
Starter, Standard, Pro, Premium, and
Enterprise. Toggle Monthly or Annual billing (annual saves
20%). Plan cards match the in-app layout: scale limits, catalog tools, register caps, customers, and reports.
Free trial: new organizations get 7 days of full Premium access —
no credit card required. Subscribe before the period ends to avoid workspace gating on
Catalog, Register, Sales, Customers, and More.
Starter — solo operator, basic catalog and register.
Standard — small teams, CRM, promotions, email invites.
Pro — reports, expenses, PDF branding, cycle count, activity log.
Enterprise — Premium included with higher scale for large multi-location retailers (web checkout).
Billing platform depends on where you subscribe: App Store or Google Play on
mobile, or secure web checkout when signed in at app.ewinventory.com.
See marketing pricing for list prices and feature comparison.