Watch the full training
Follow along on app.ewinventory.com (web), or use the iOS and Android apps. Pause the video after each chapter and repeat the steps in your 7-day trial organization.
Also on YouTube: youtube.com/watch?v=OUM_BKAIJzU
Complete walkthrough for shop owners, managers, and cashiers — from sign-in and organization setup through catalog, point-of-sale, team roles, reports, and exports.
See benefits & ROI → How subscription cost compares to time saved, fewer stockouts, and cleaner books.
Follow along on app.ewinventory.com (web), or use the iOS and Android apps. Pause the video after each chapter and repeat the steps in your 7-day trial organization.
Also on YouTube: youtube.com/watch?v=OUM_BKAIJzU
EW Inventory is an inventory management and point-of-sale platform for small and medium-sized retailers. Manage catalog and stock, ring sales at the register, track customers, run reports, record expenses, and invite your team — all synced in the cloud across phone, tablet, and desktop.
Below are four step-by-step guides with screenshots from the original Trupeer walkthroughs — fully hosted on this site with no third-party dependency.
Sign in, start your 7-day trial, configure your organization and locations, and learn the dashboard.
This document explains how to access the EW Inventory application, start a trial, configure your organization and locations, and understand the key elements of the main dashboard, including low stock alerts and help resources.
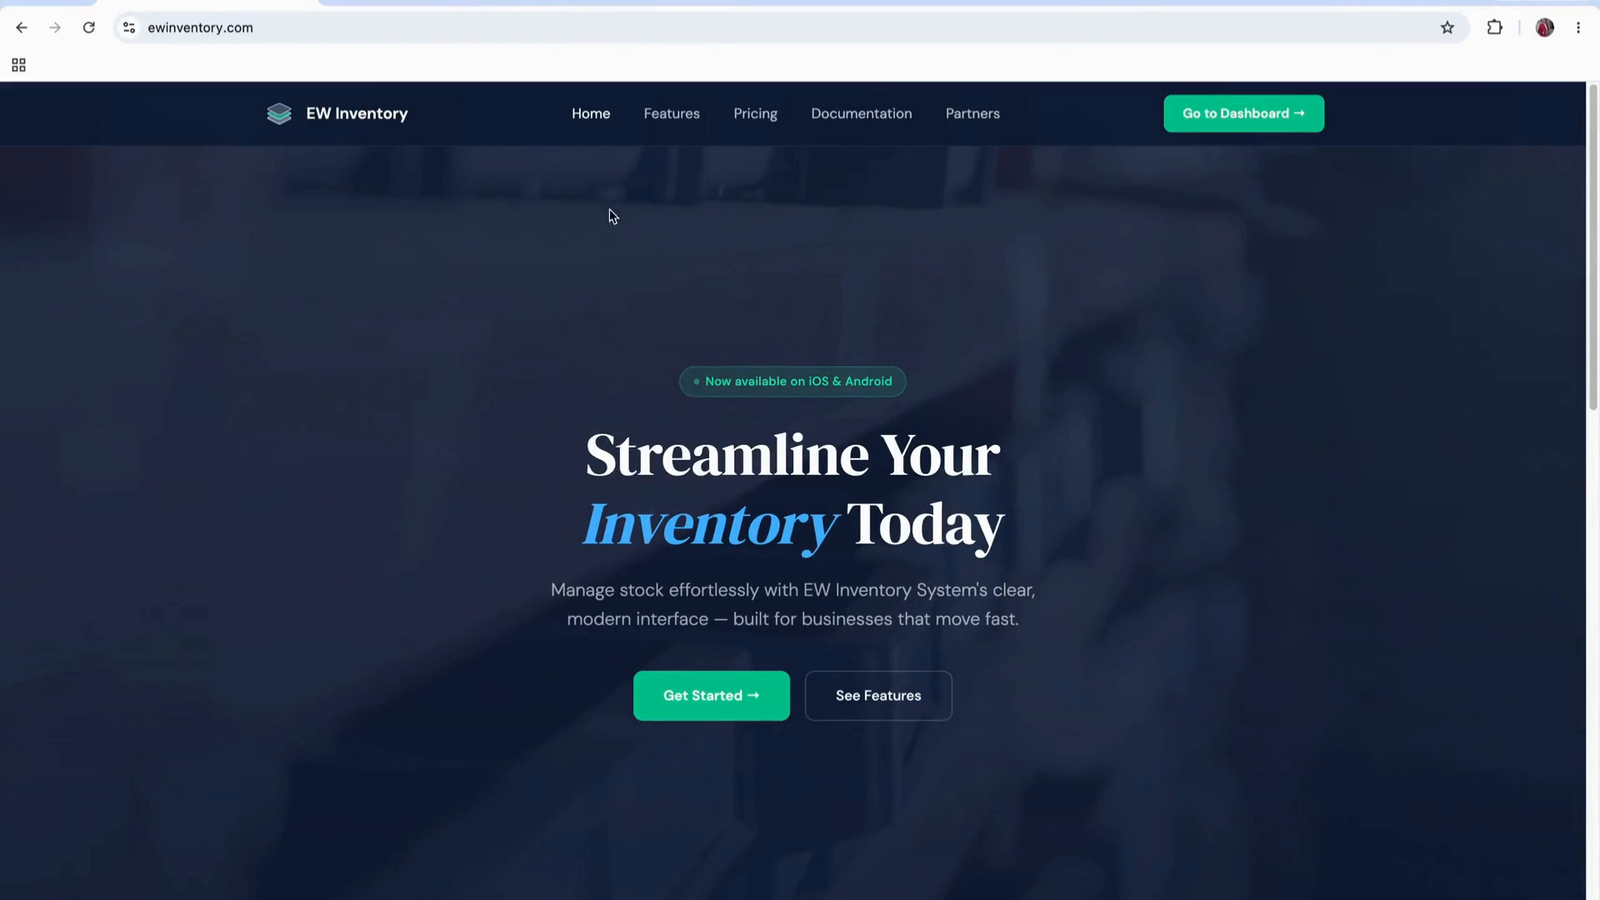
Open your browser and navigate to the EW Inventory marketing website. From here, you can learn about the application and access the different platforms (web, Android, and iOS) supported by EW Inventory.
Use the link provided on the website to download the Android app from the Google Play Store.
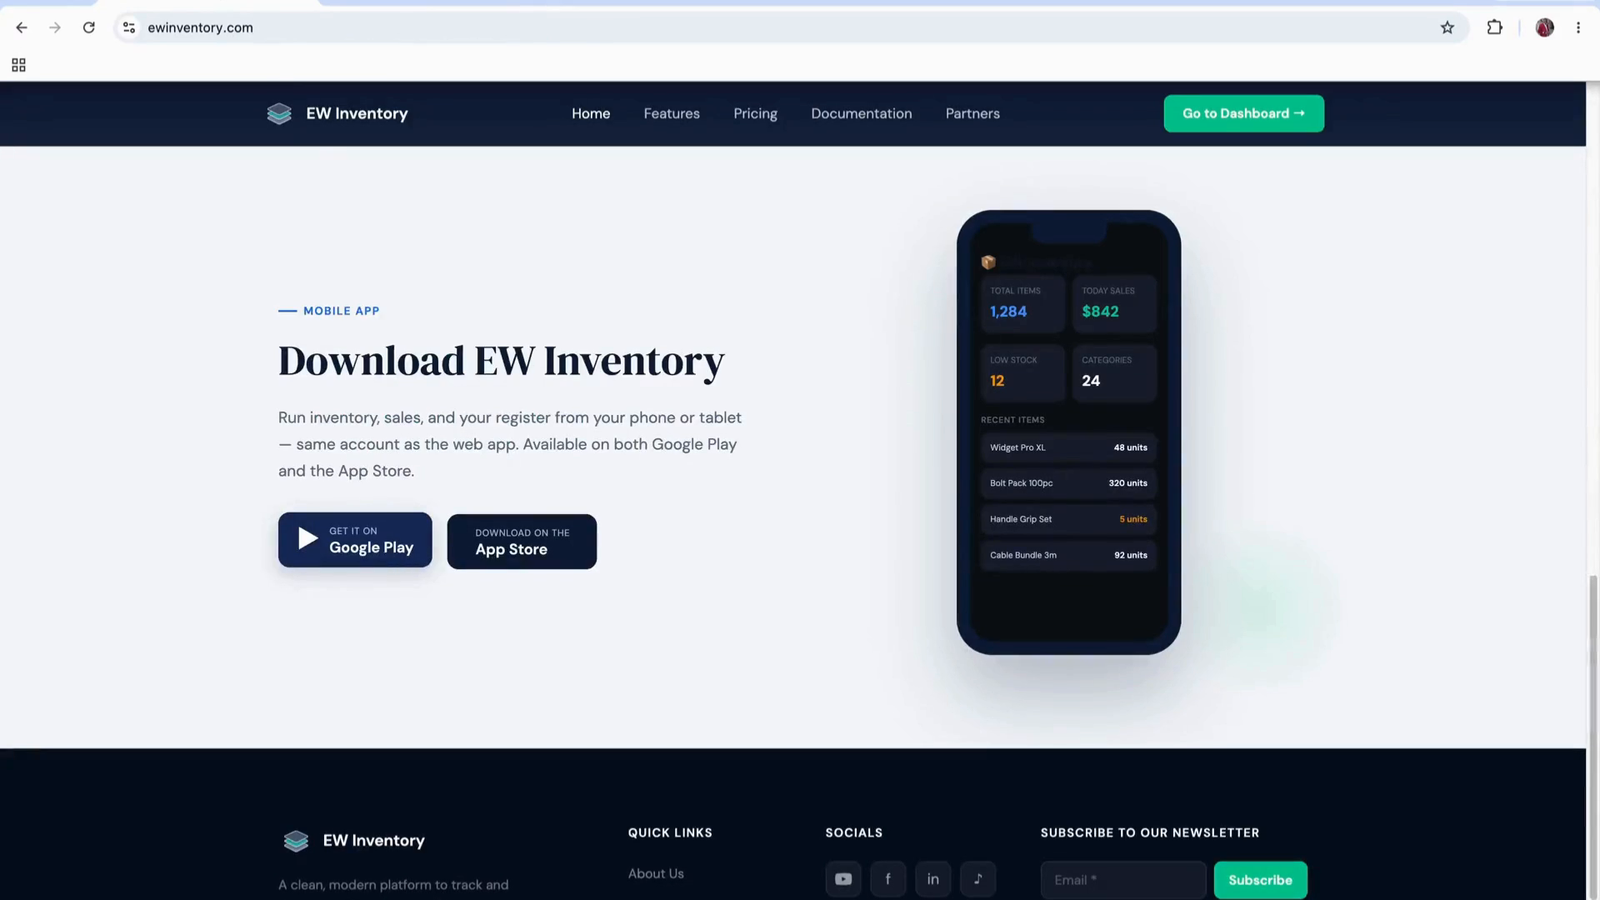
Use the corresponding link to download the iOS app from the Apple App Store.
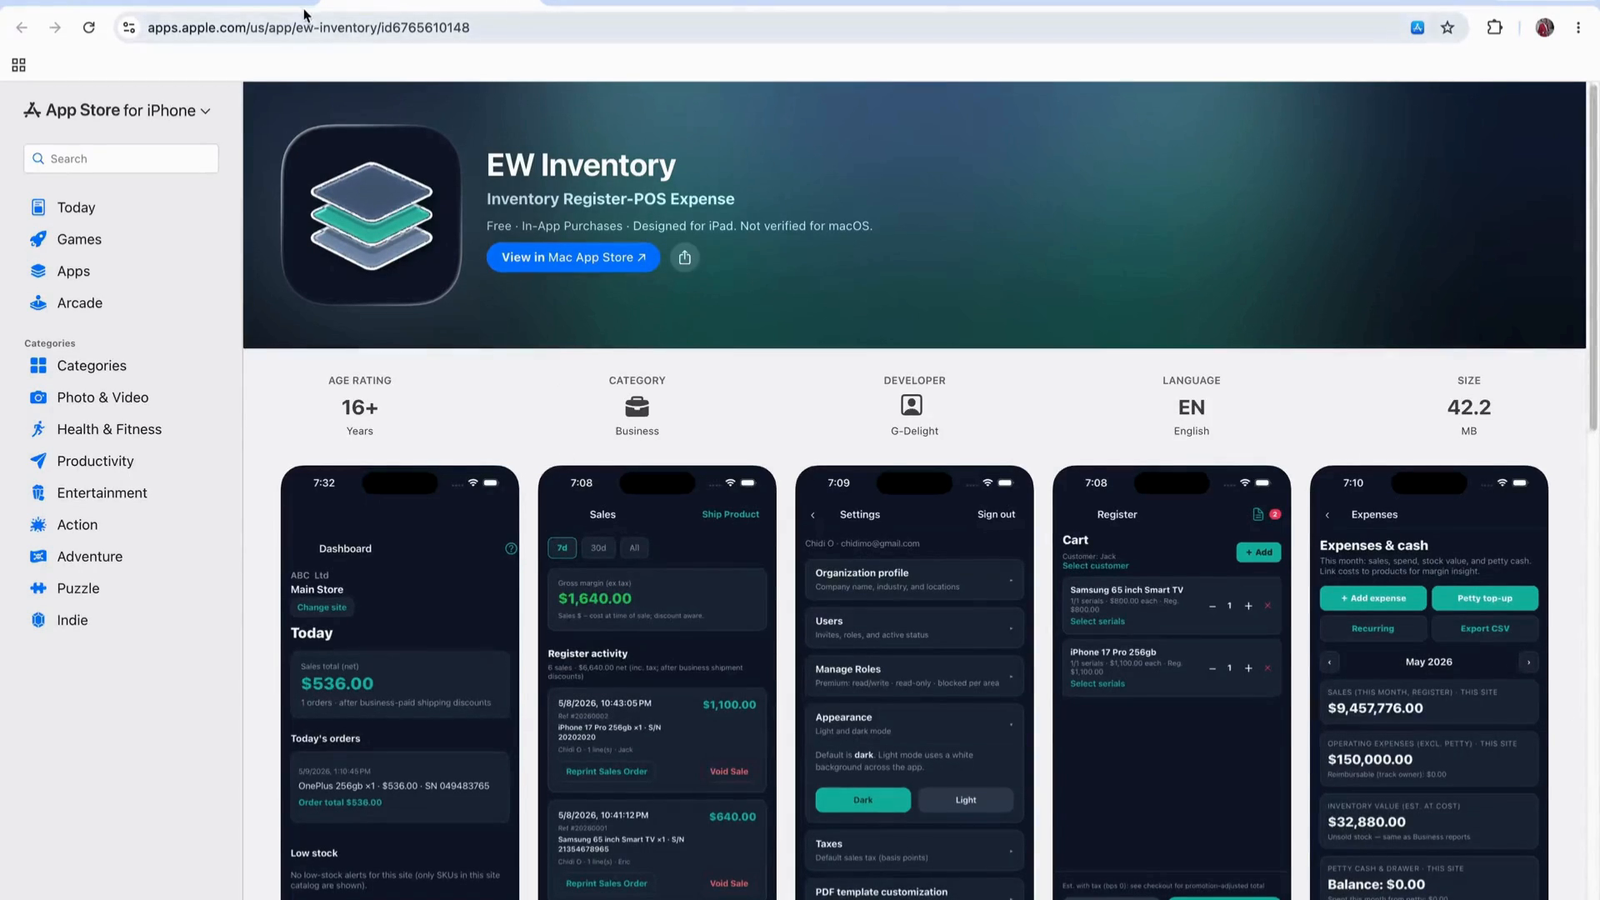
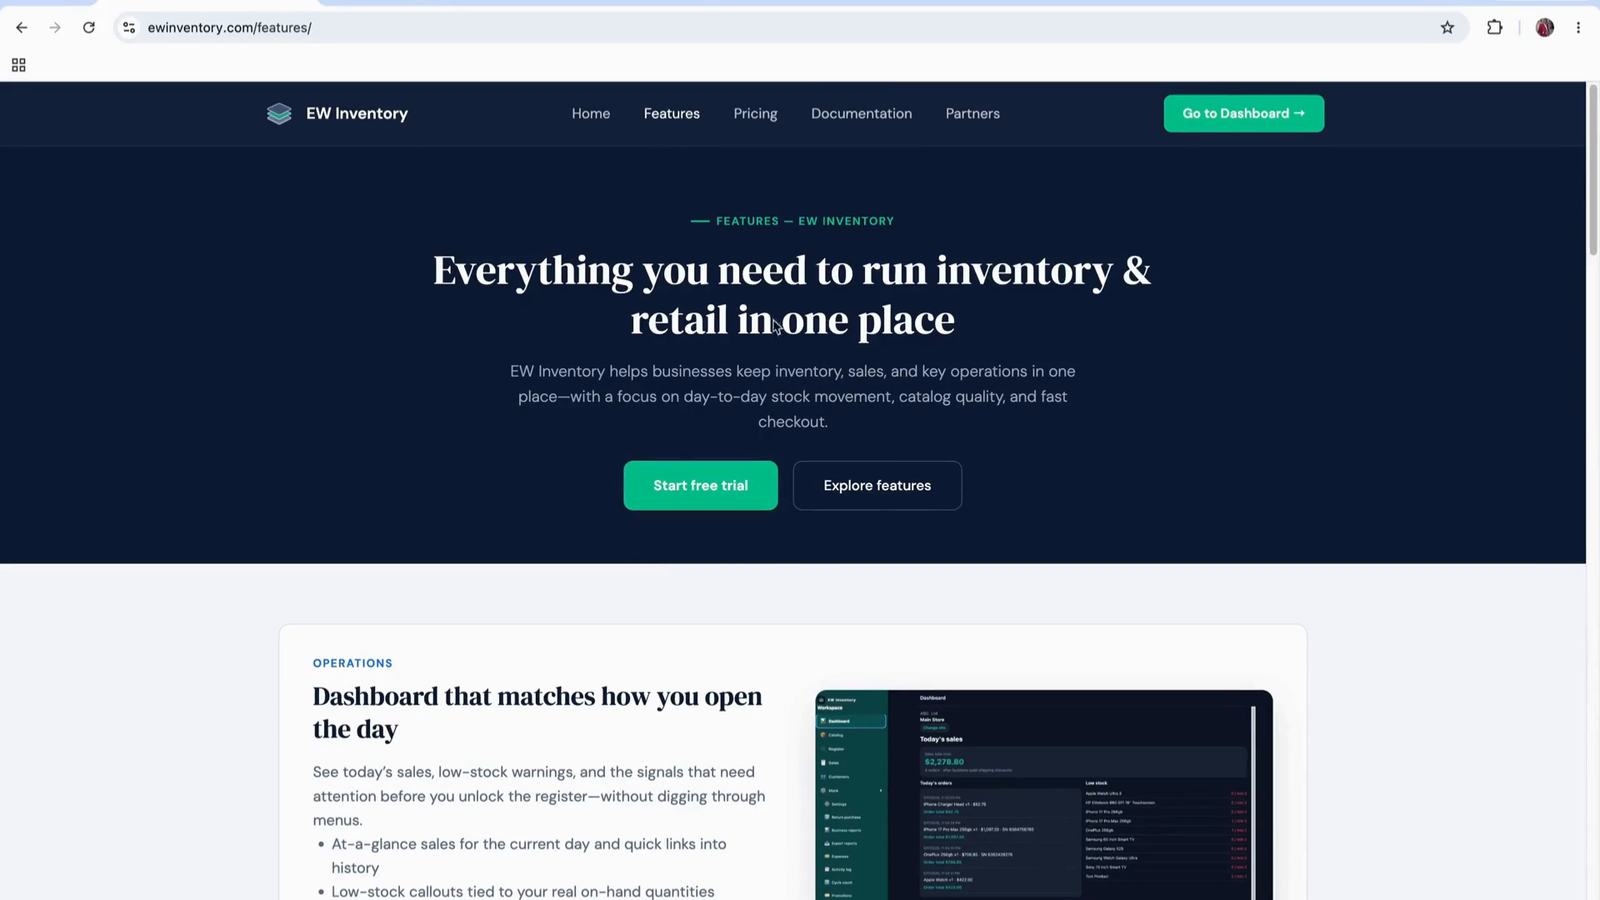
Review the list of features presented on the website to understand the capabilities of the application, including inventory management, point of sale (POS), and expense tracking.
From the website, navigate to the main dashboard entry point for the web application, which will be the focus of this training.
Use the provided link or button to proceed to the web app’s main dashboard page.
This is the environment we will use for the remaining steps.
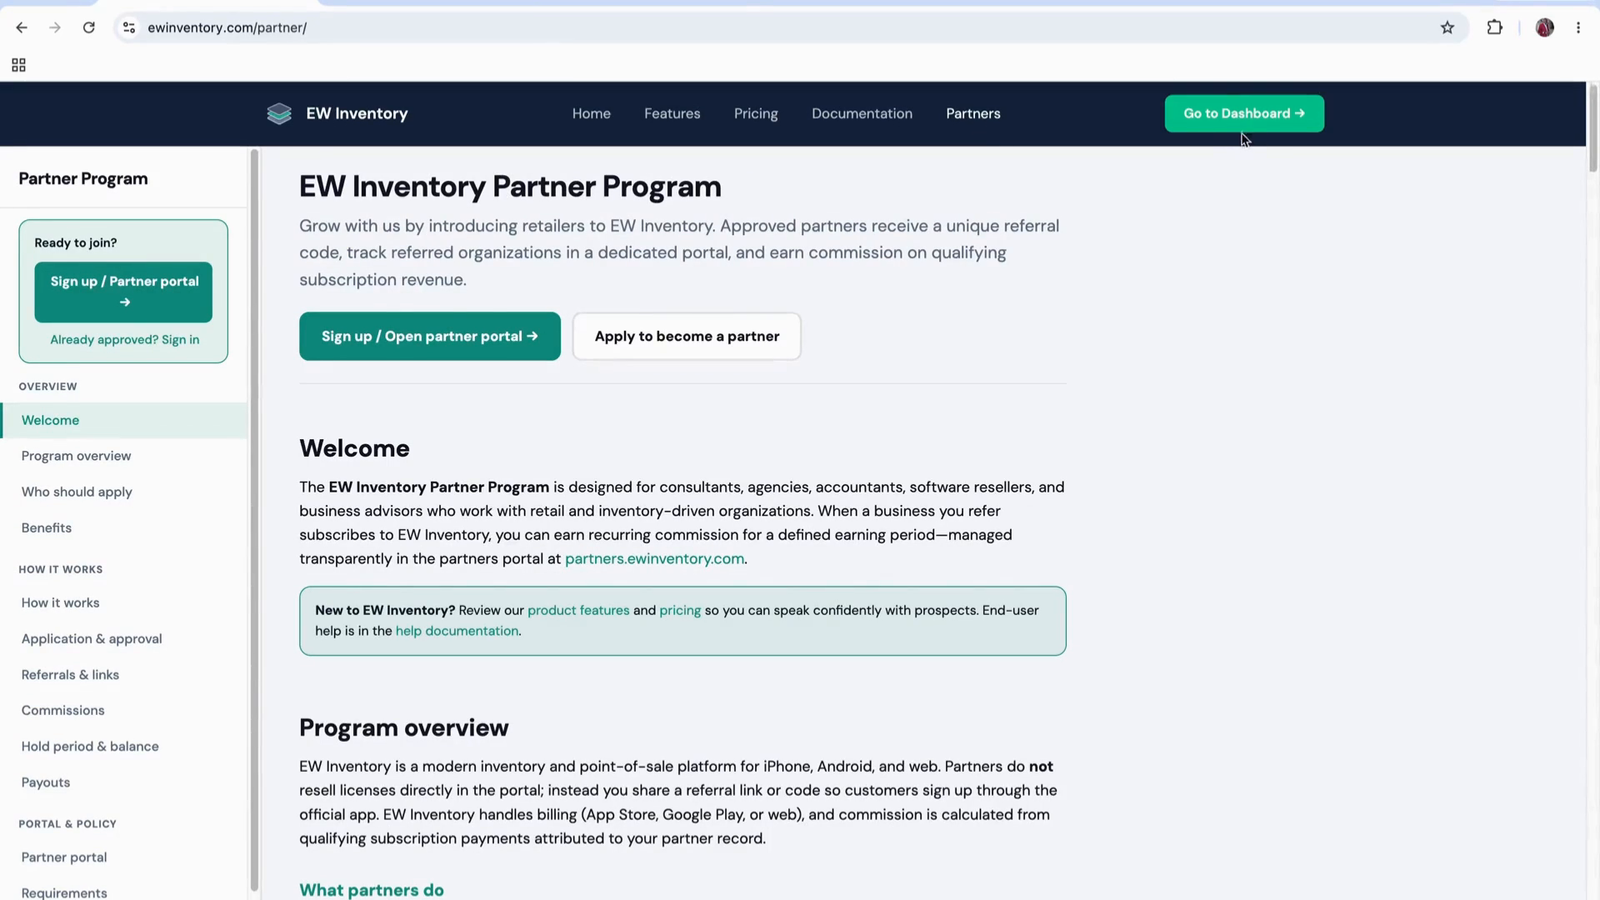
From the website, select the option to go to the dashboard to start using the web application.
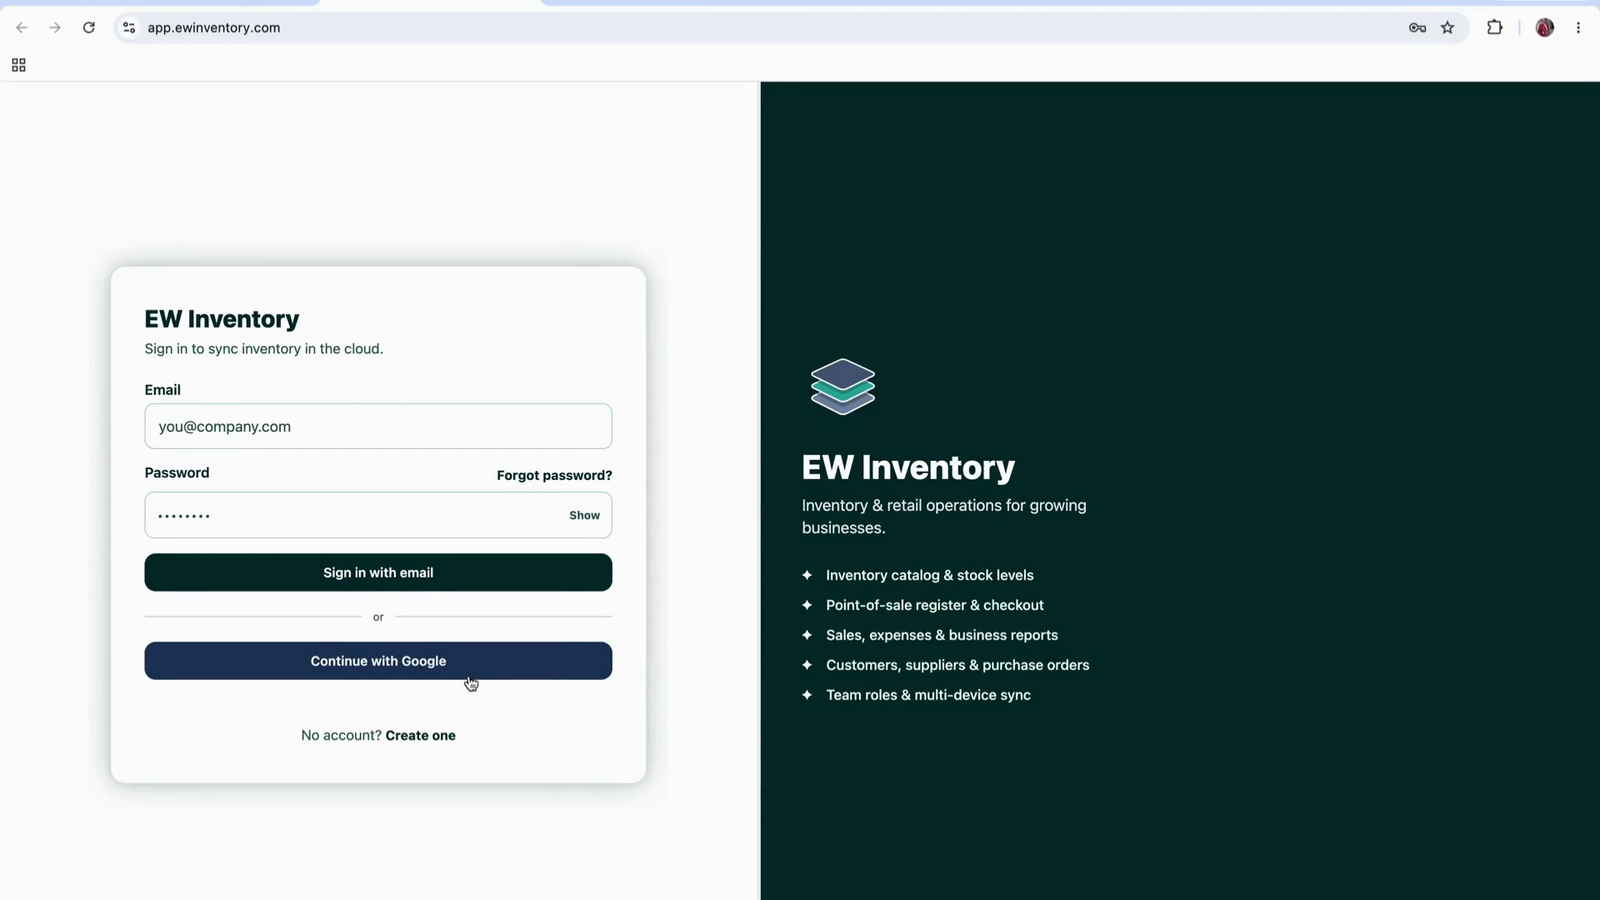
On the dashboard sign-in page, choose your preferred sign-in method. You can sign in using your Gmail account for convenience.

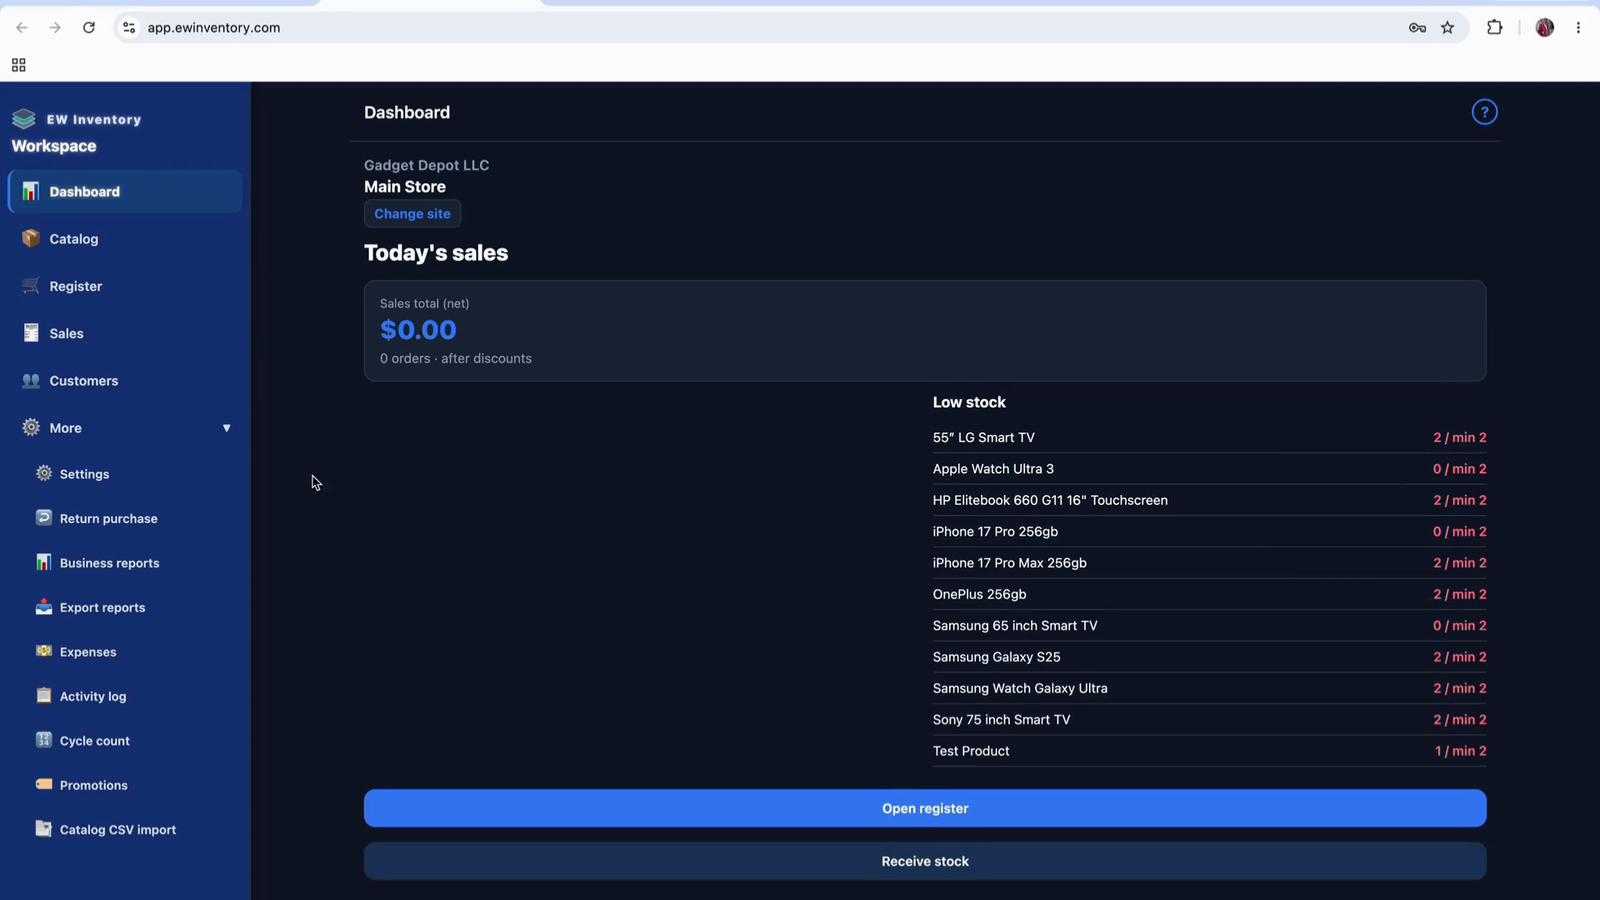
Once signed in, you will be taken to the main dashboard of the web application. The web app has a desktop-style layout, while the Android and iOS apps have a mobile application layout, but the core functionality is similar.
When you first log in, the system requires you to activate a trial before you can use the full functionality. You will not be able to navigate to the different tabs or features until you select a trial option.
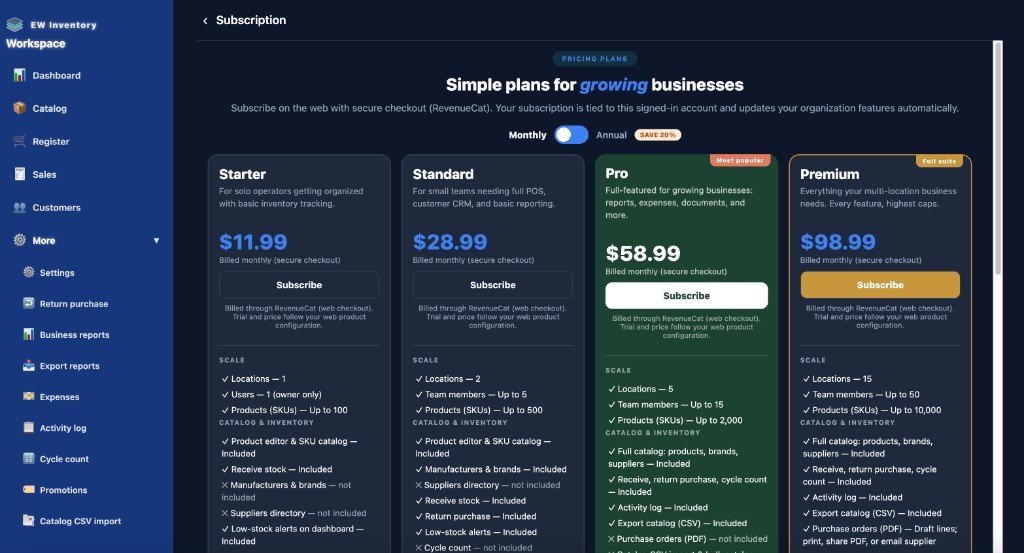
From the subscription prompt, choose the seven-day trial plan to begin using the application.
Confirm your selection of the seven-day trial.
After selecting the seven-day trial version, the application will be fully available for you to use at no cost for seven days.
You can now navigate through the app and explore its features during the trial period.

Return to the dashboard to start configuring your organization and locations.


From the dashboard, the first recommended action is to set up your organization details. Open the settings area.
Within settings, navigate to the Organization Profile section.
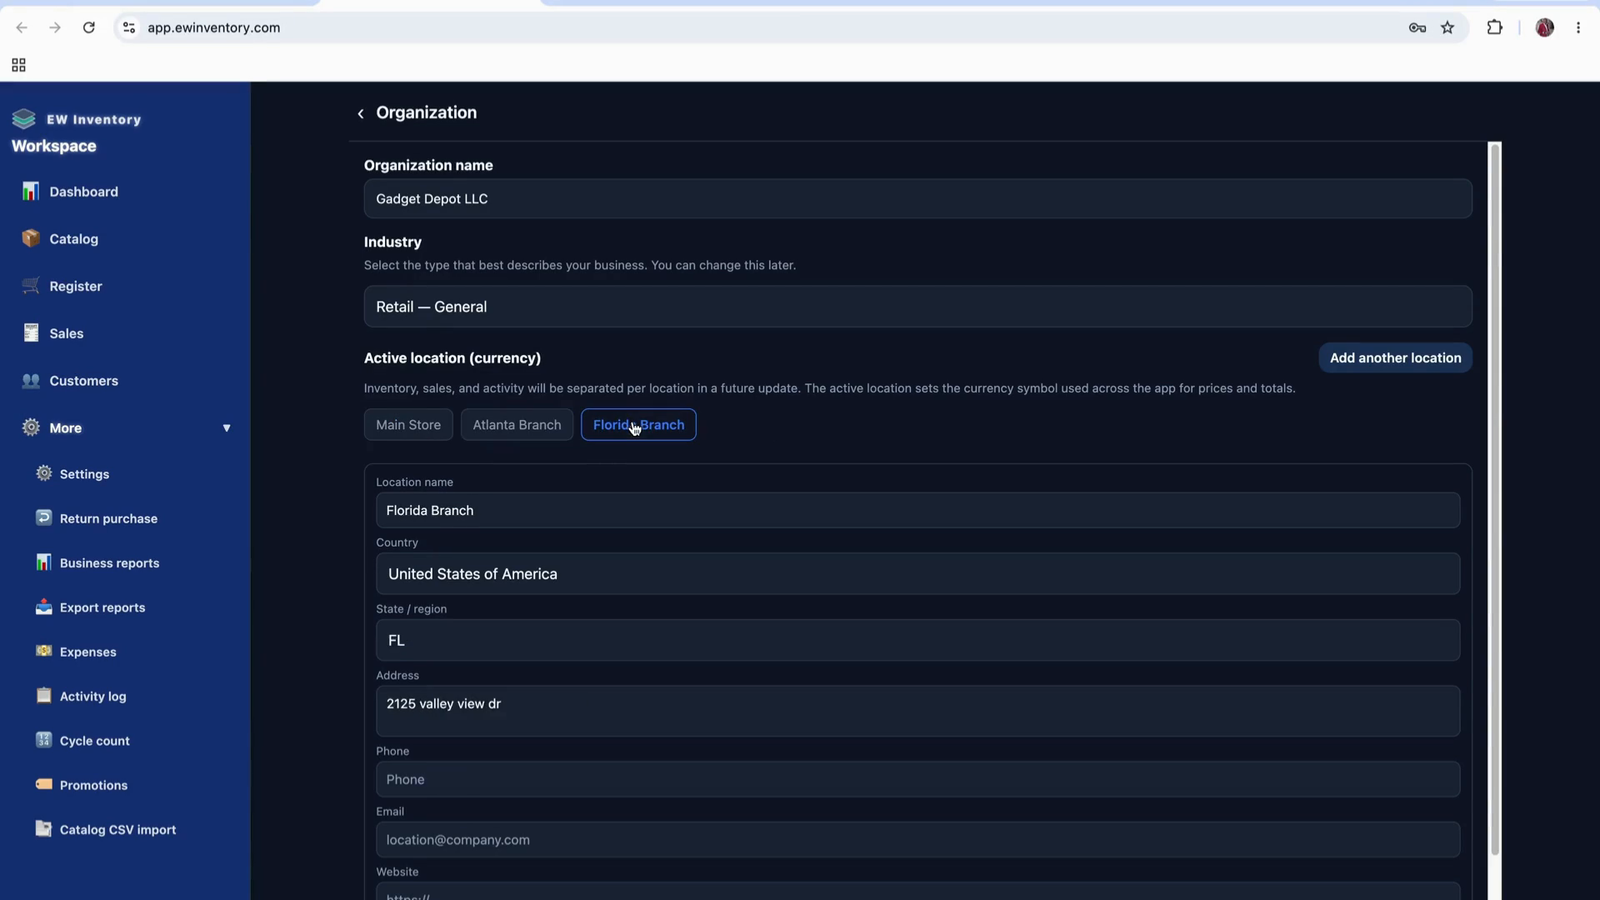
Enter your organization’s information, including:
The application automatically maps your local currency based on the business location you provide. Once the location is set, the app will display and use the appropriate local currency throughout the system. Configure your organization name and set up all relevant locations you operate from.
If you already have multiple locations configured, you will see them listed here.
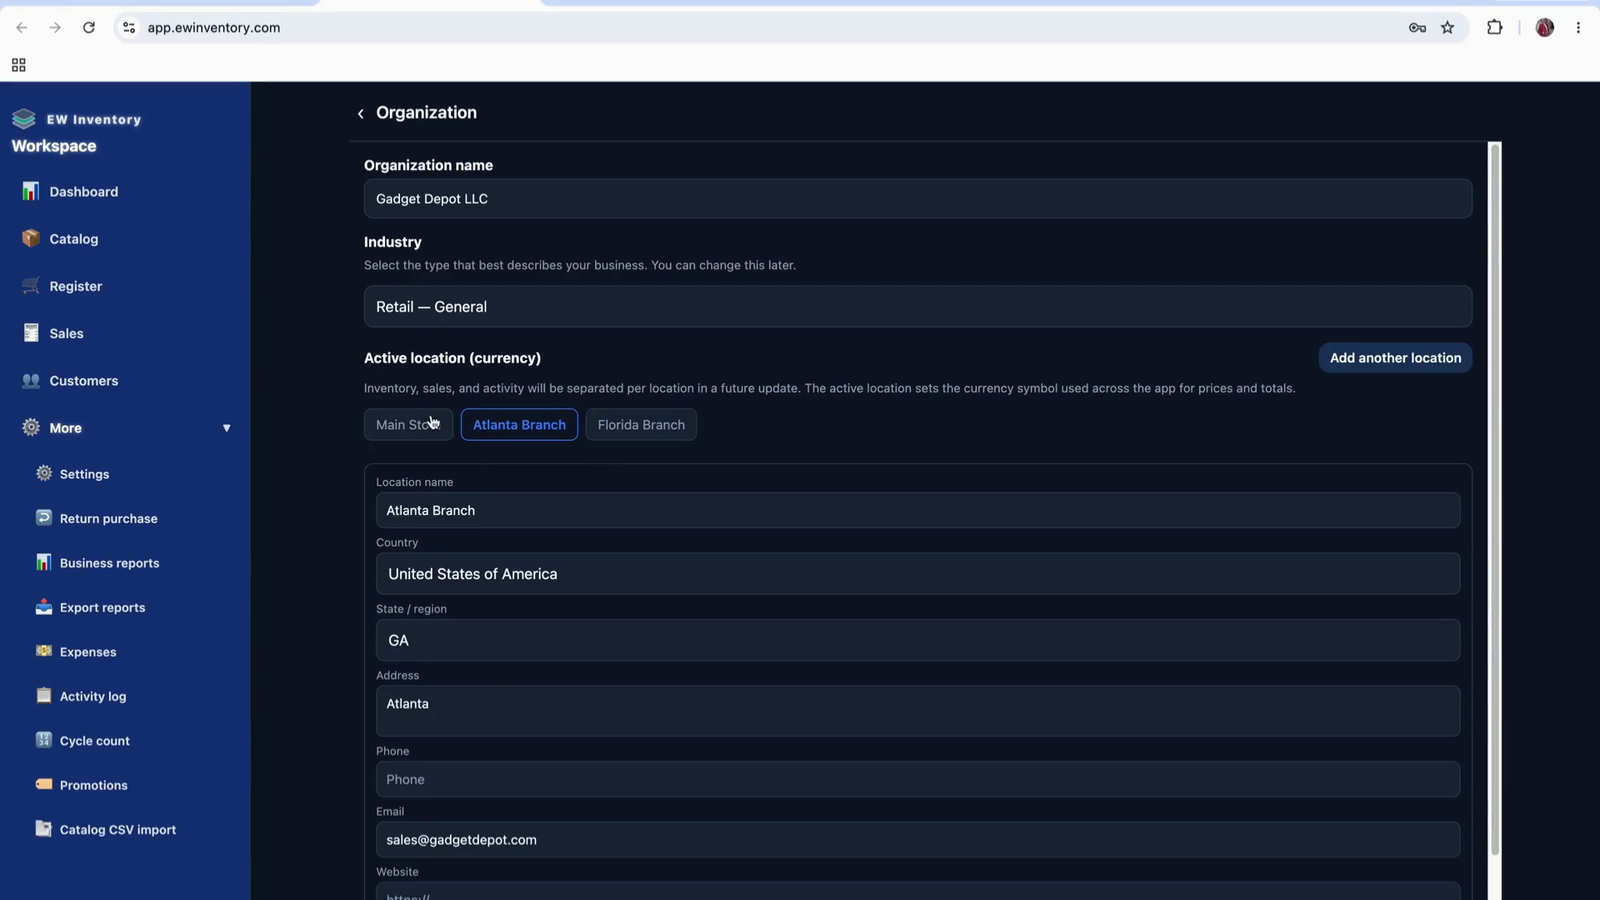
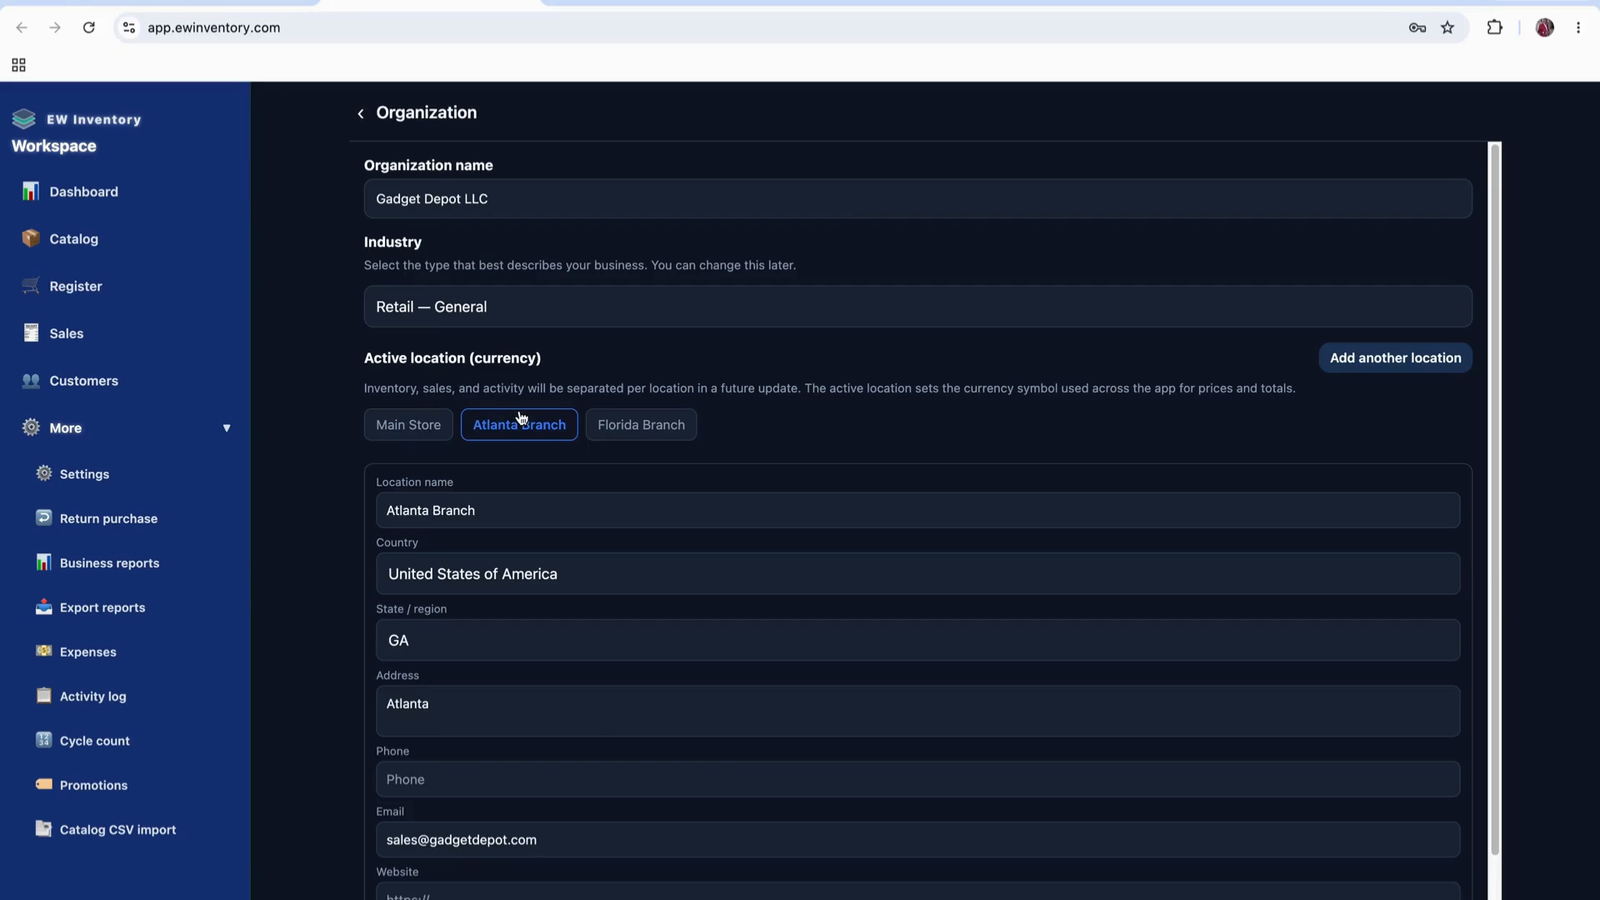
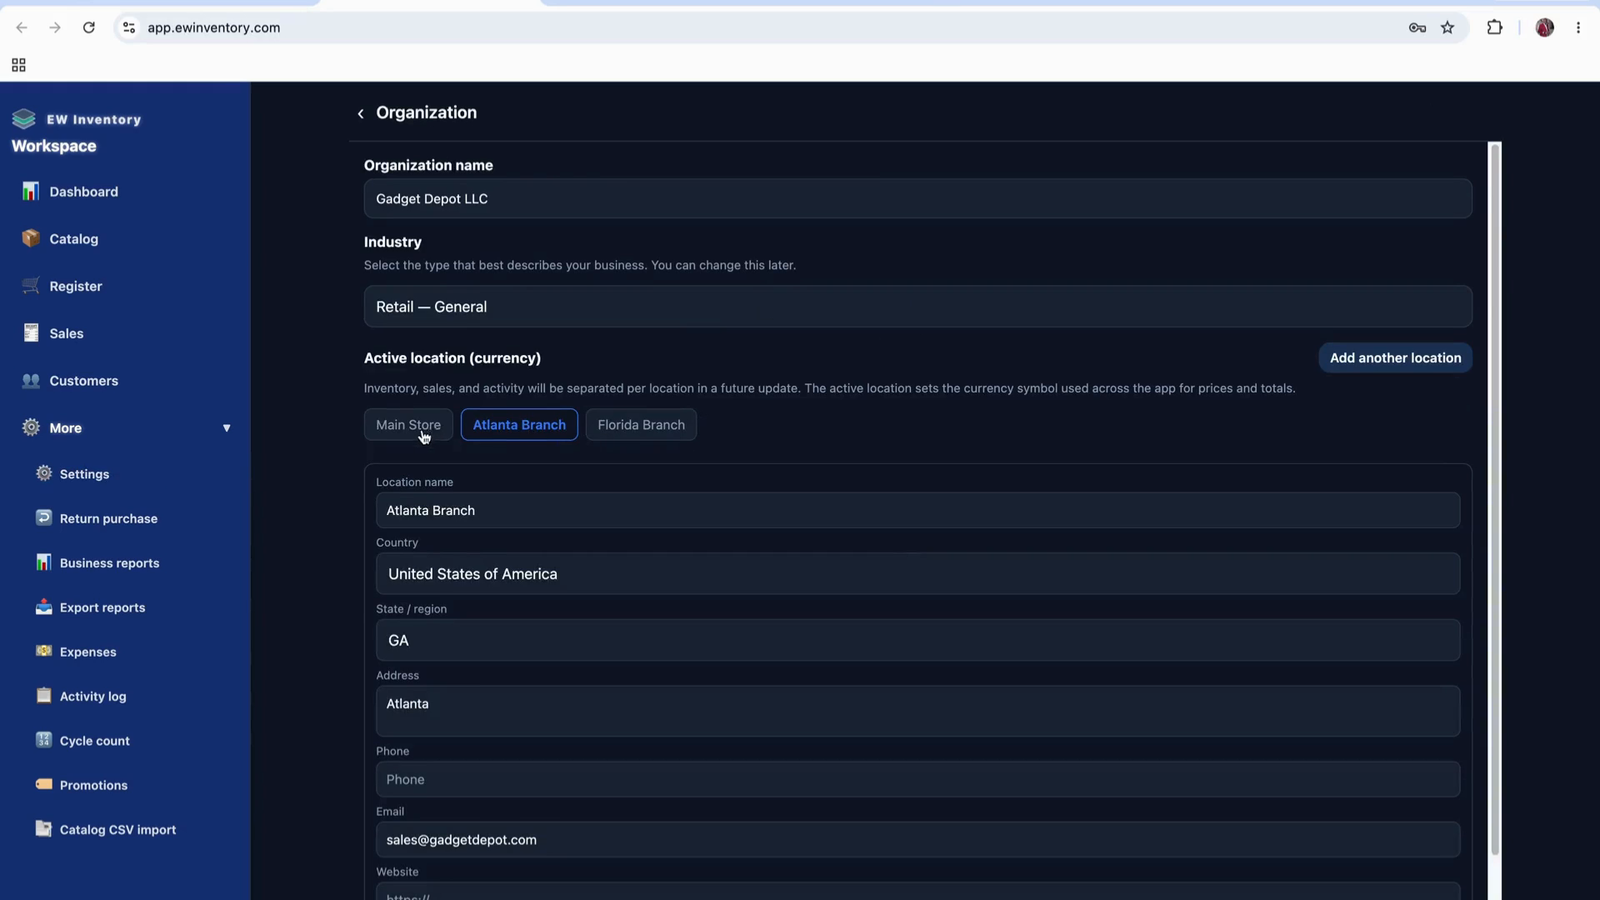
From the locations list, select any location to switch the active context of the application.

When you change the selected location, the entire app’s data view changes to that location’s records only.
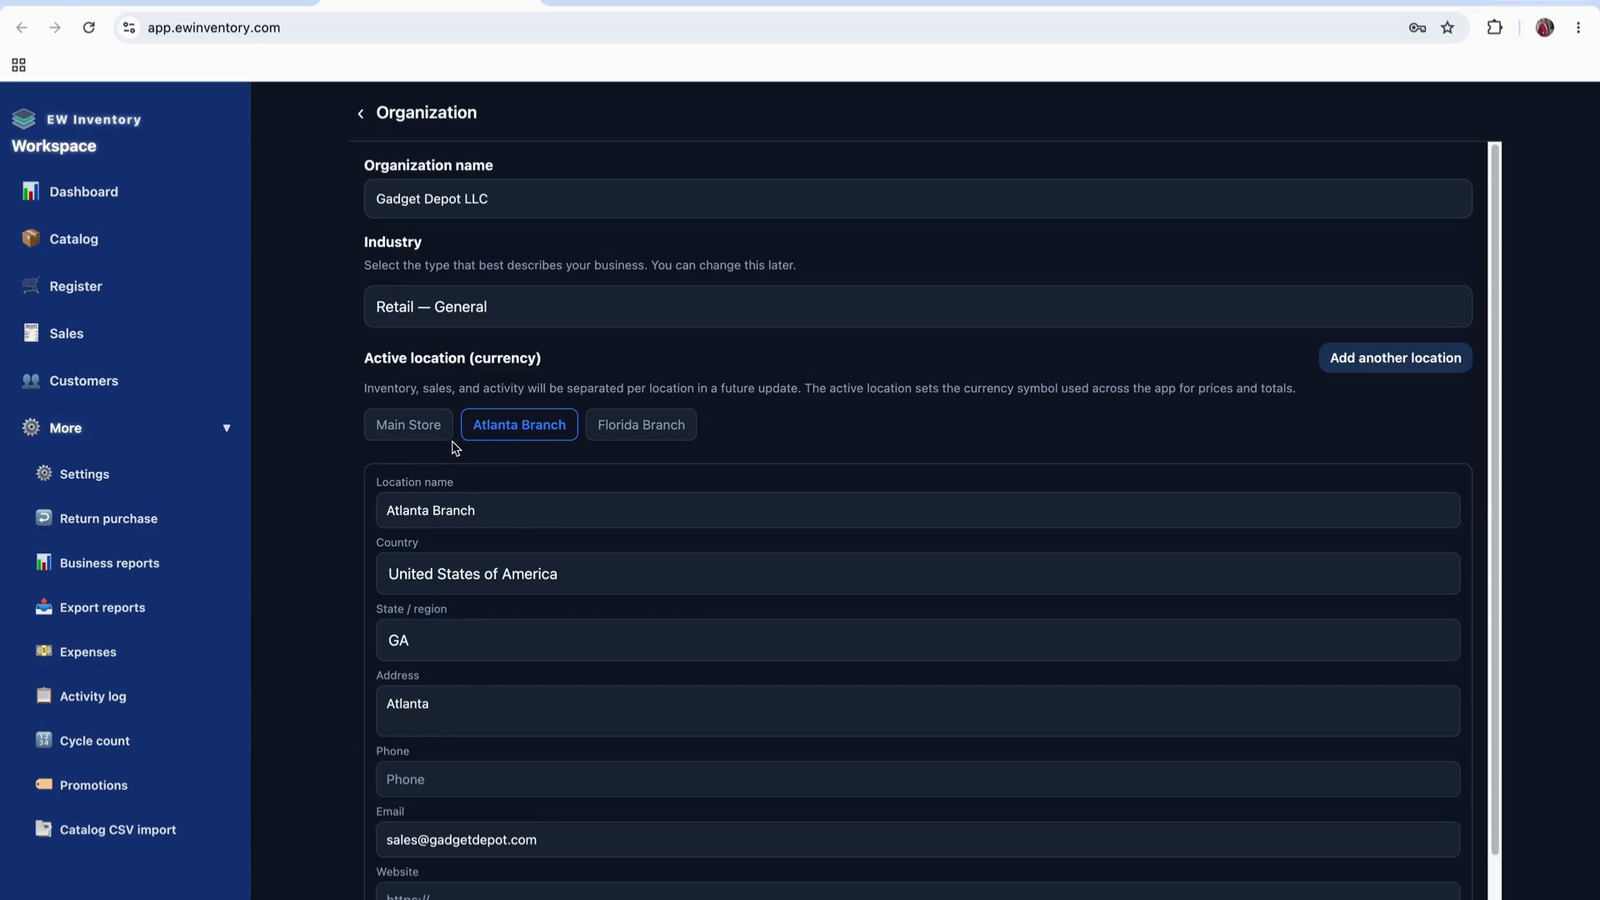
Be aware that if you select a new or empty location, it may appear as if there is no data.
For example, you might notice more entries in one location and zero entries in a newly created location.

If the new, empty location is selected, returning to the main dashboard will show no records.
Similarly, if you go to the catalog while an empty location is active, it will look as though you have no products or records, even though other locations may have existing data.
This behavior occurs because you are viewing a location that does not yet have many records.
Another example is a location that has only a few records configured.


To continue with the training using existing sample data, return to settings.
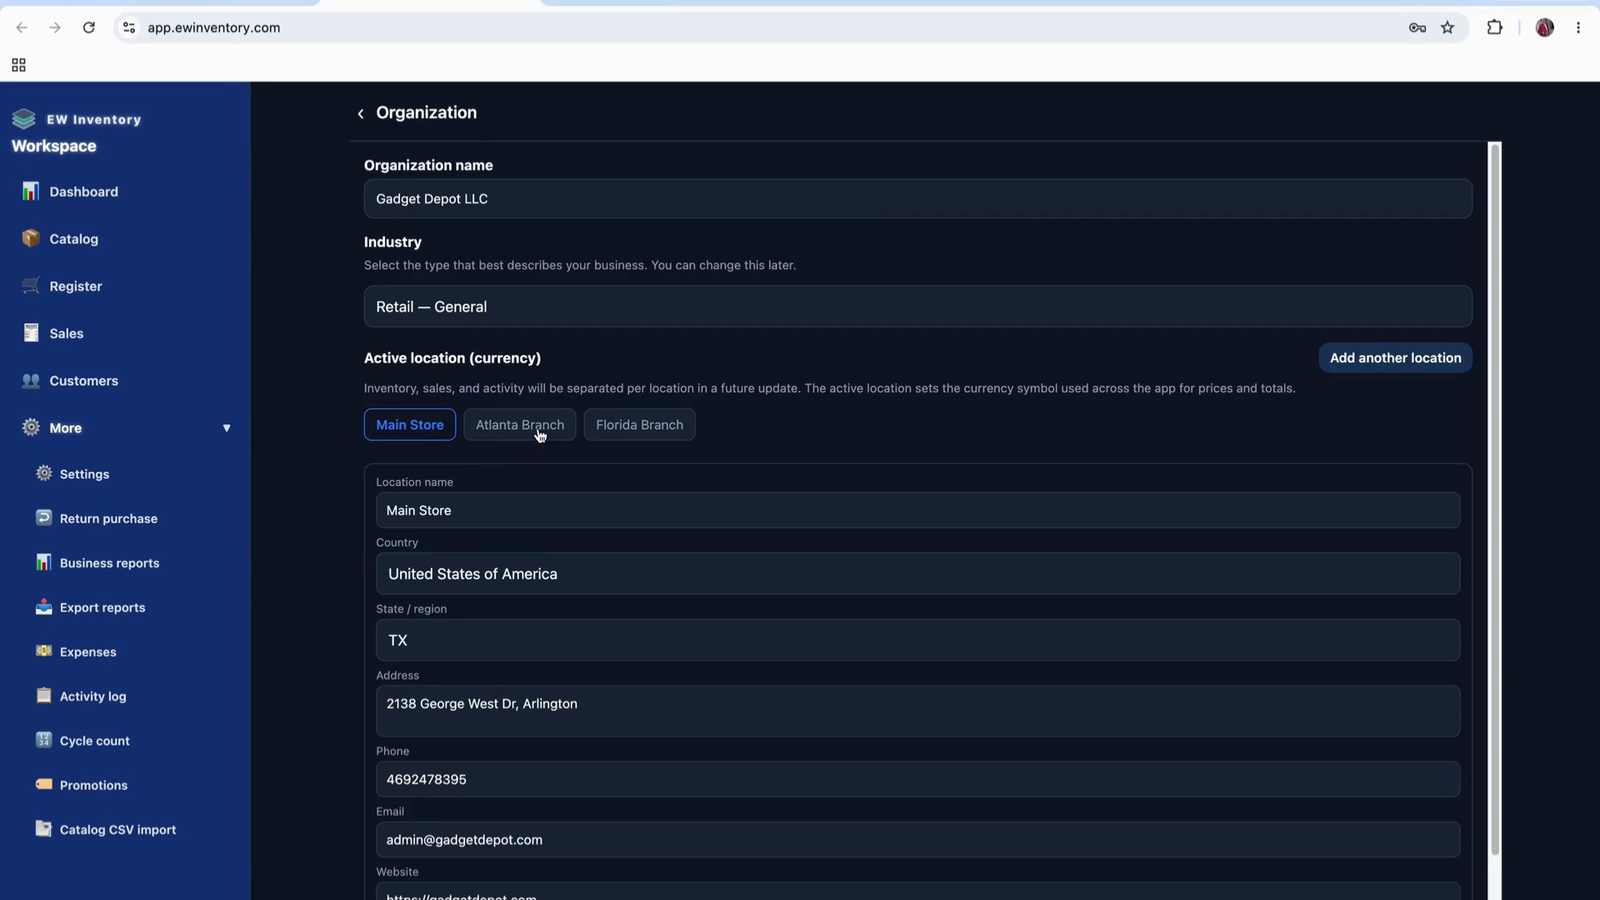
Switch back to the location that already contains sample records (e.g., your main or primary location).
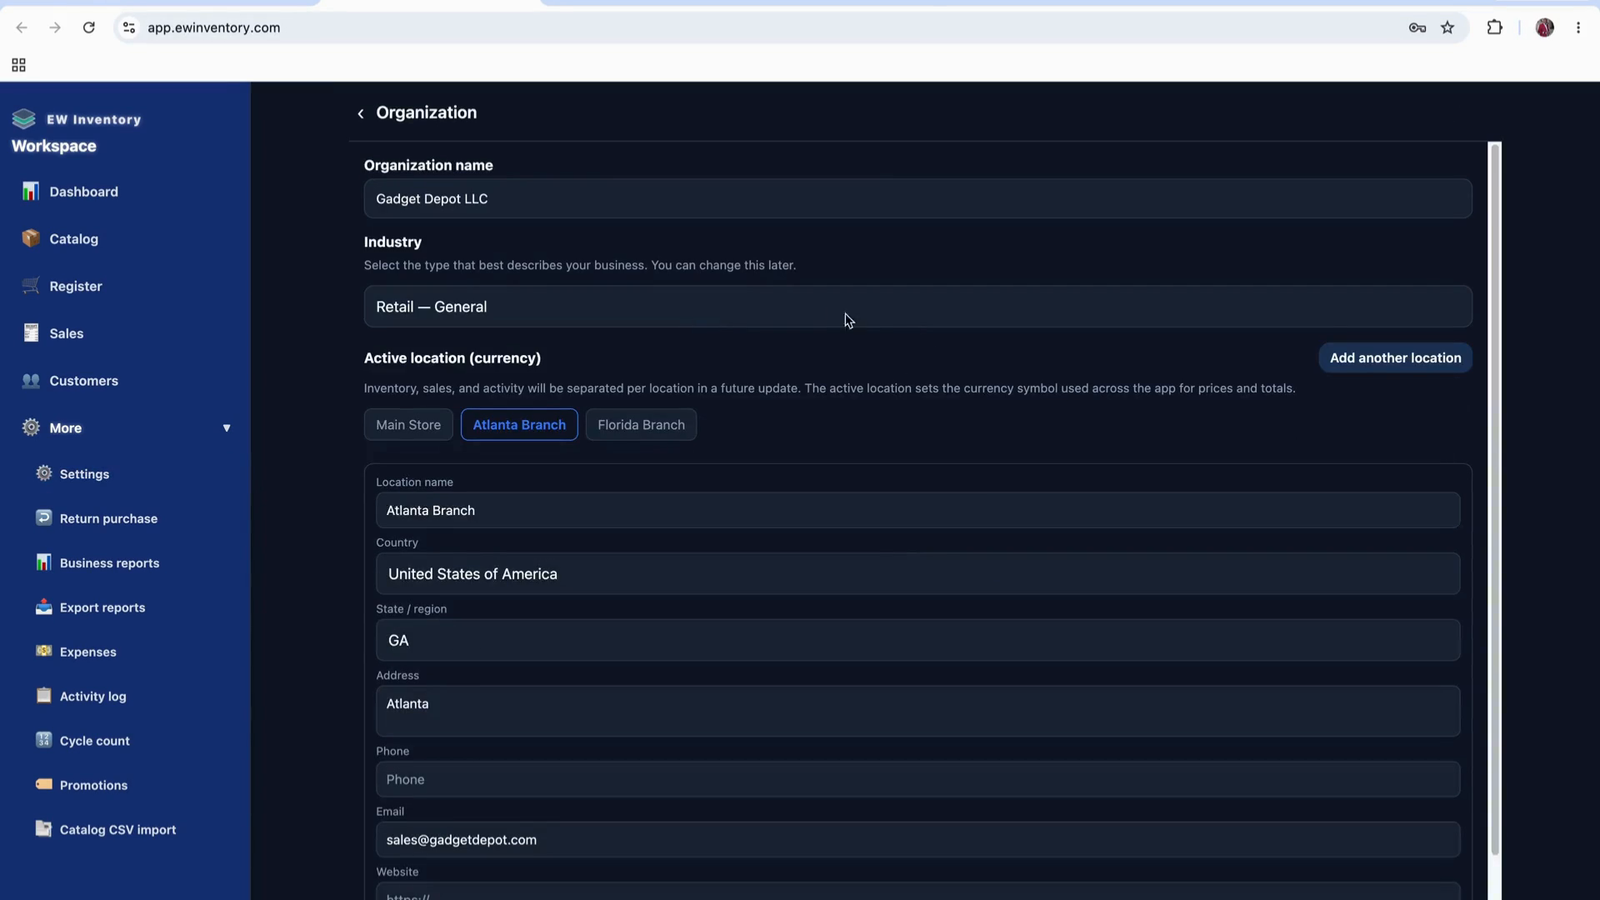
This is how you change locations from the settings area.
You can also switch locations directly from the main dashboard without going into settings. On the dashboard, locate the Change Location option.

Click Change Location to open the list of available locations.
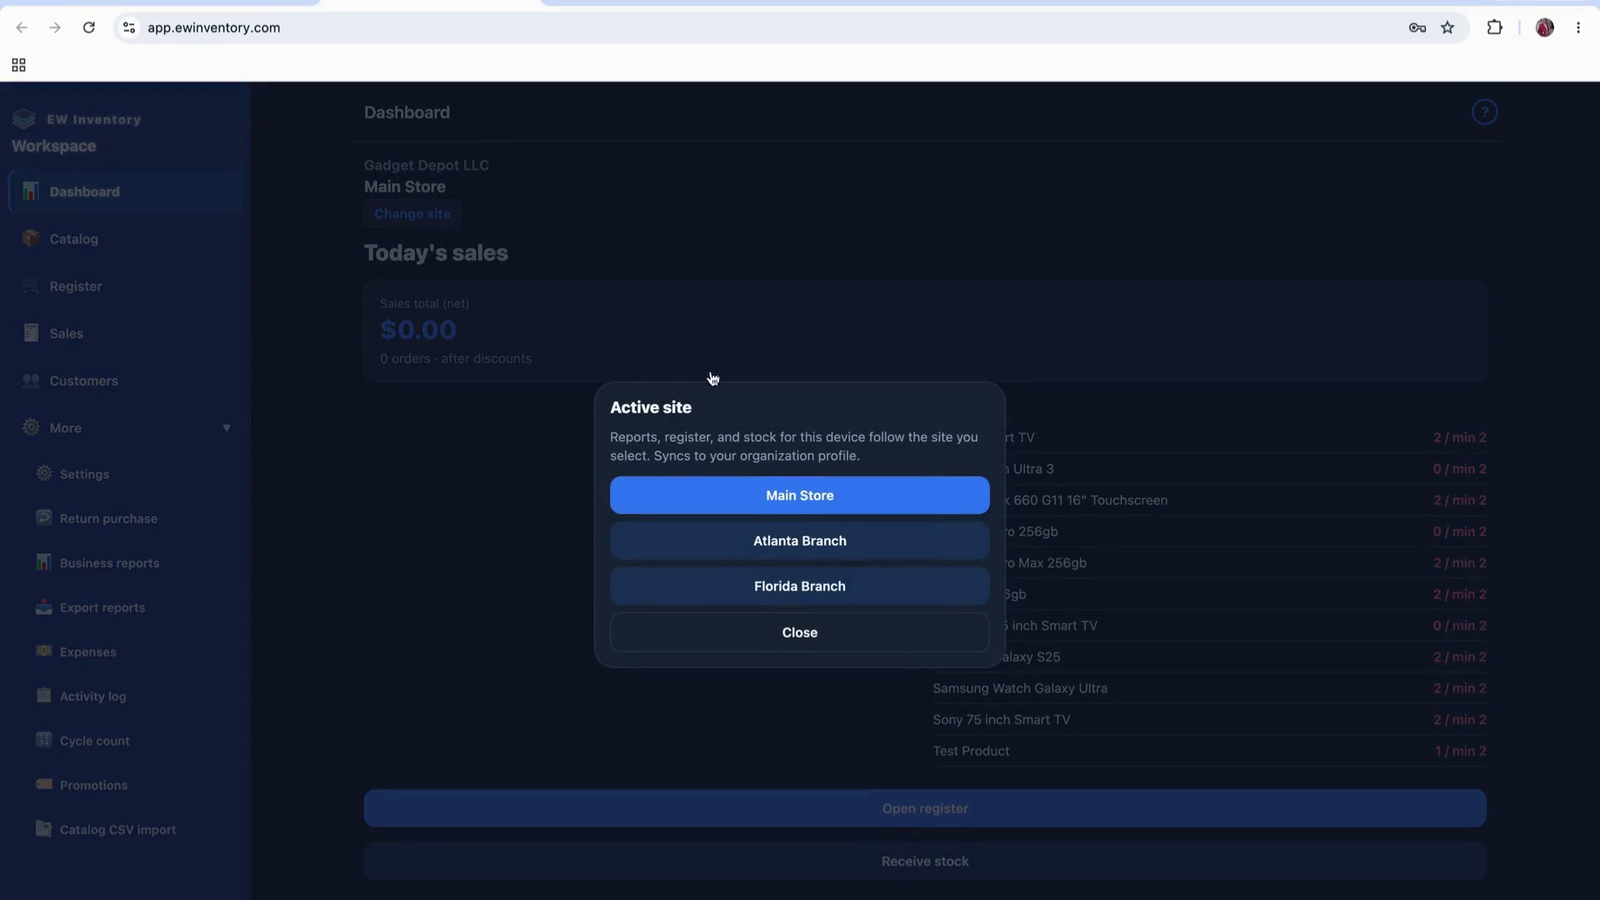
Select the desired location from the list.

For example, choosing the Florida location will switch the app to that location’s data.
If the Florida location has no catalog or records, all relevant sections will appear empty.

In this case, the dashboard and catalog will show no entries because there is no data in that specific location.
Switch back to the location that contains the sample records you want to use for training or daily operations.
Return to your main location (with existing records) so that you can see realistic sales, inventory, and catalog data.

Confirm that the location with previously created records is now active.

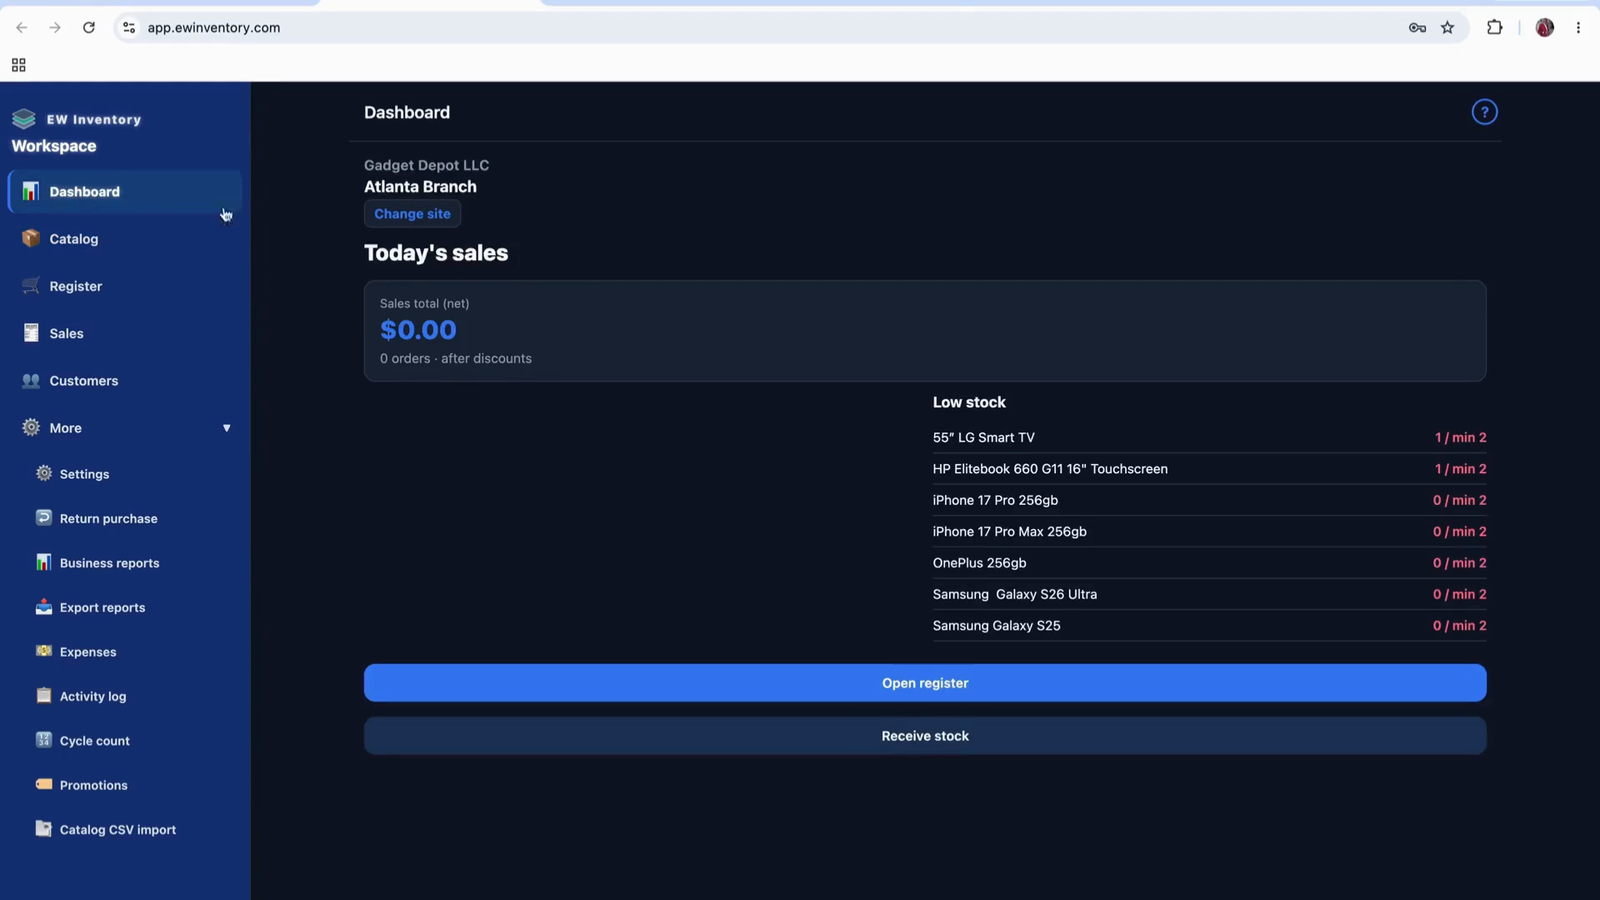
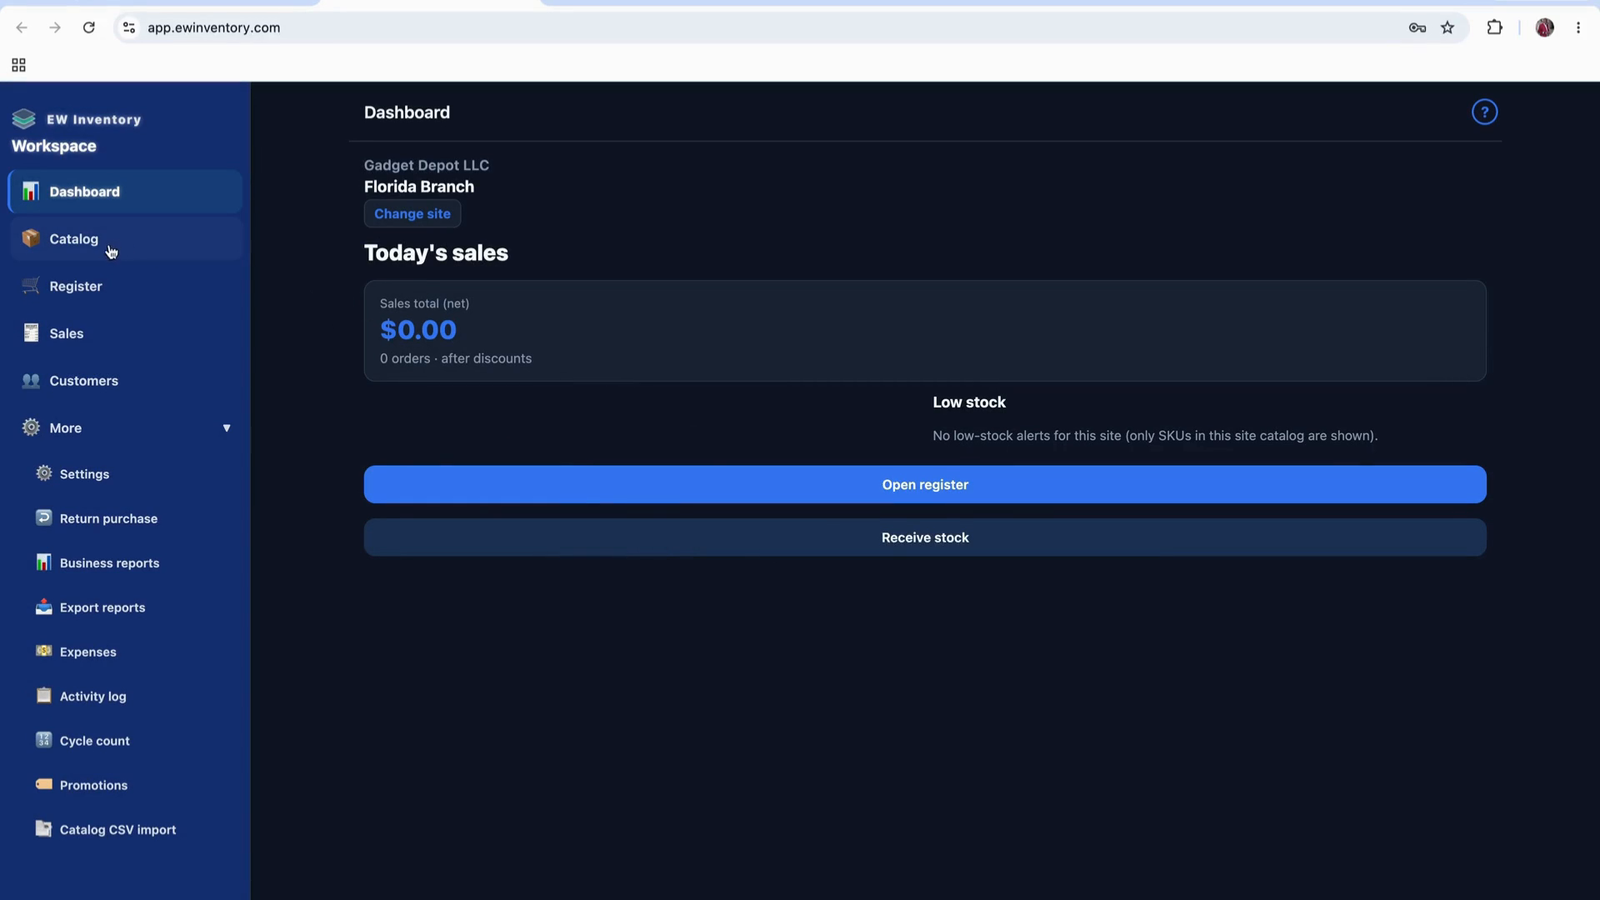
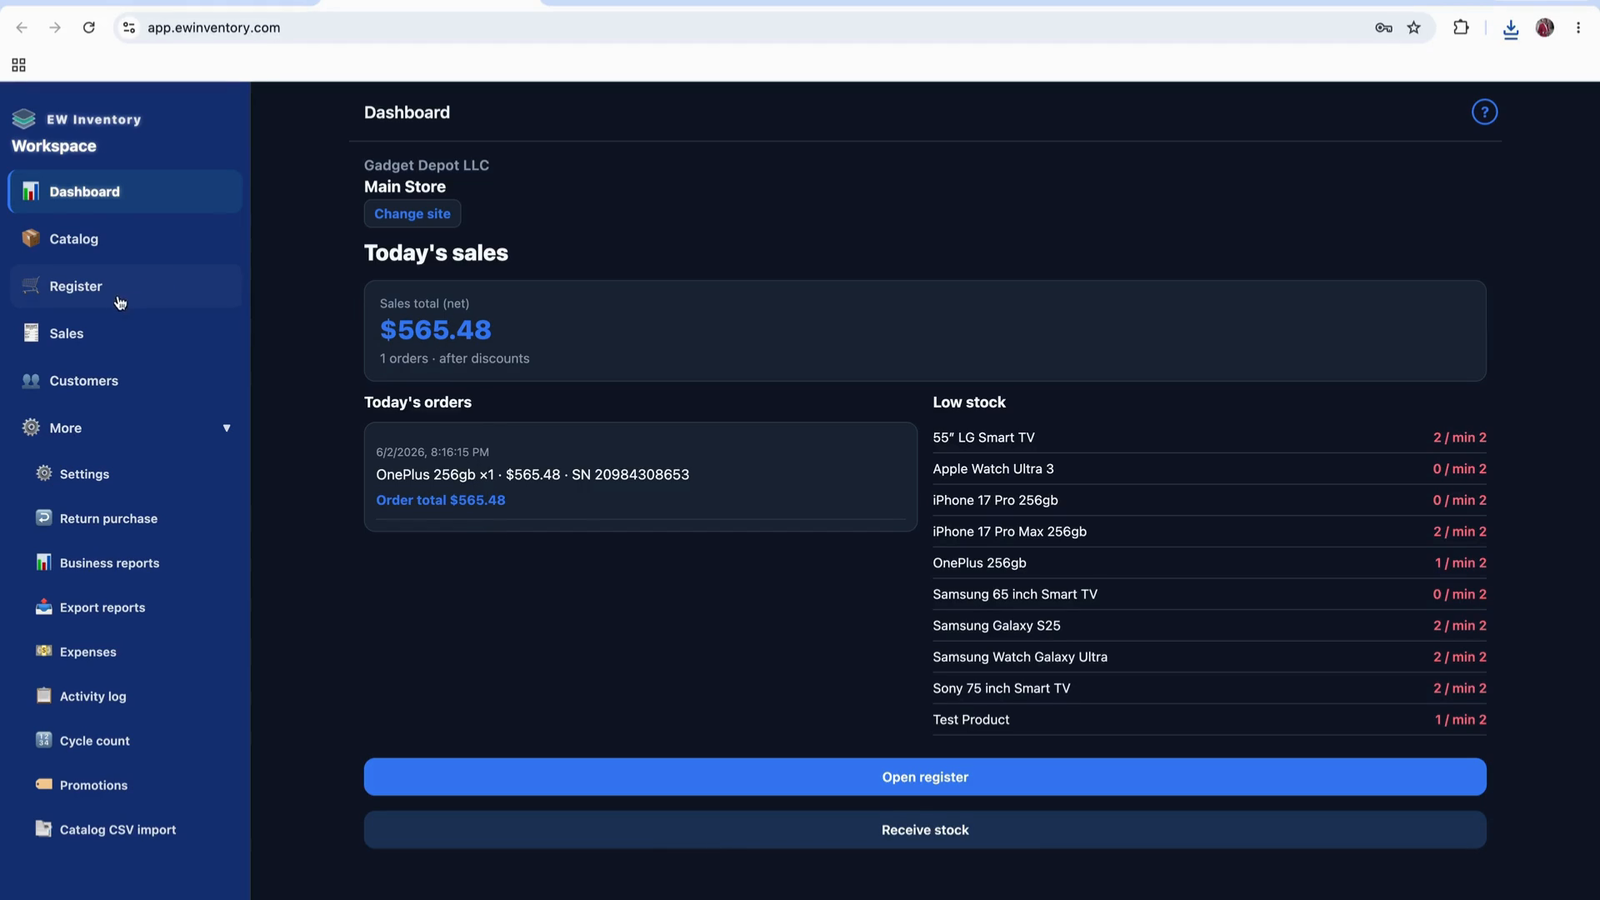
With the main location active, review the dashboard components. One of the key items is the Total Sale card. This card shows the total sales for the current day.
The total sales figure includes:
Once an invoice is issued, the sale is recorded and counted in the total sales displayed on the dashboard.
You will also see quick-action links or buttons on the dashboard, such as:
These shortcuts duplicate functions that are also available in the left navigation bar.
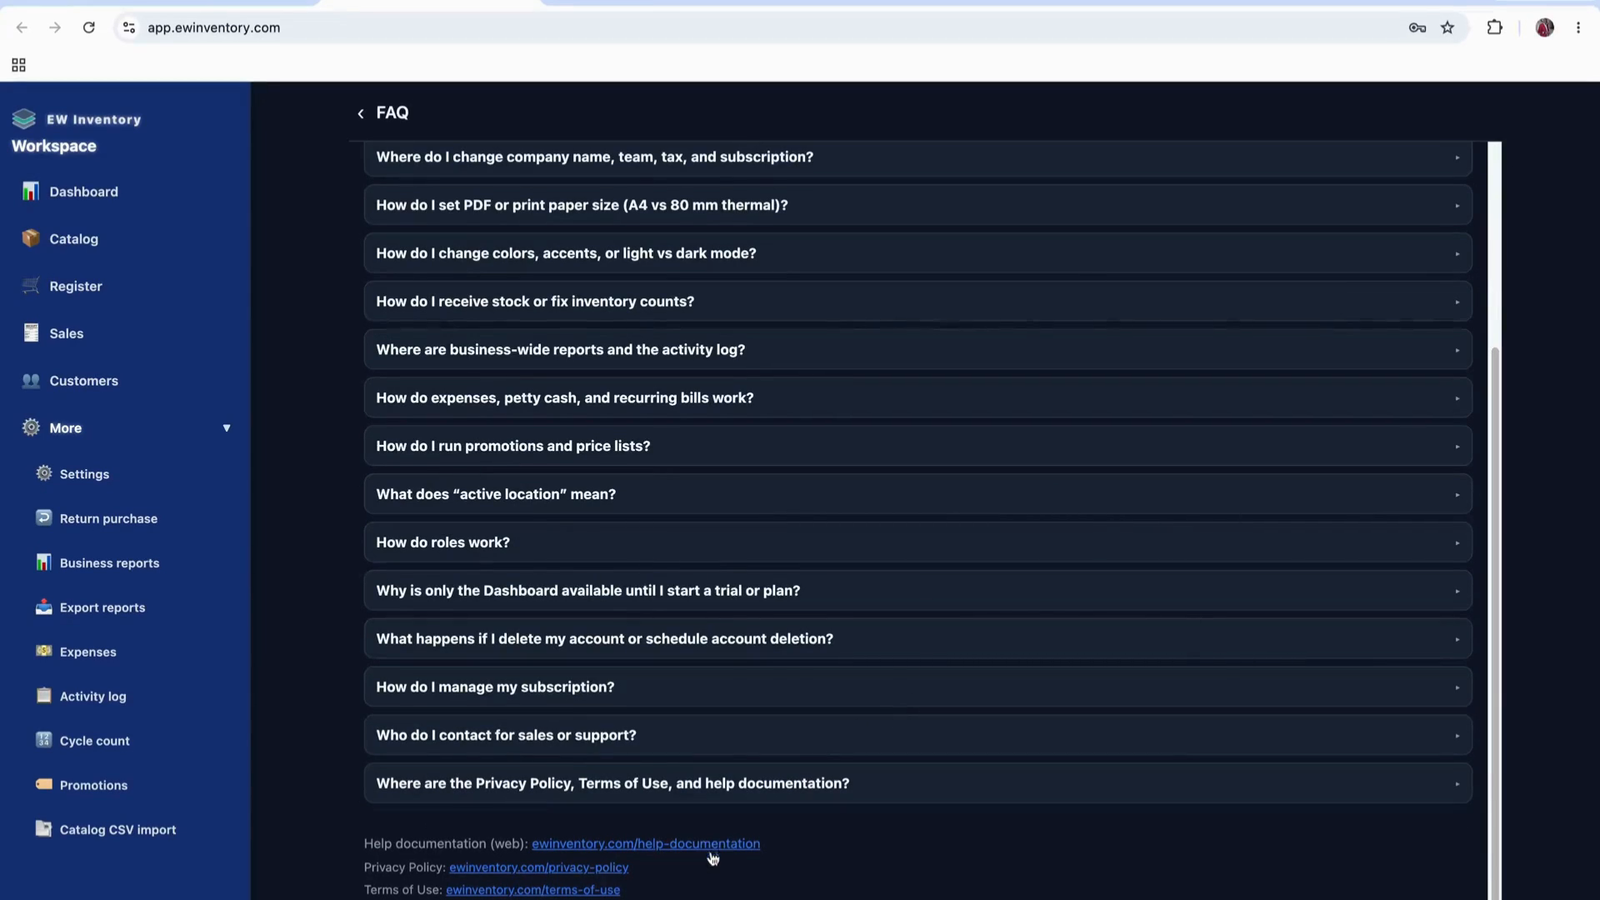
On the dashboard, locate the help icon. Click this help icon to access the FAQ (Frequently Asked Questions) page. The FAQ addresses many common questions about using the application.
If your questions are not fully answered in the FAQ, scroll down to the Documentation or Help Documentation section.

Click the documentation link to open the detailed online documentation on the website, where you can find comprehensive information about all features and how to use them.

Within the documentation or support area, you will also find contact details (such as support@ewinventory.com) where you can send additional questions or support requests.
Return to the dashboard when you are done reviewing help resources.

On the dashboard, locate the Low Stock section. This section tracks products whose inventory levels have fallen below a defined minimum threshold.
In the example shown, the minimum quantity is set to 2. That means:
You can configure your own minimum stock level according to your business needs. The records visible here are sample data, but in your live environment they will represent real products that need replenishment.
Build your catalog, receive stock (including serial numbers), add customers, and complete sales at the point-of-sale register.
This document explains how to manage products in the catalog, receive stock (with or without serial numbers), configure reorder points, filter and export inventory data, and add new products, manufacturers, and brands.
Set a minimum stock (reorder point) for each product (for example, 5 units). Once the on-hand quantity drops to this minimum, the system will show an alert so you can backfill the product.

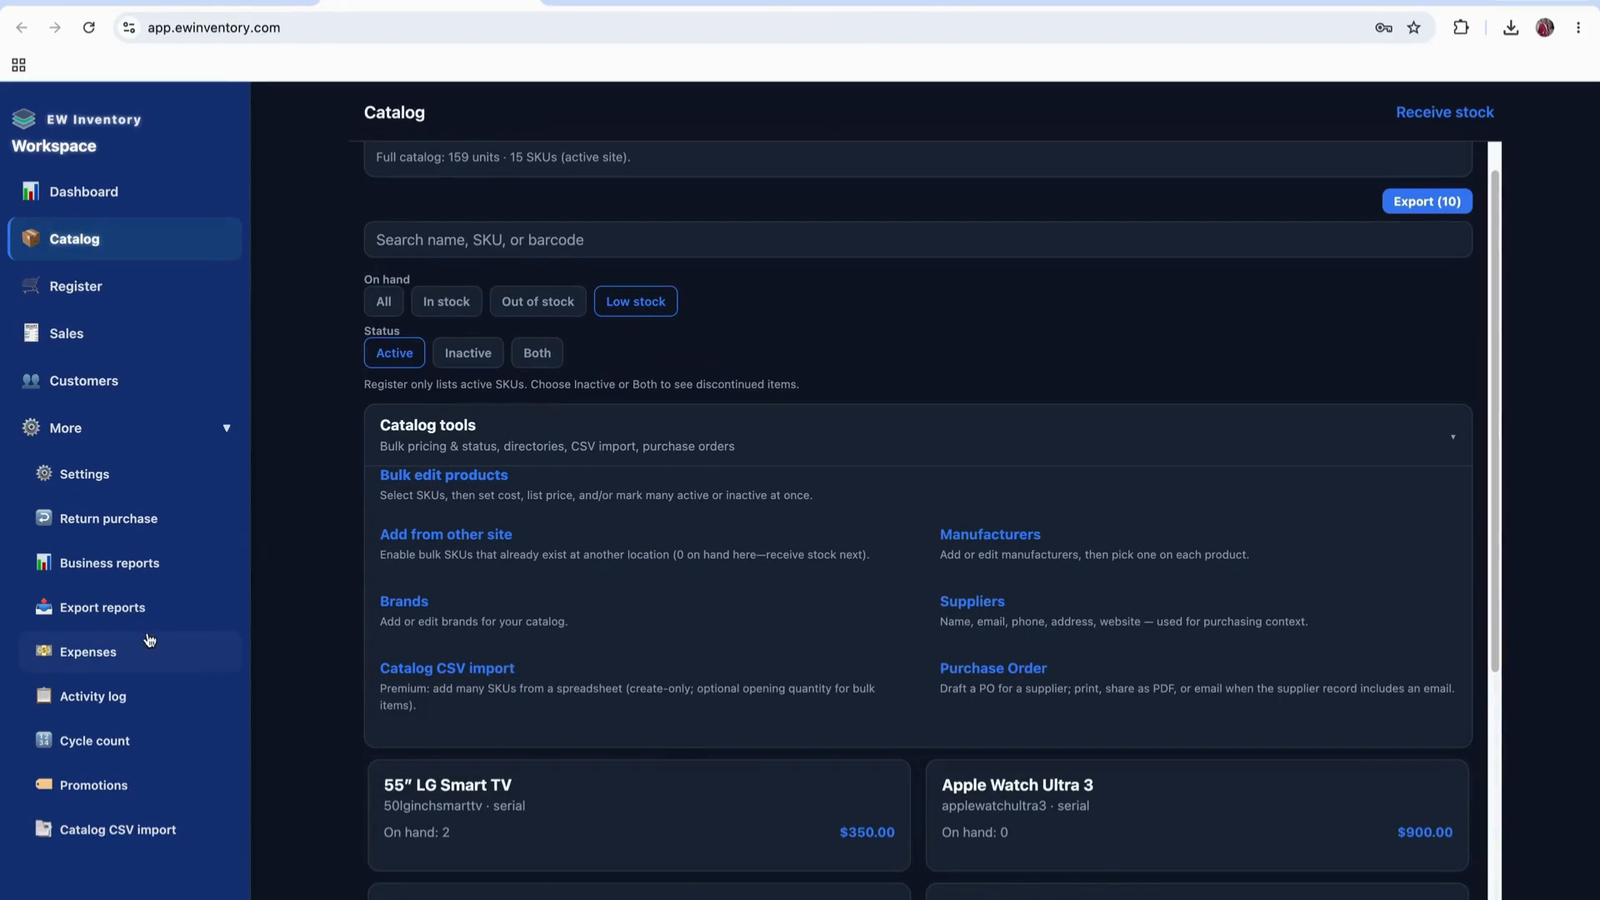
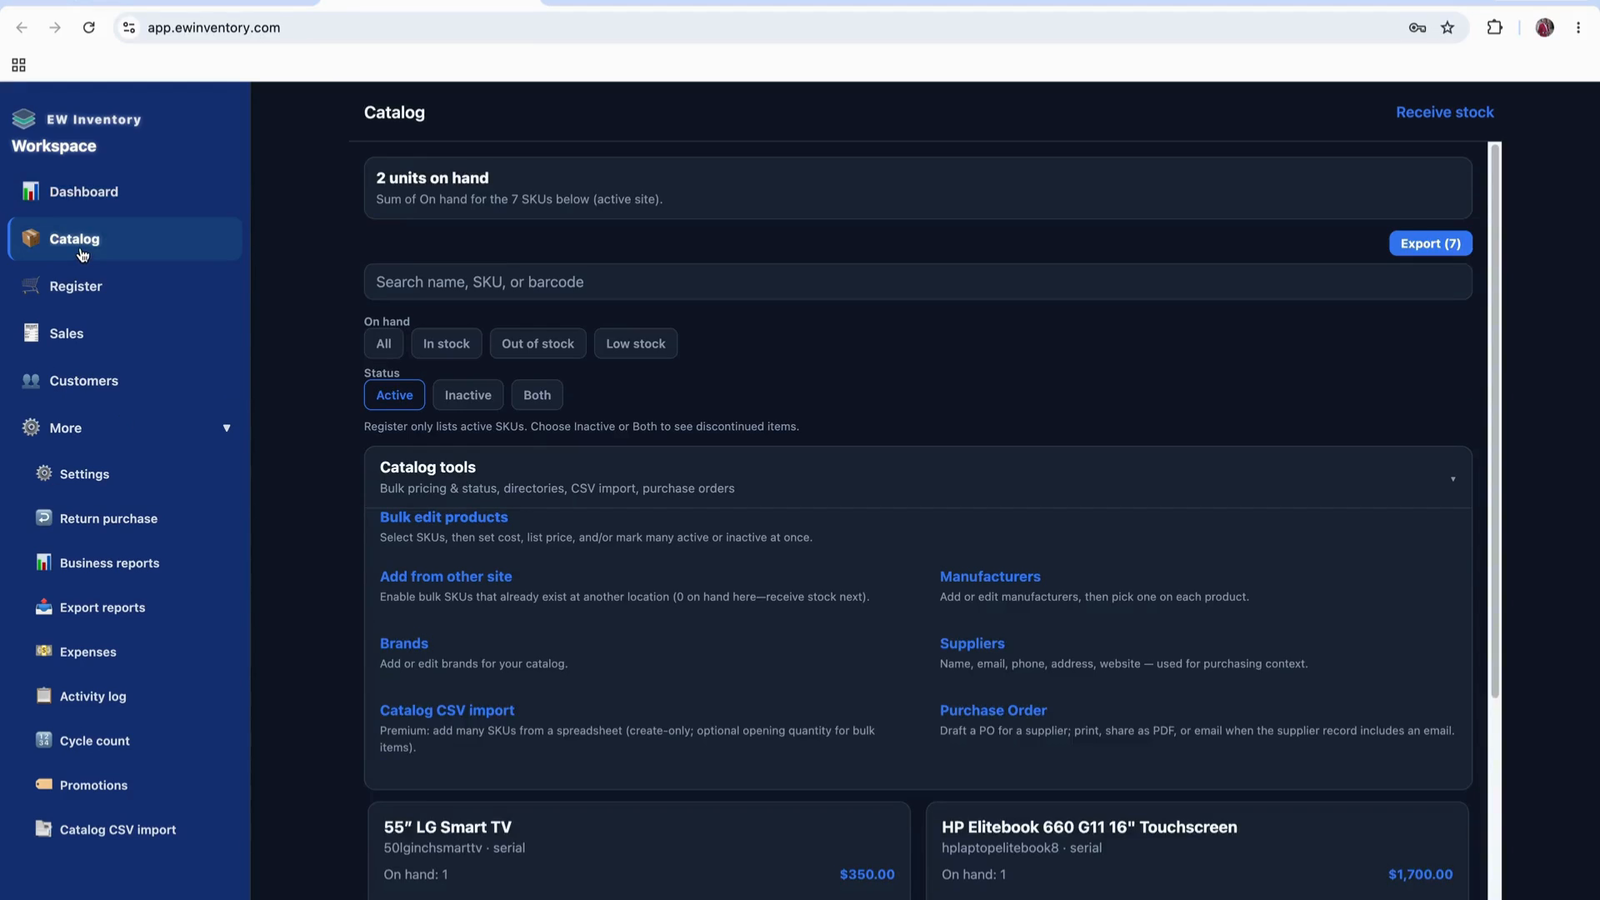
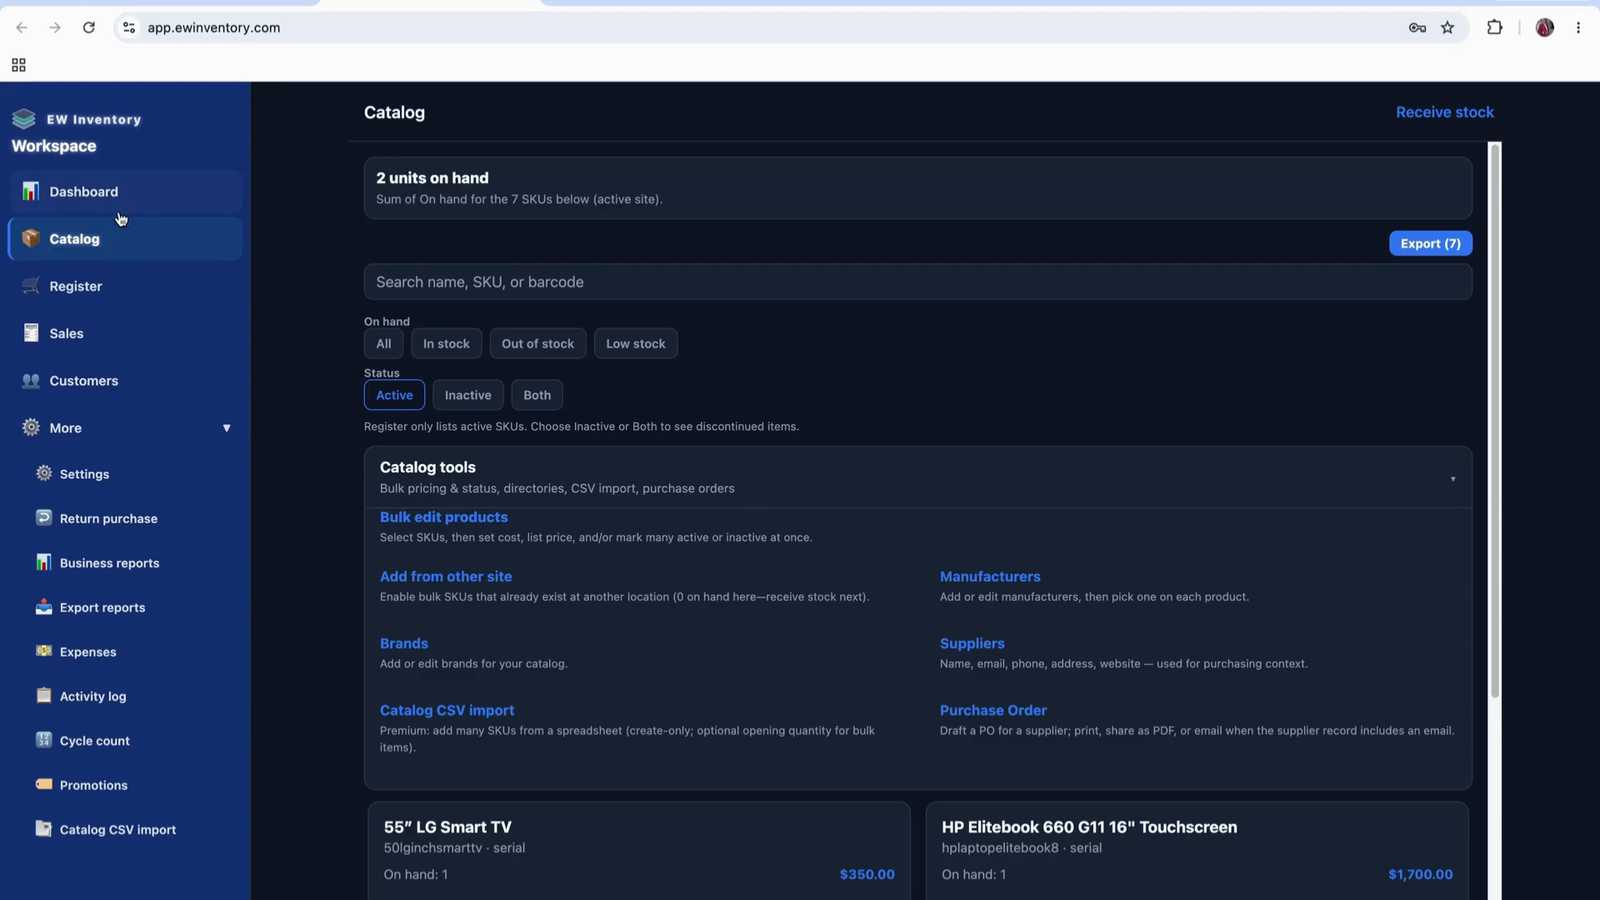
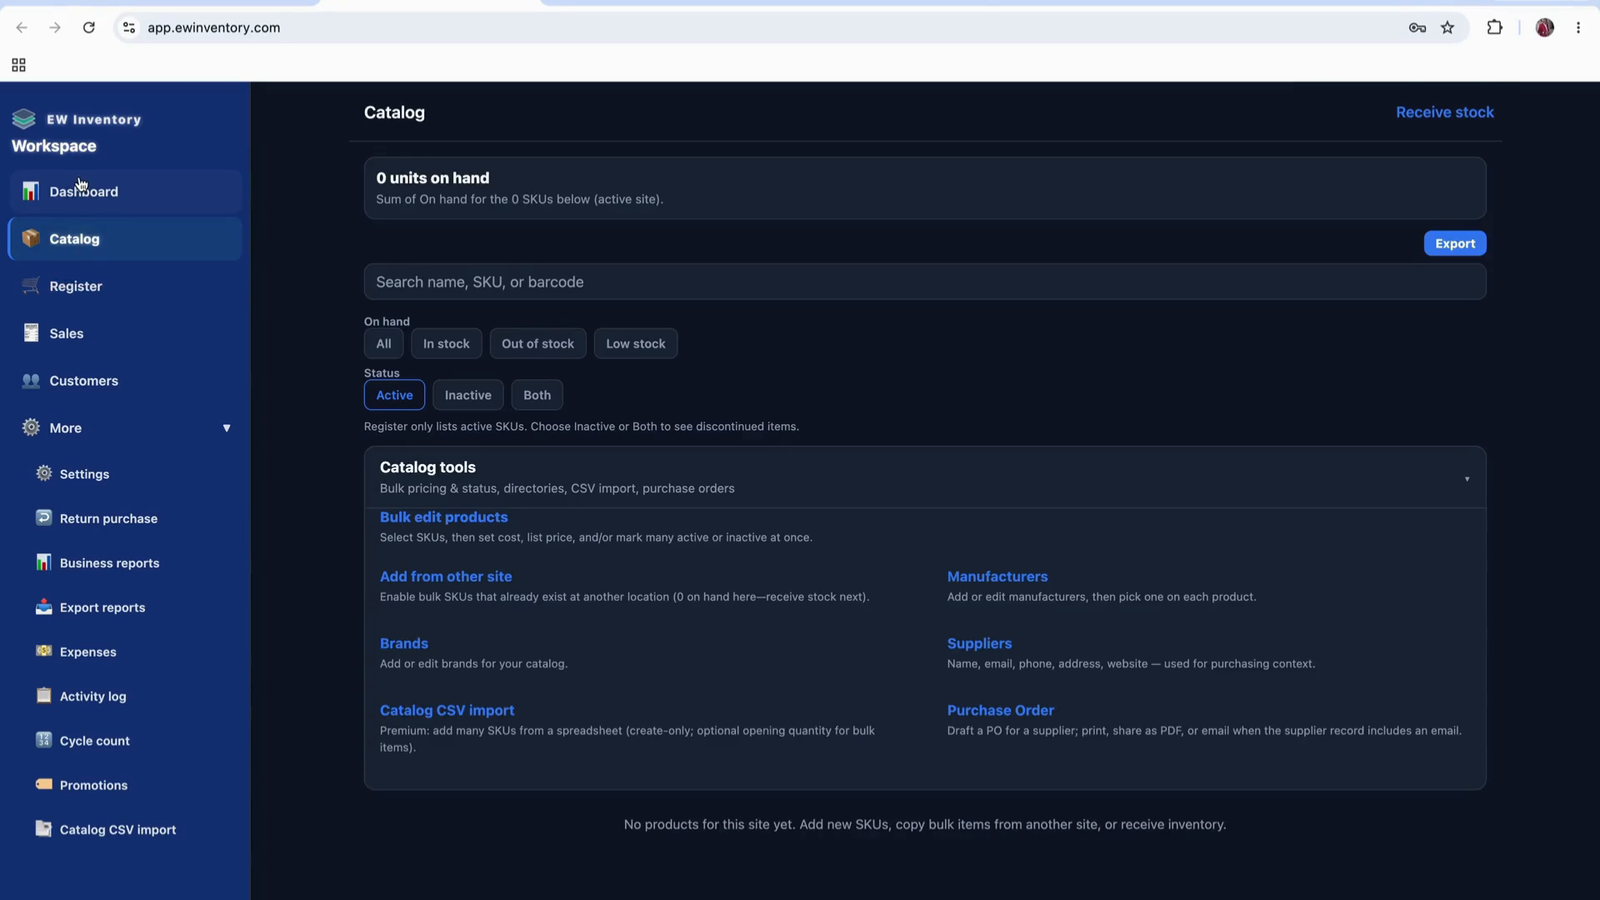
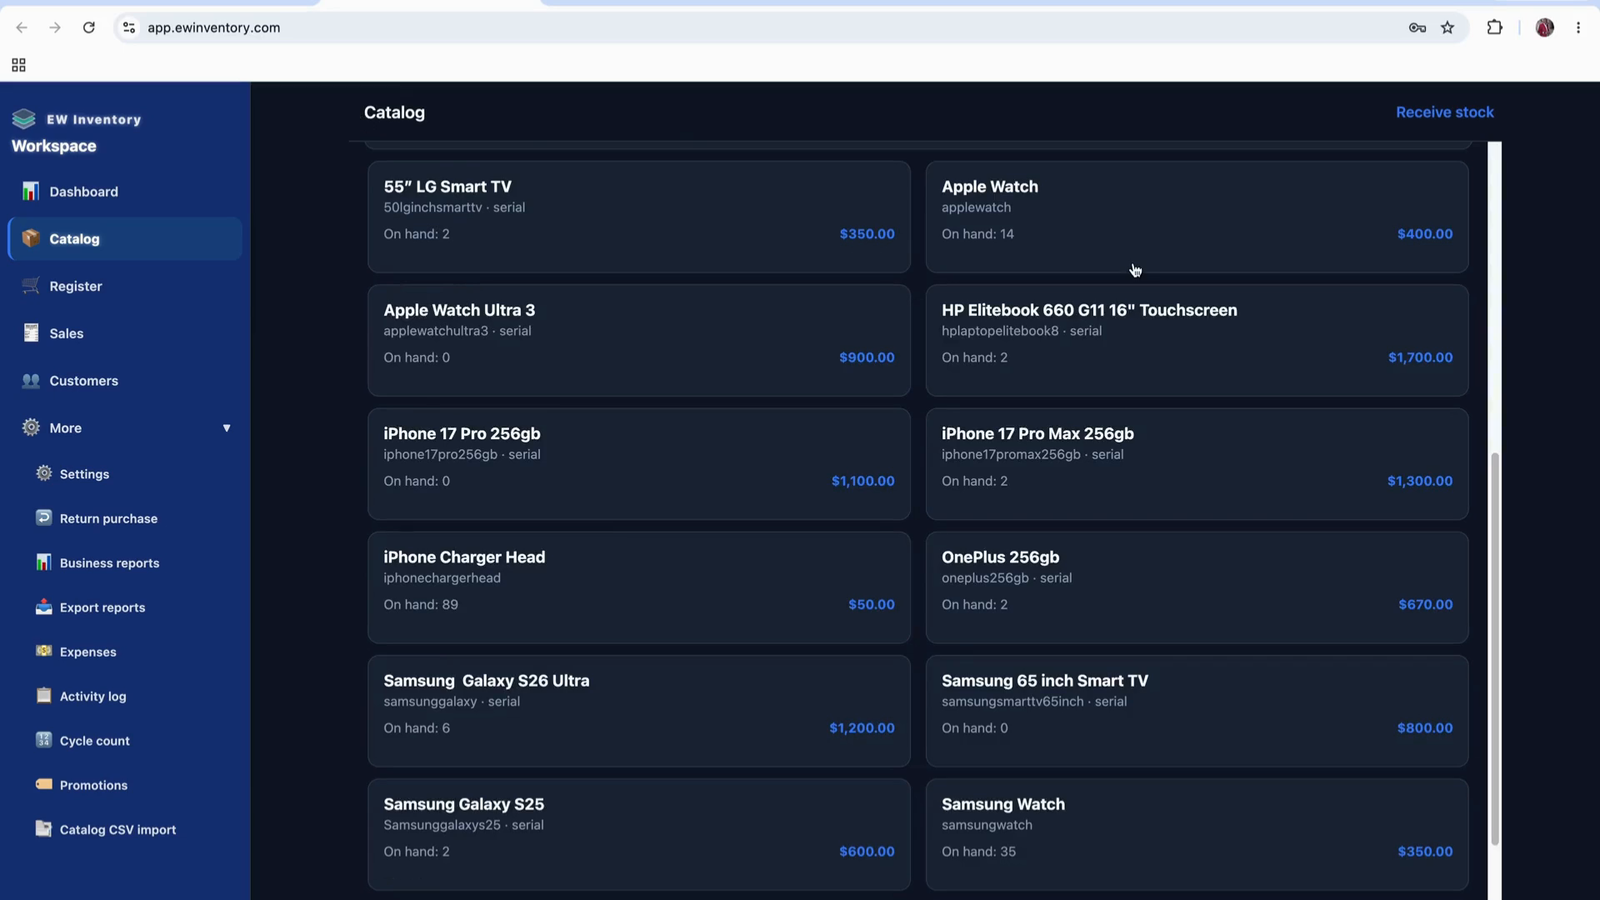
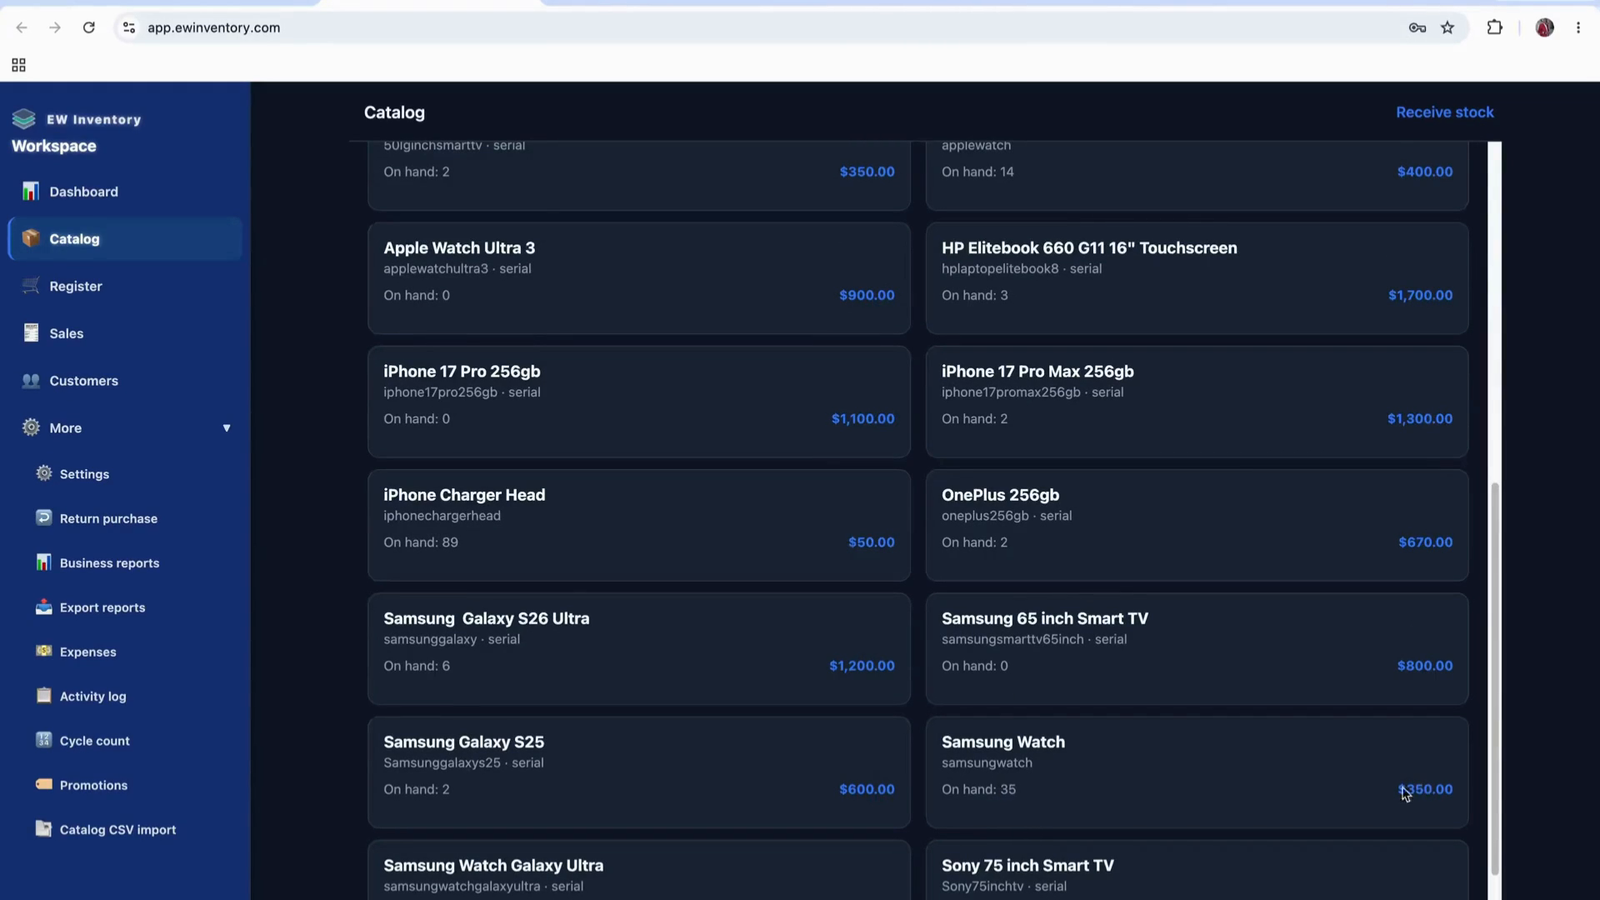
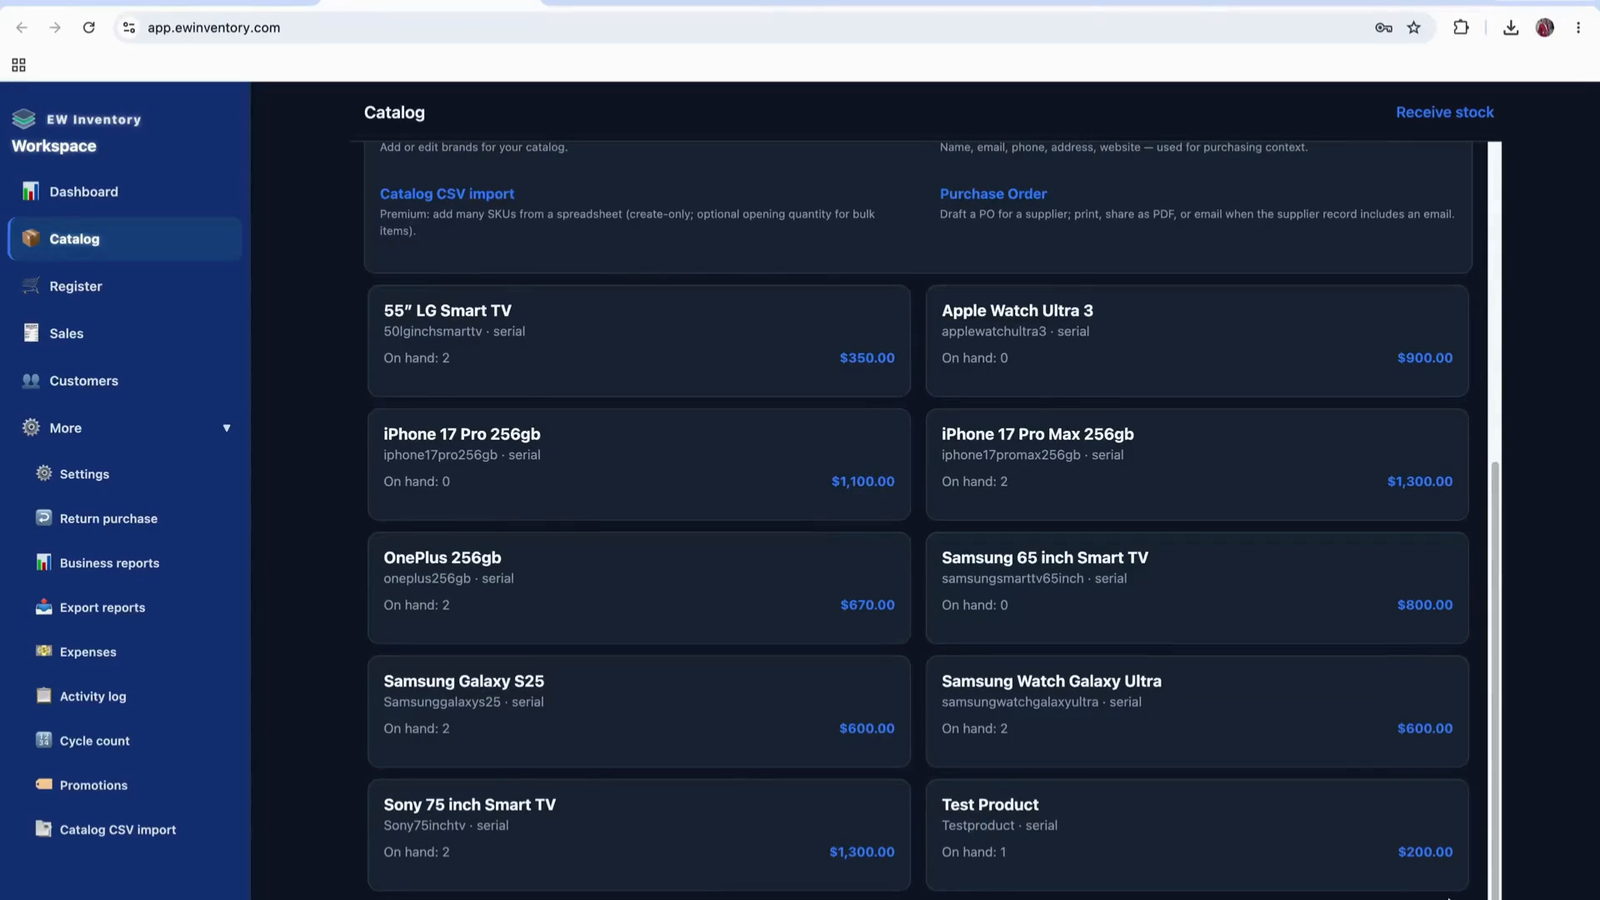
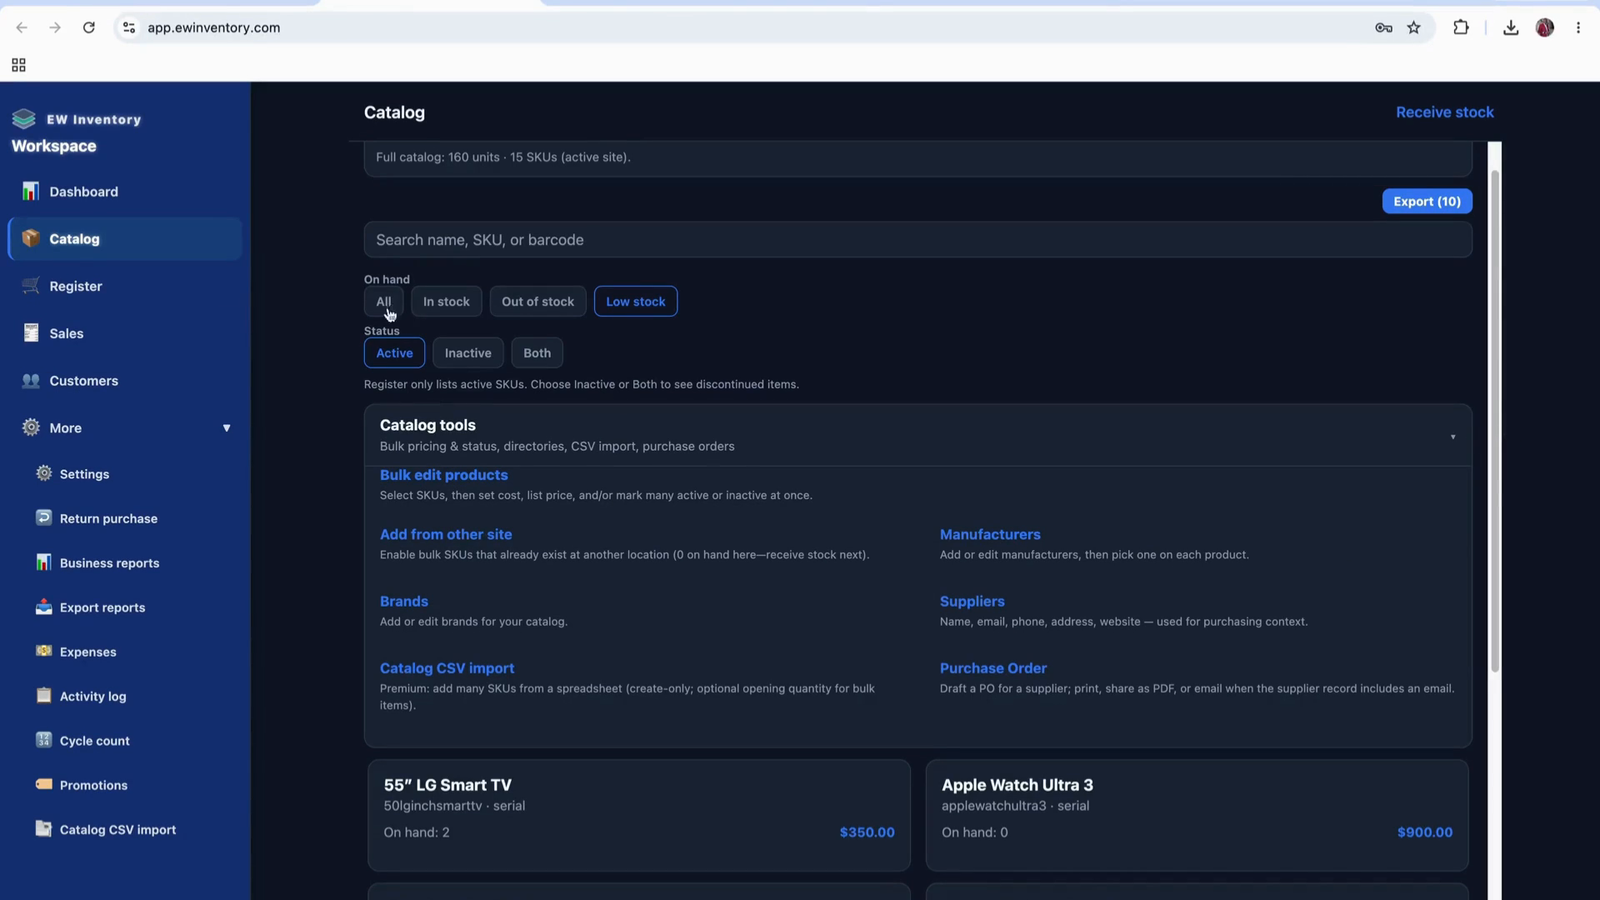
Open the Catalog page to view all products you have entered into the system. This page lists each unique product and shows the current on-hand quantity (e.g., 159 units on hand across products). Use this view to quickly see all product quantities in your catalog.

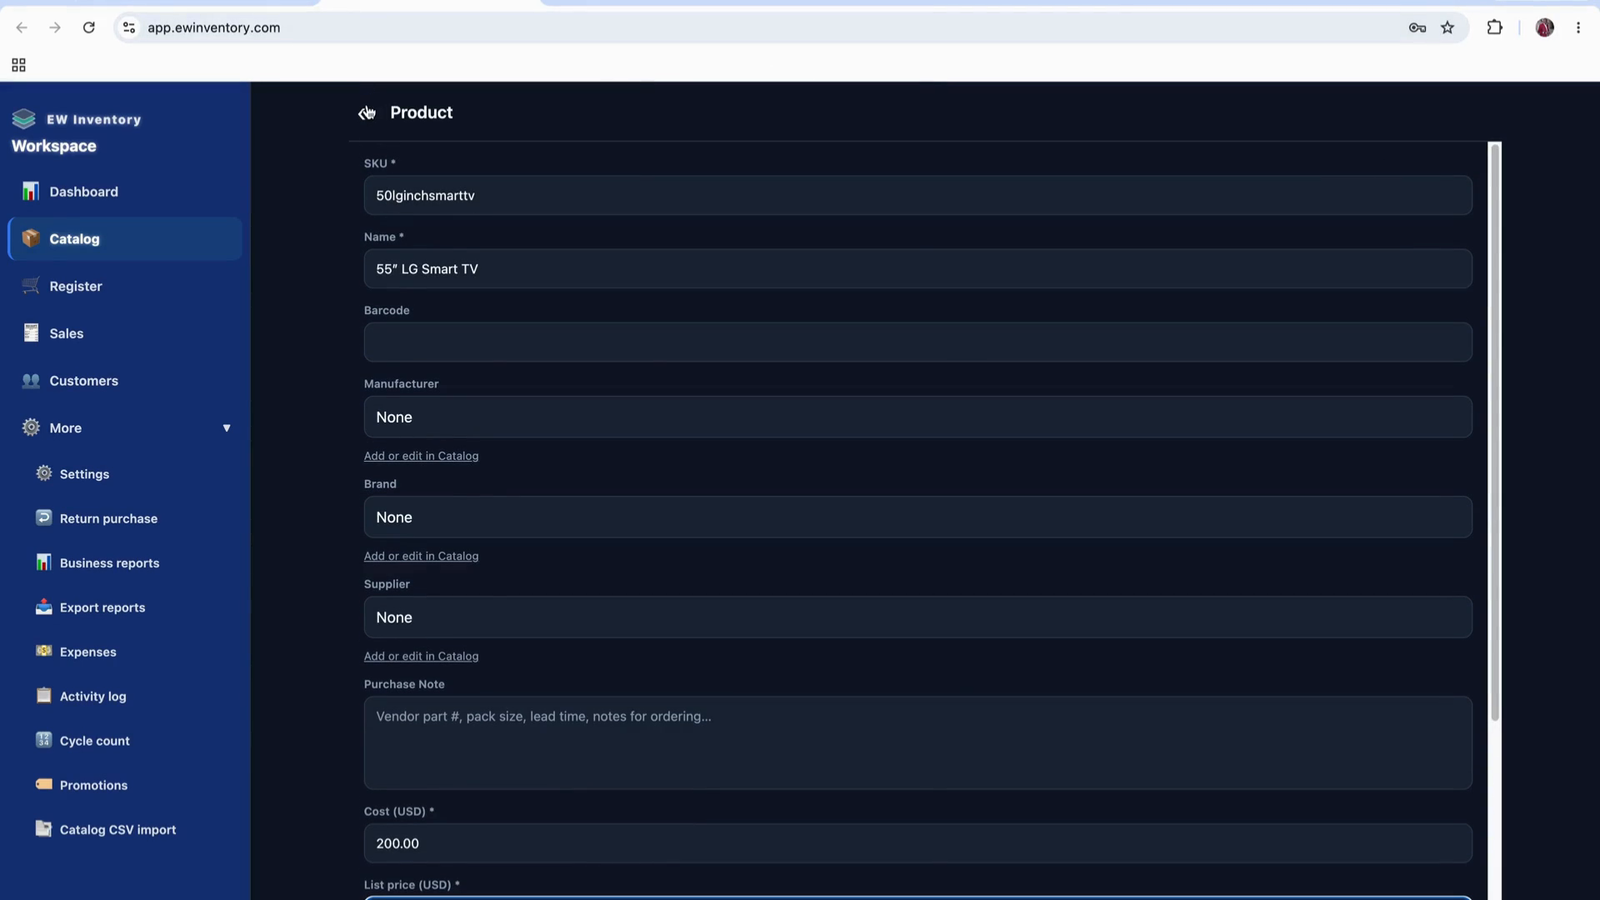
On the Products page, each item must have a unique SKU (Stock Keeping Unit). Ensure every product is assigned a unique SKU so the system can track each item individually and accurately.
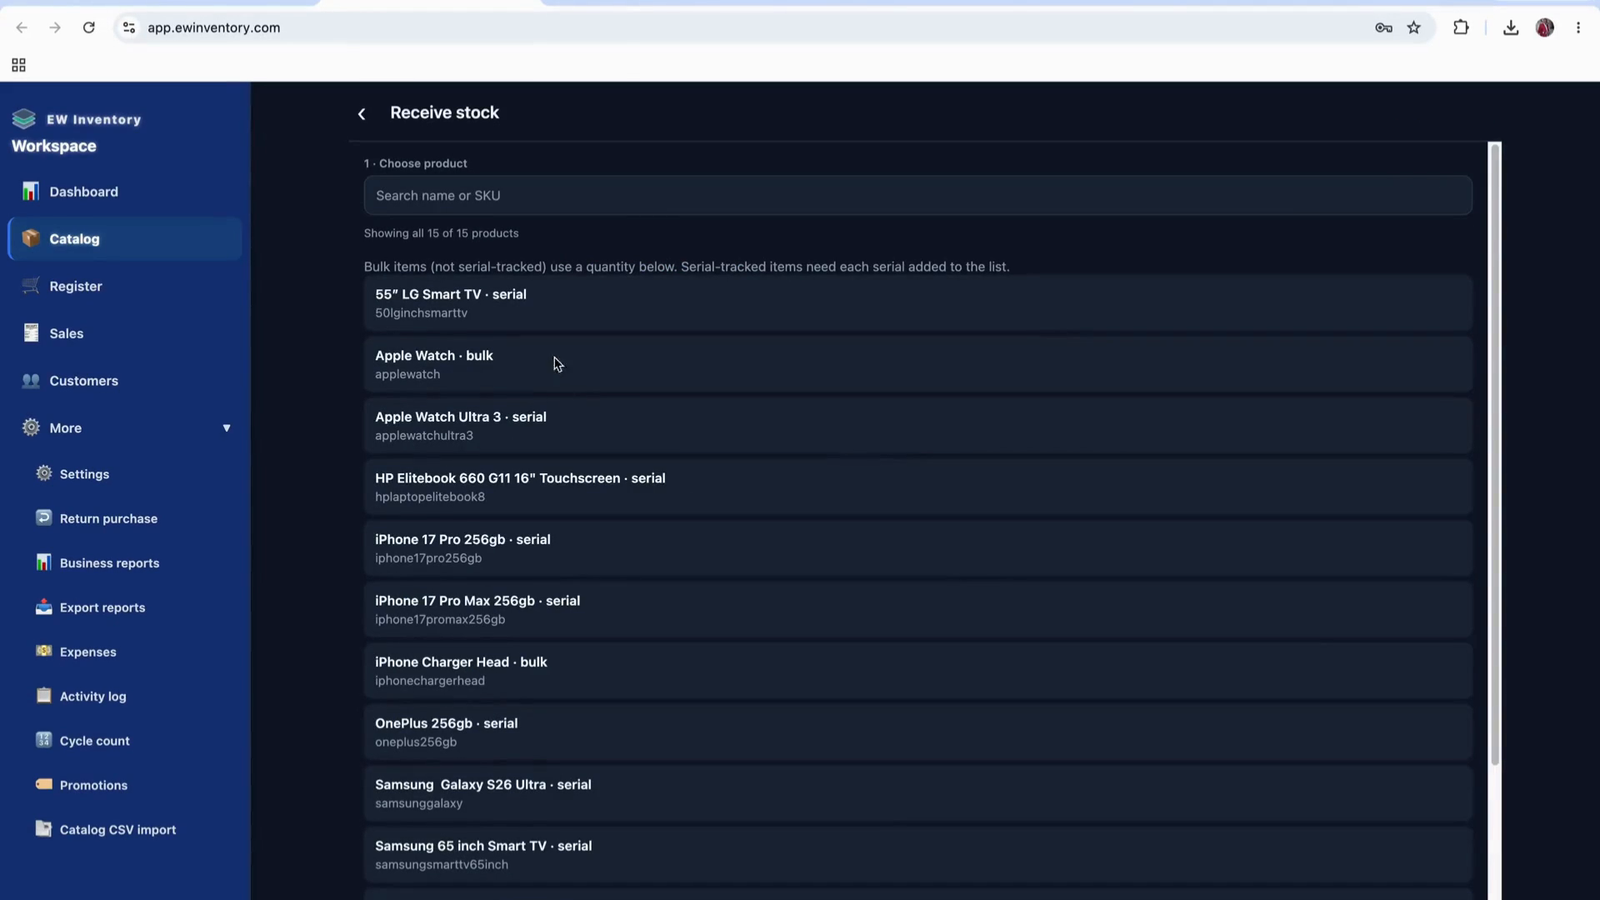
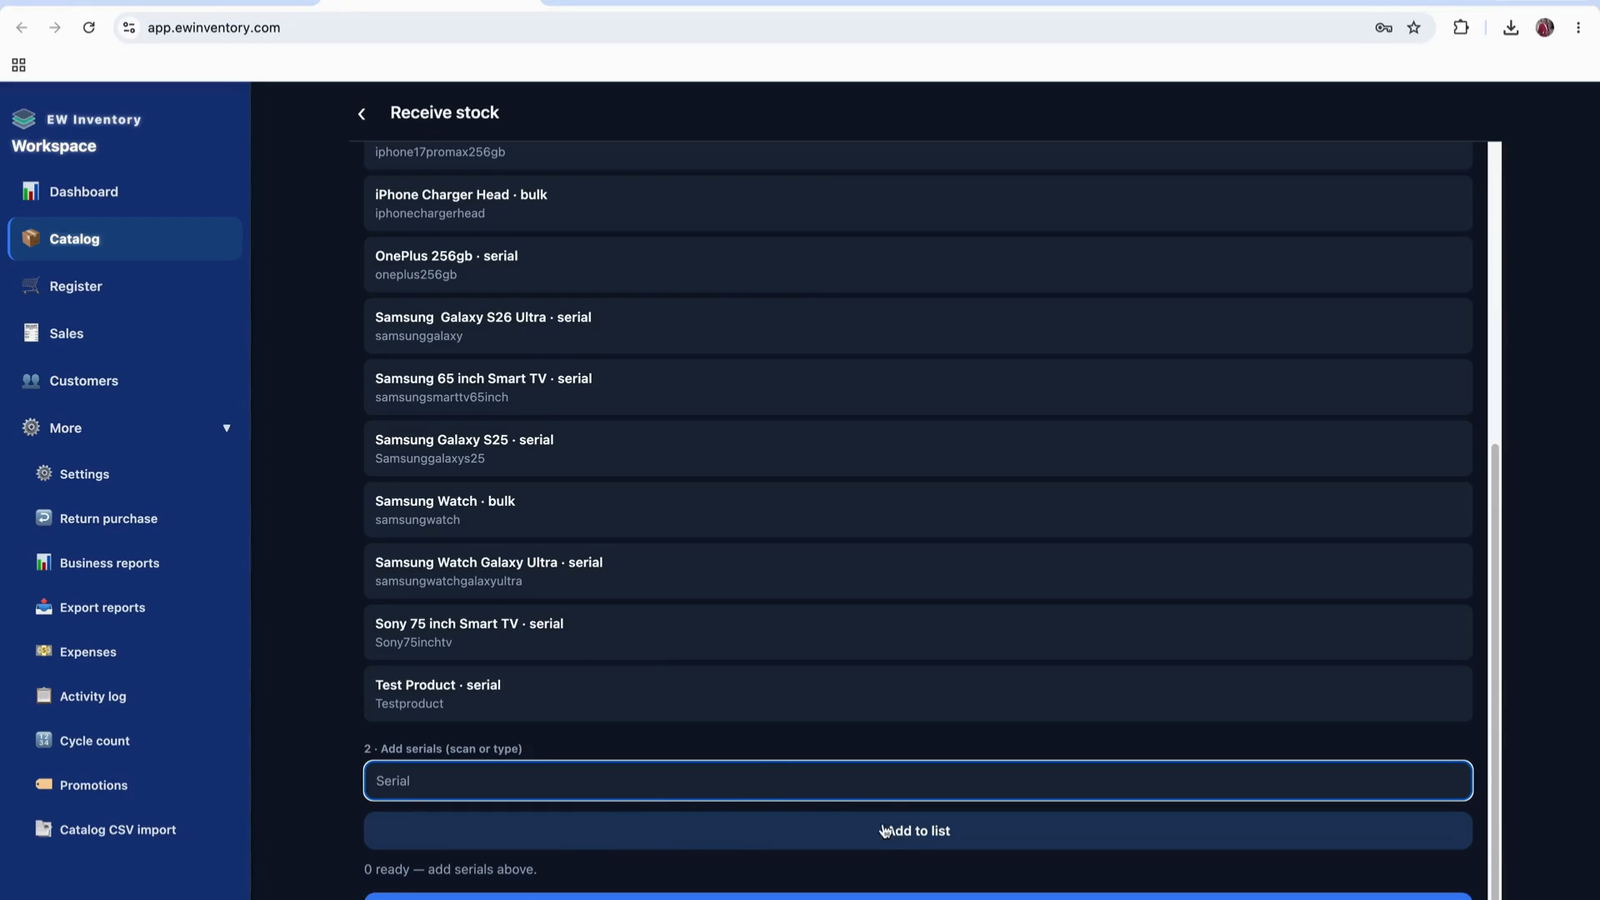
When you are running low on any product, use the “Receiving Stock” function to backfill inventory. Tap on “Receiving Stock,” then search for the product you want to receive (for example, start typing “HP EliteBook laptop” by entering “HP”).
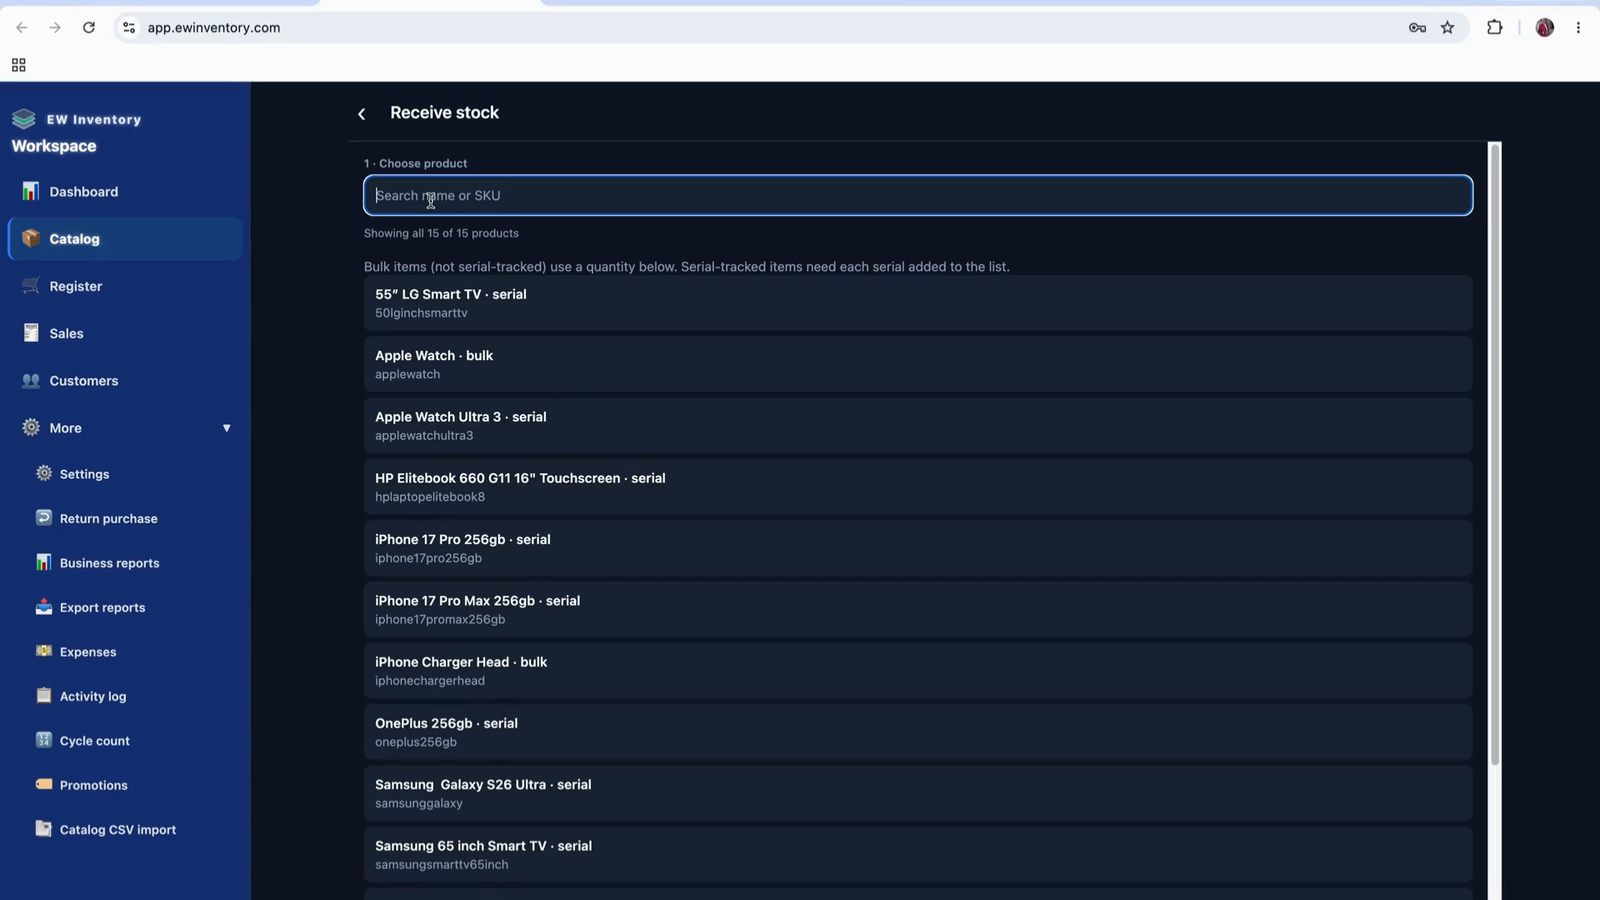
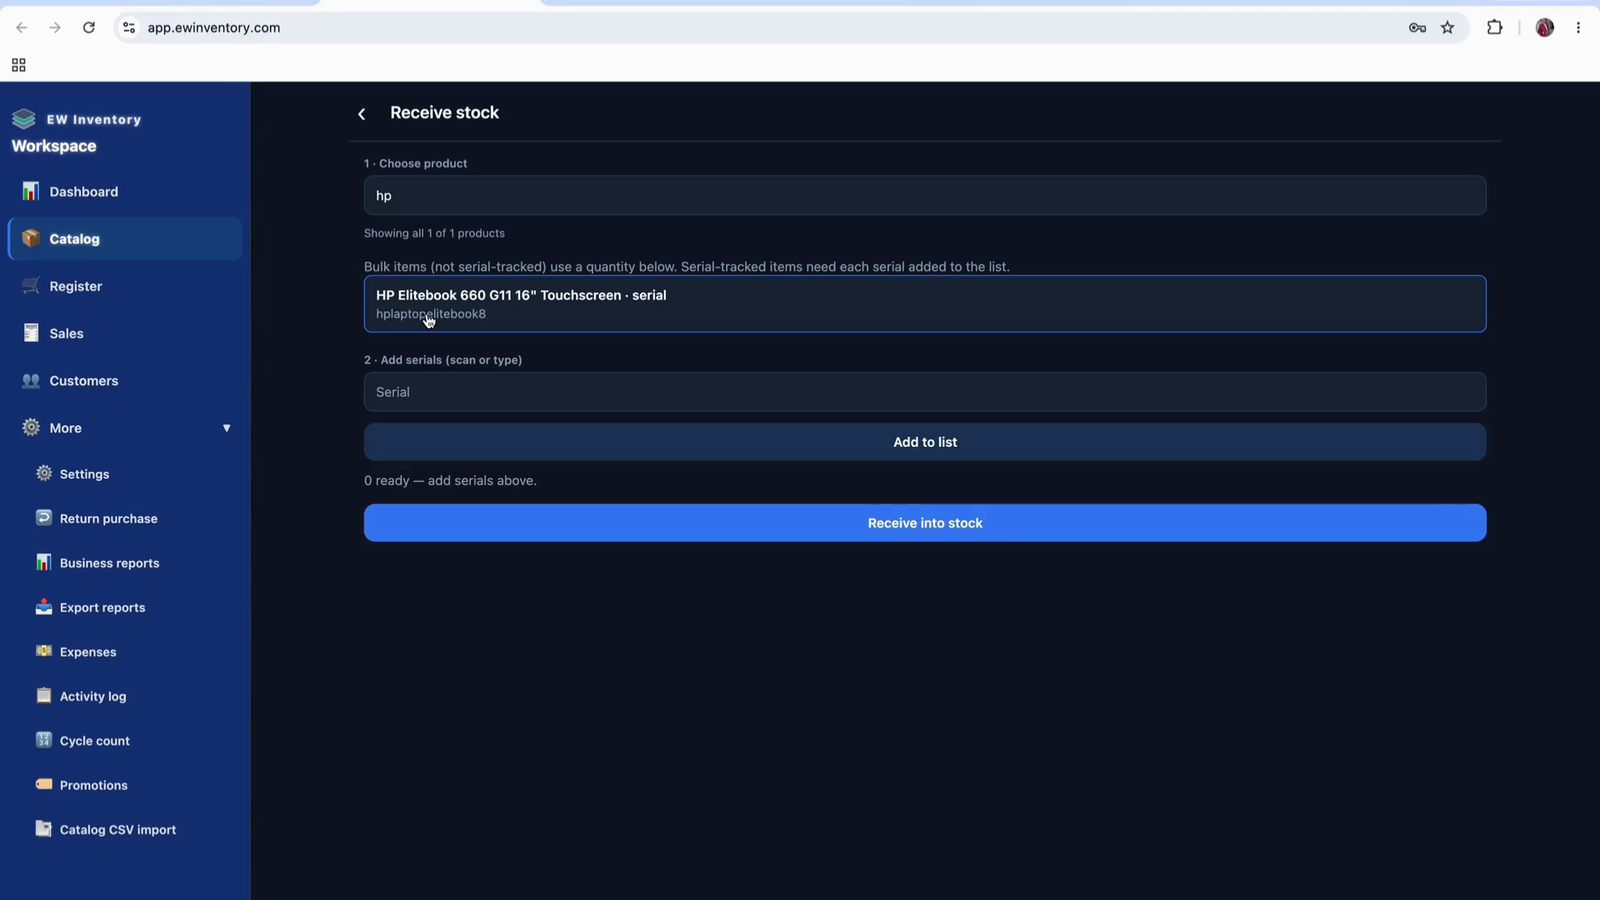
From the search results, select the desired product (e.g., the HP EliteBook). Then proceed to receive stock for that selected product.
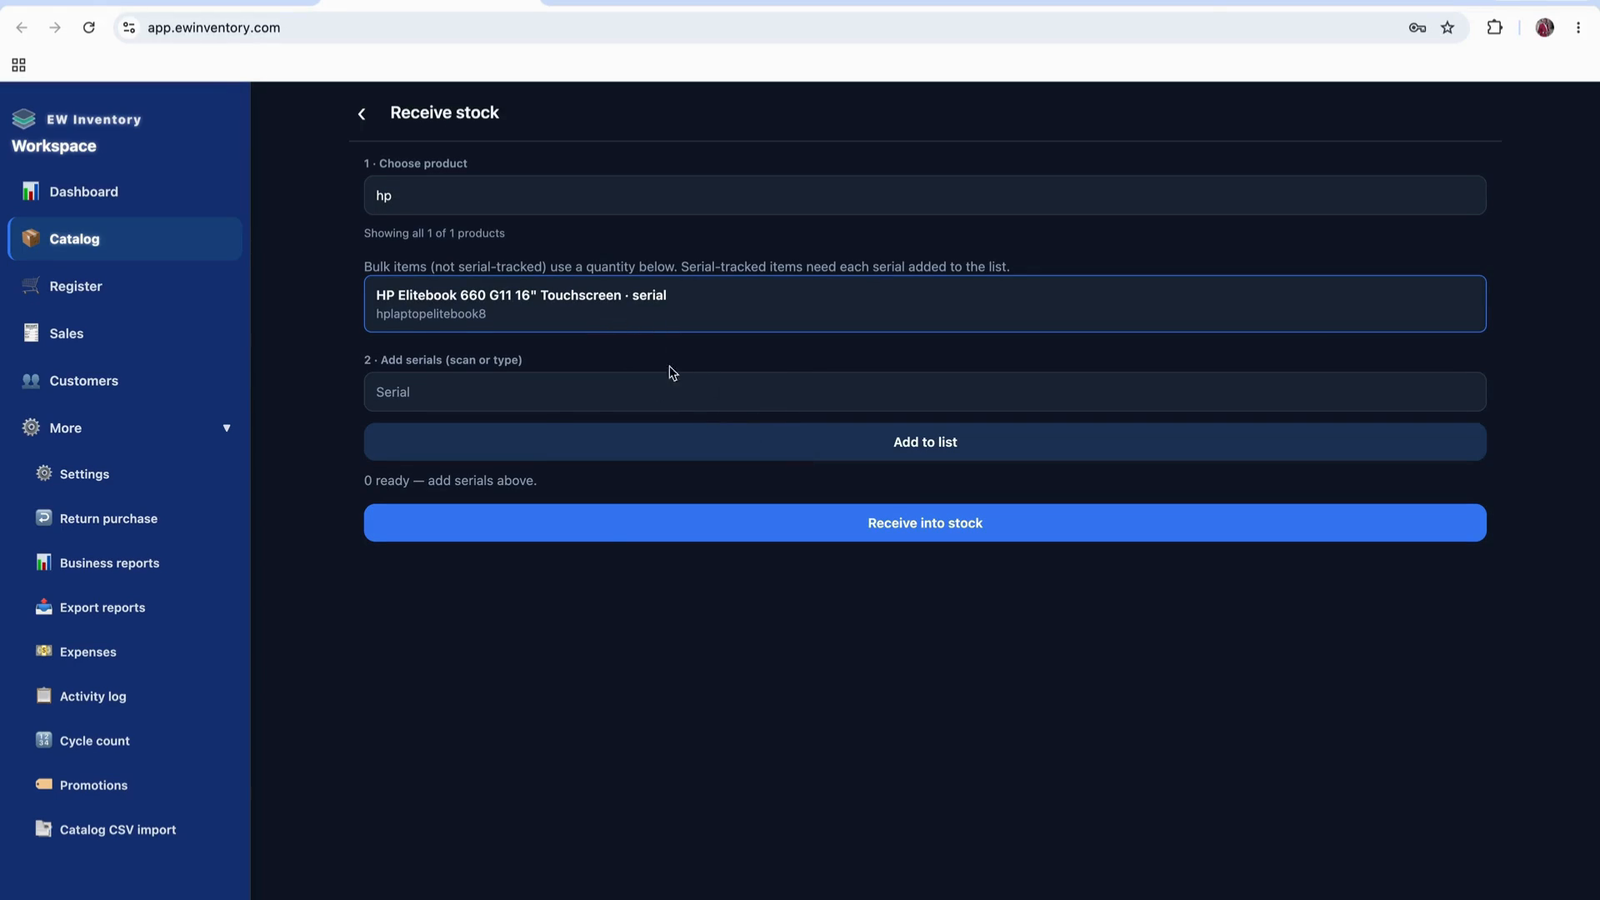
If the product is configured to track serial numbers, you will be prompted to add a serial number for each unit received. Enter the serial number (for example, 3456789) in the serial number field.
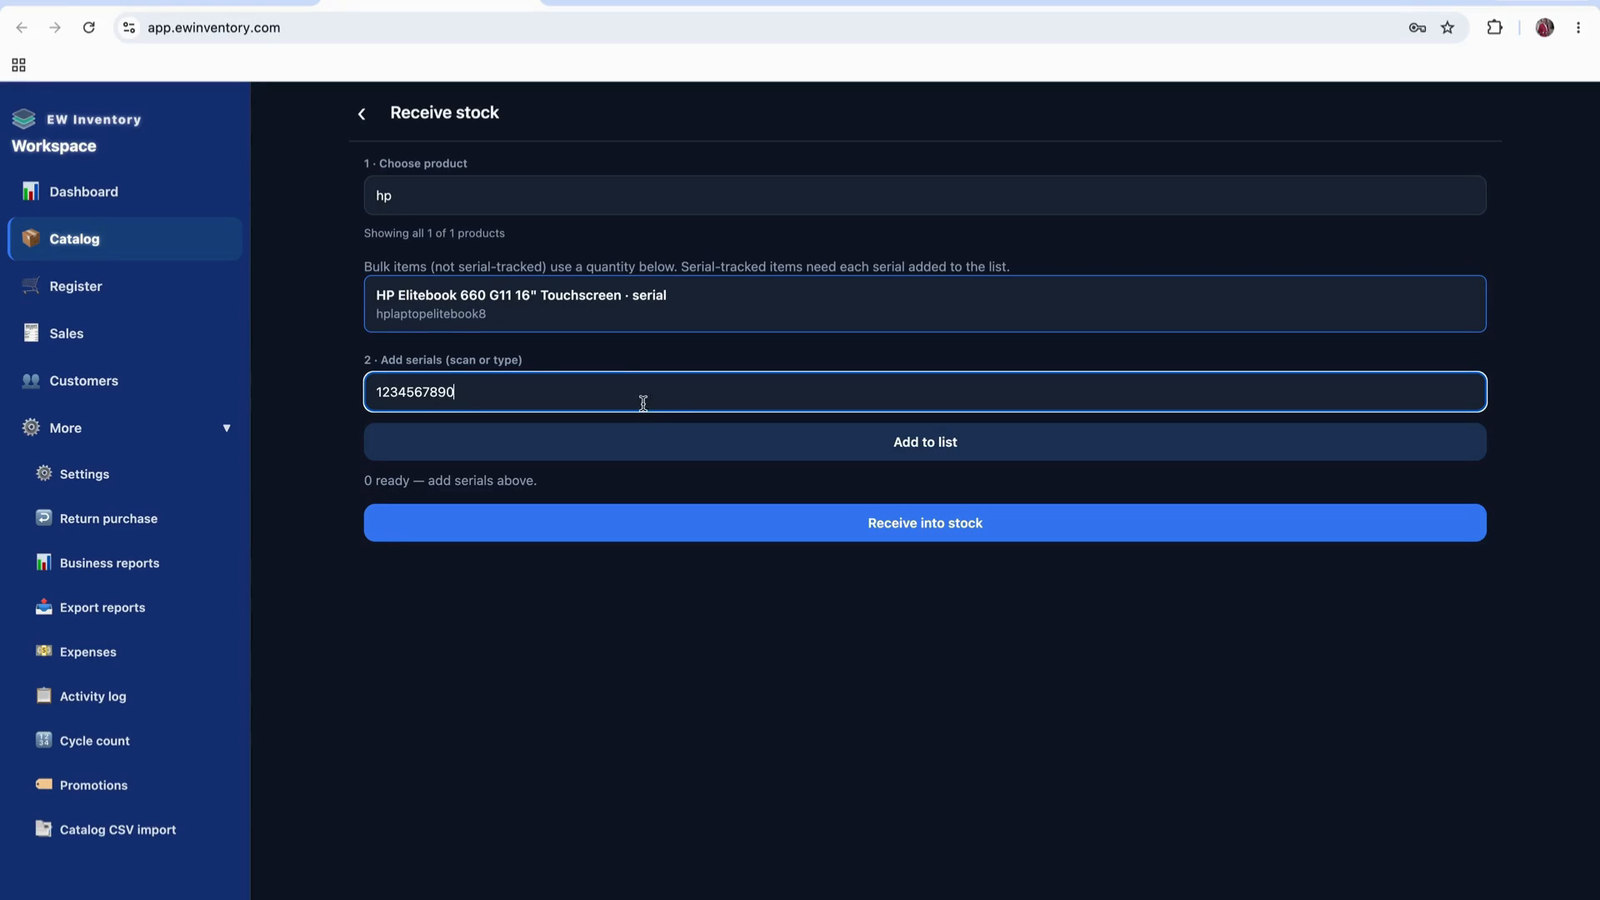
After entering the serial number, continue to the next step to confirm and receive it into stock.


The system will display a confirmation message such as: “You’re about to receive 1. Serial numbers cannot be edited after you add it.” Carefully double-check that the serial number is correct before proceeding.
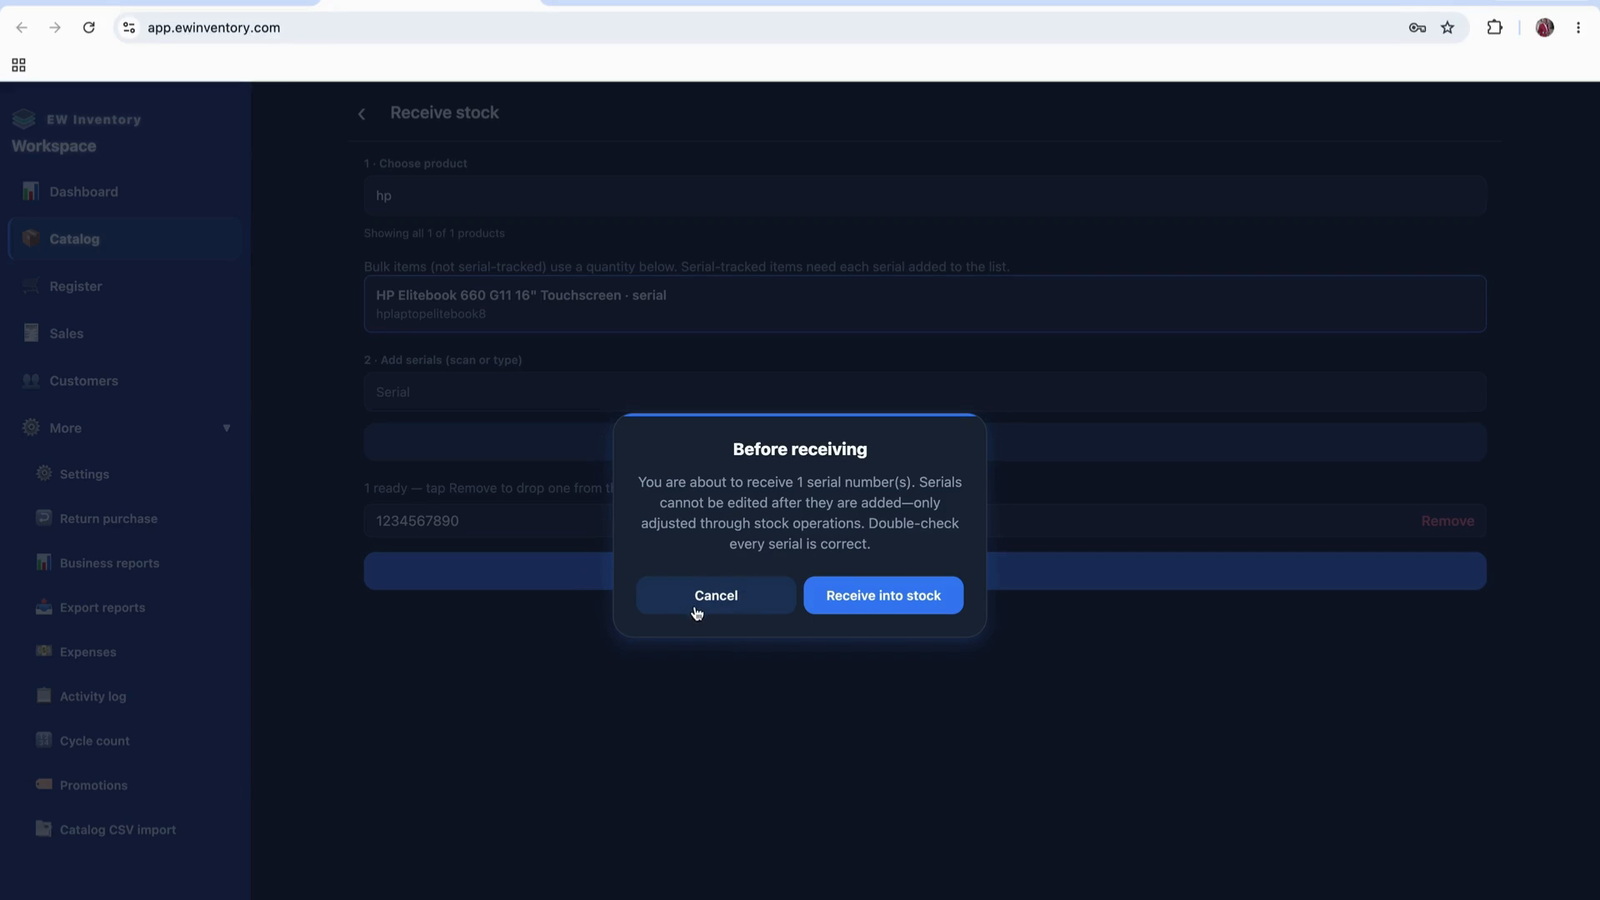
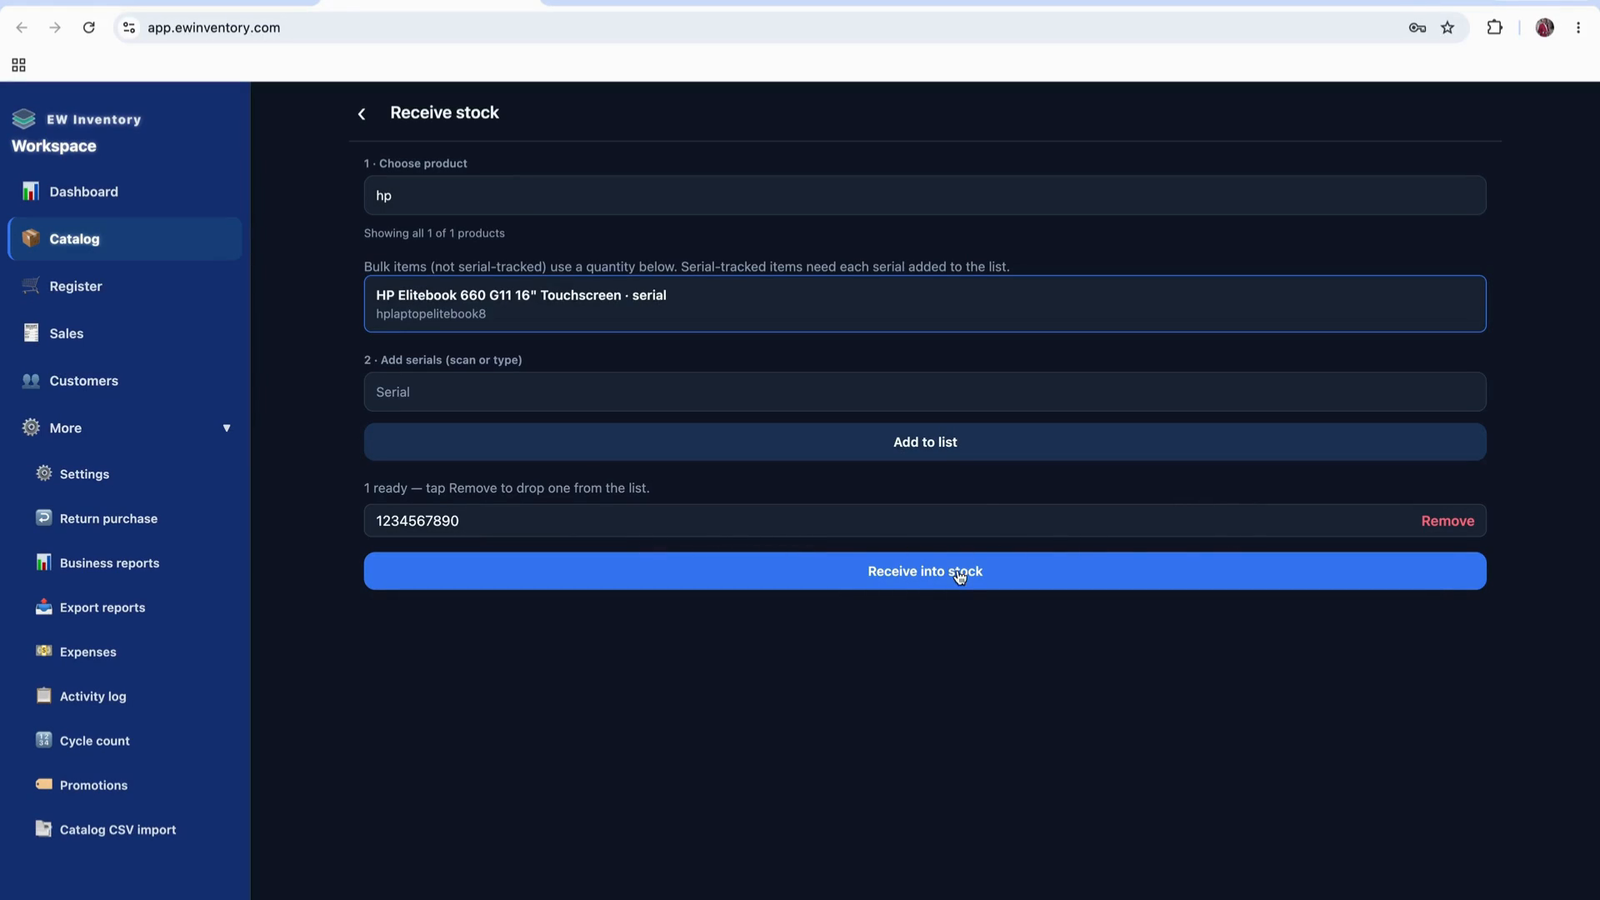
Once confirmed, choose “Yes,” then select “Receive in stock” to complete the process.

The system will add one more unit of that product (e.g., HP EliteBook) to your inventory.
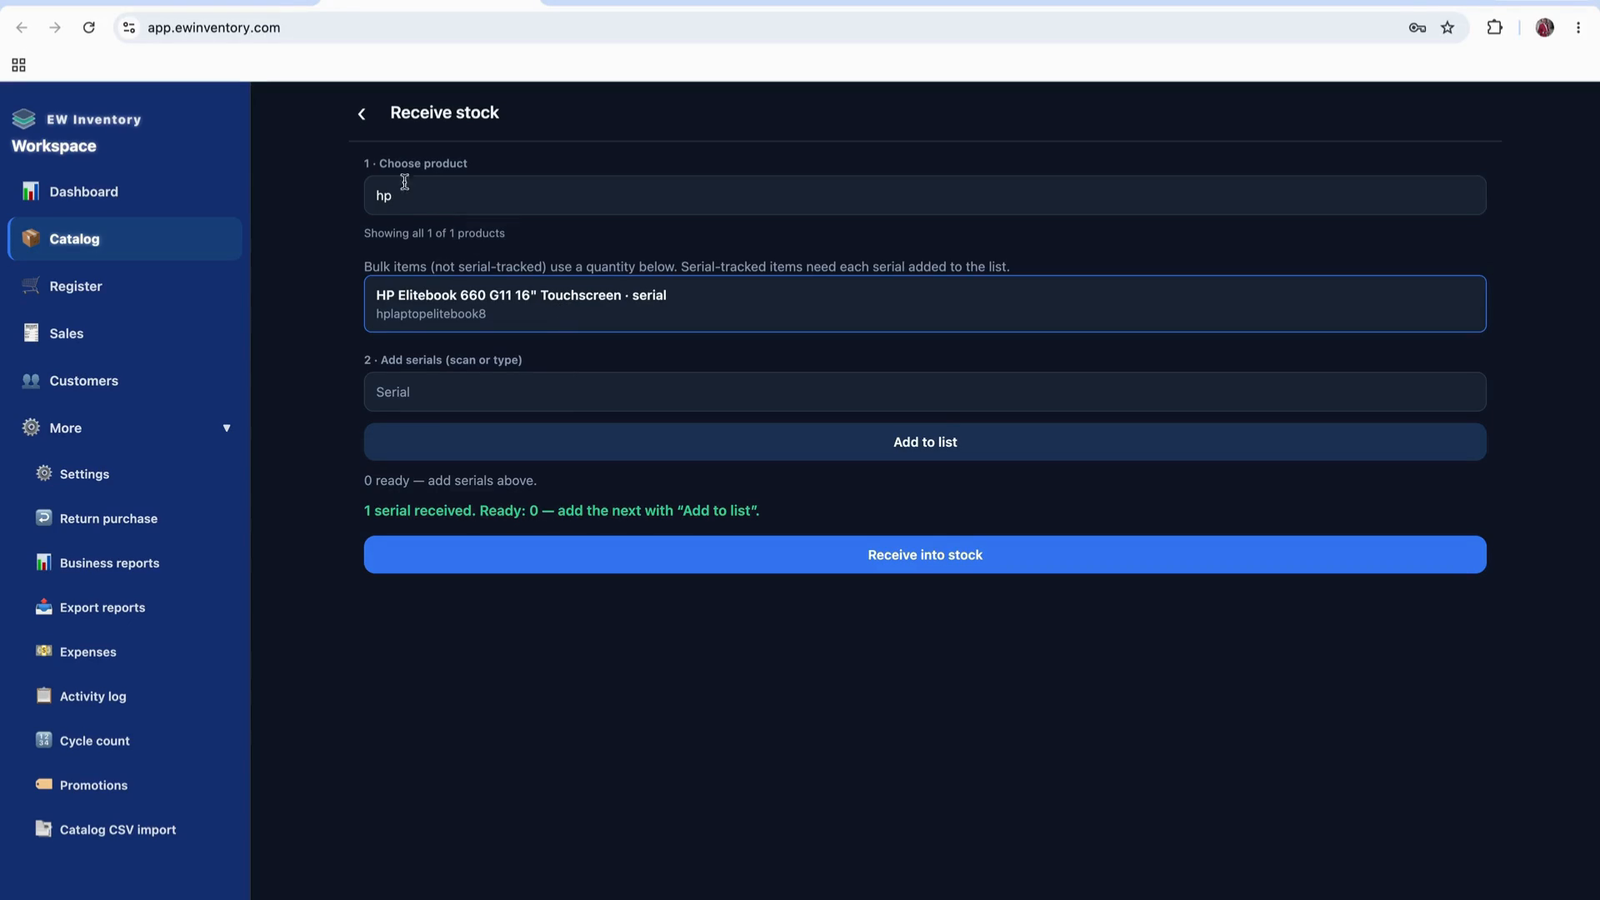
Return to the Products page and search for the product (e.g., EliteBook). Verify that the on-hand quantity has increased (for example, to 35 units). This page always shows the current quantity on hand so you can easily see what you have available.
Some products are not tracked by serial number and are managed purely by quantity. For these, the “Track each unit by serial” toggle is off, meaning the system tracks only total quantity.
Set a reorder point (e.g., 2 units). You can adjust this to 5, 10, or any value that fits your needs. After setting the desired minimum quantity, save your changes.
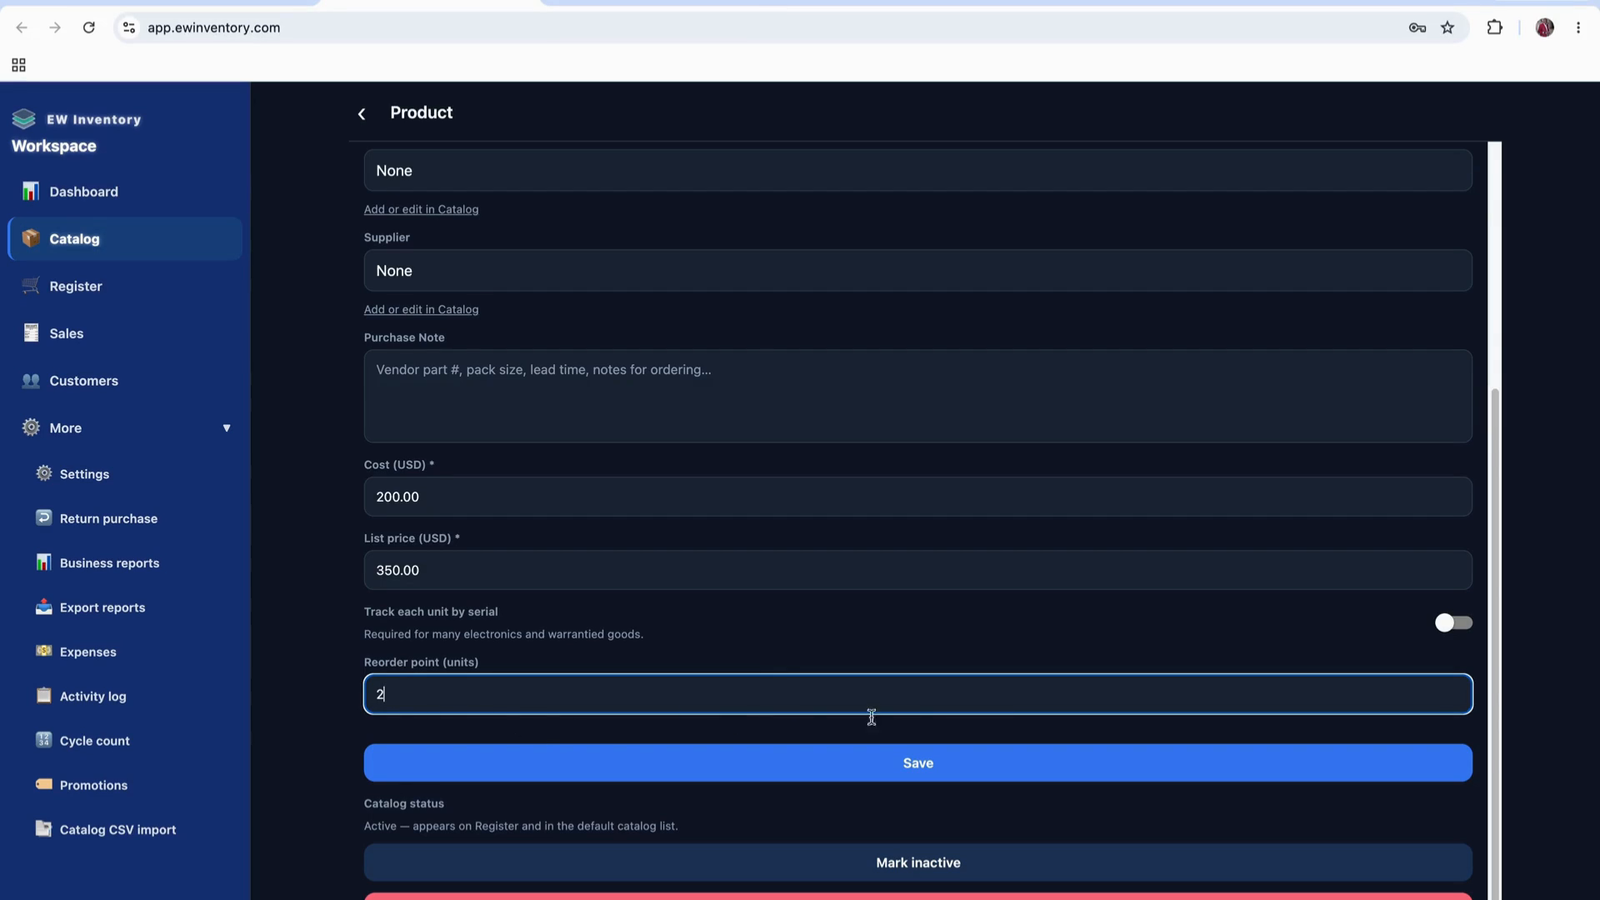
You can also choose to mark a product as inactive if you are not currently selling or bringing in that product but may want to sell it again in the future. Marking a product inactive removes it from the active catalog list without deleting it.

The prices shown in the catalog list are the selling prices (list prices) you have configured. On the product details page, you can view and edit:
The list price is what will display in the catalog and be used when selling the product.
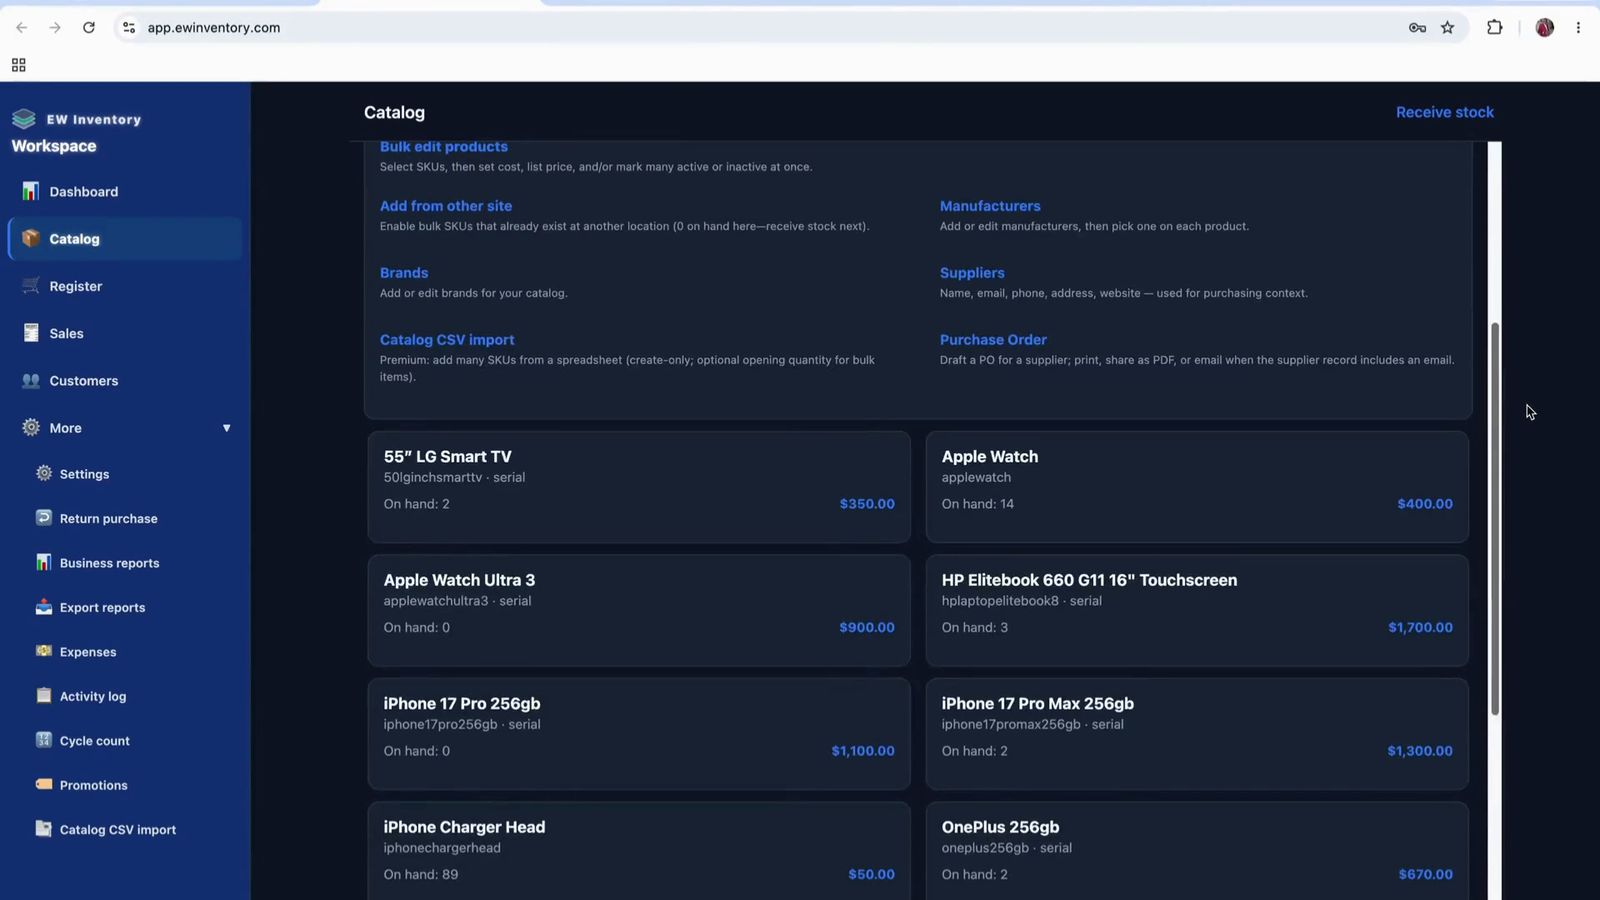
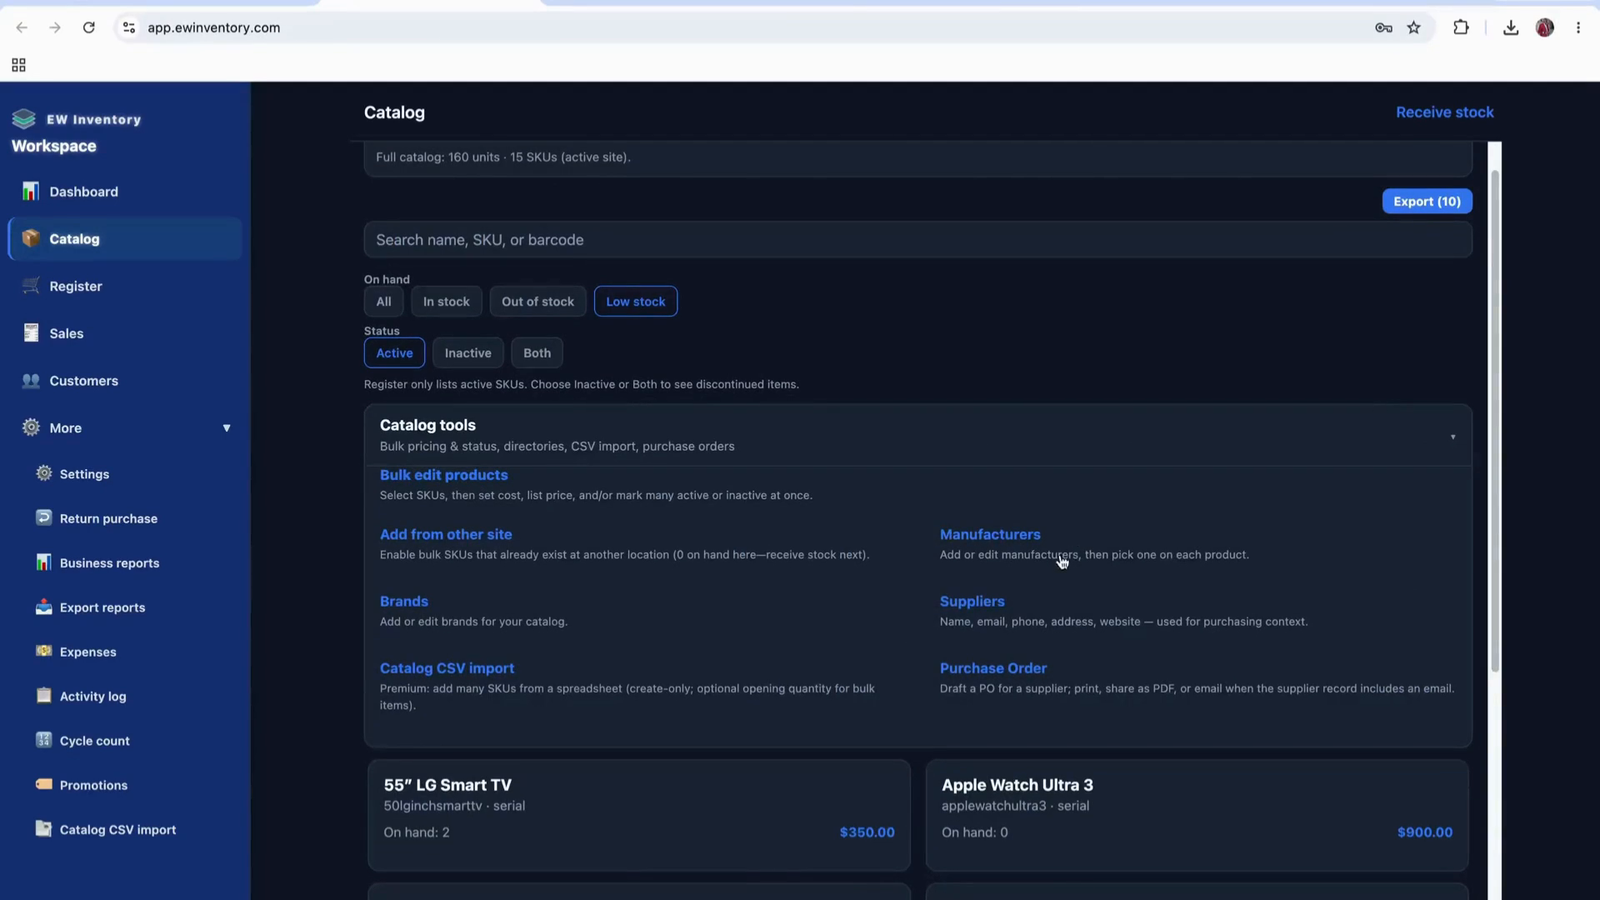
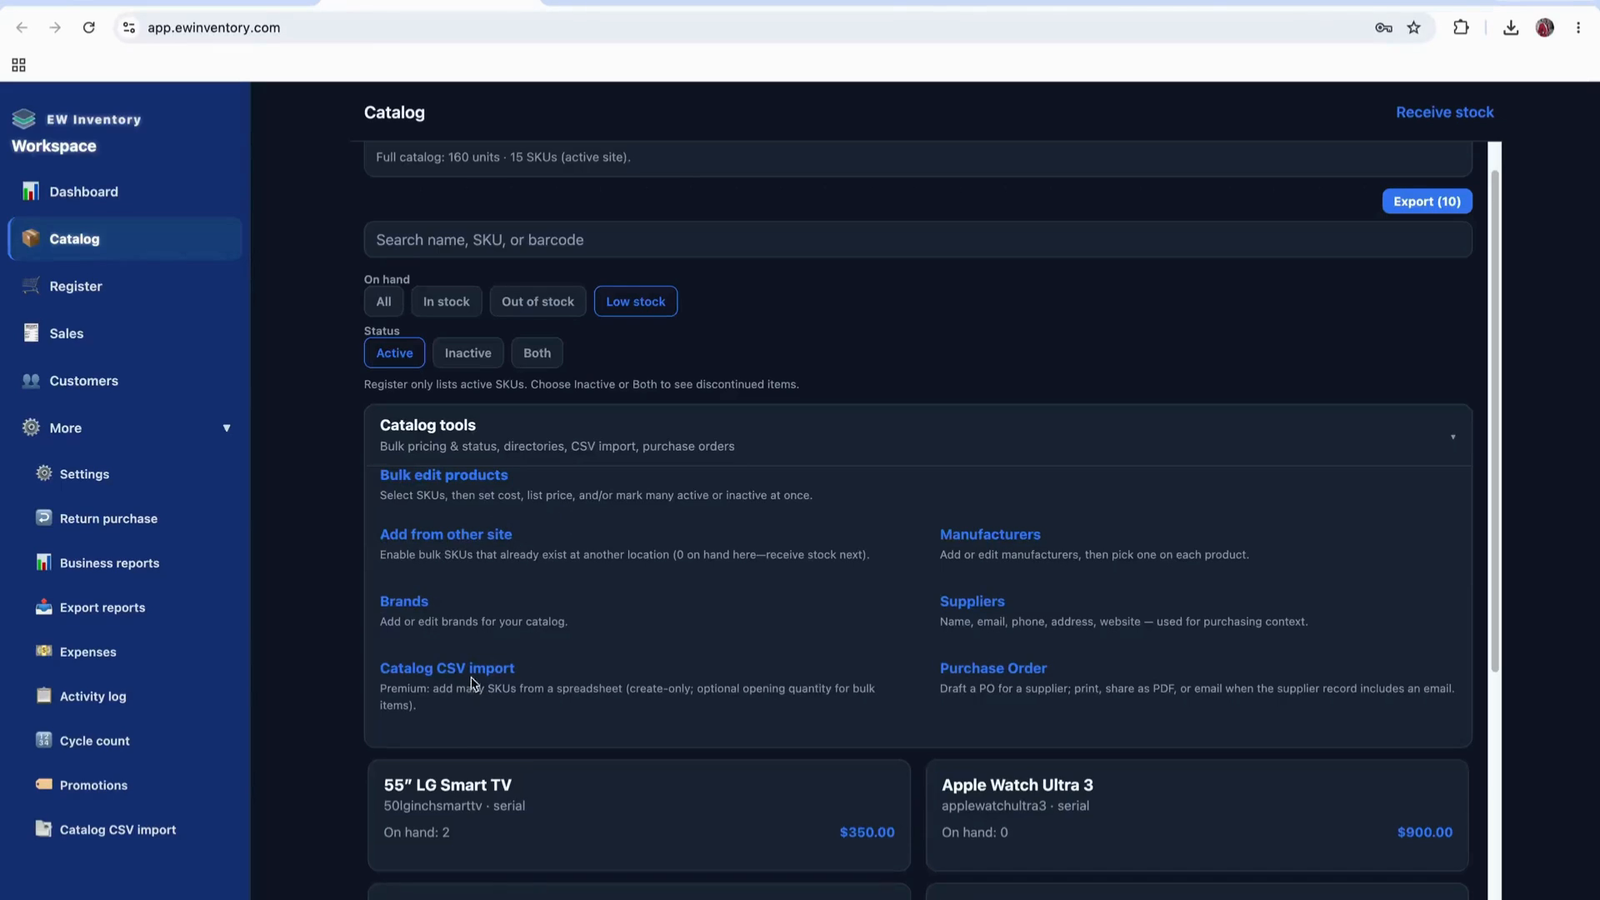
In the Catalog Tools section, you can manage products more efficiently.
Use “Bulk Edit” to update multiple products at once:
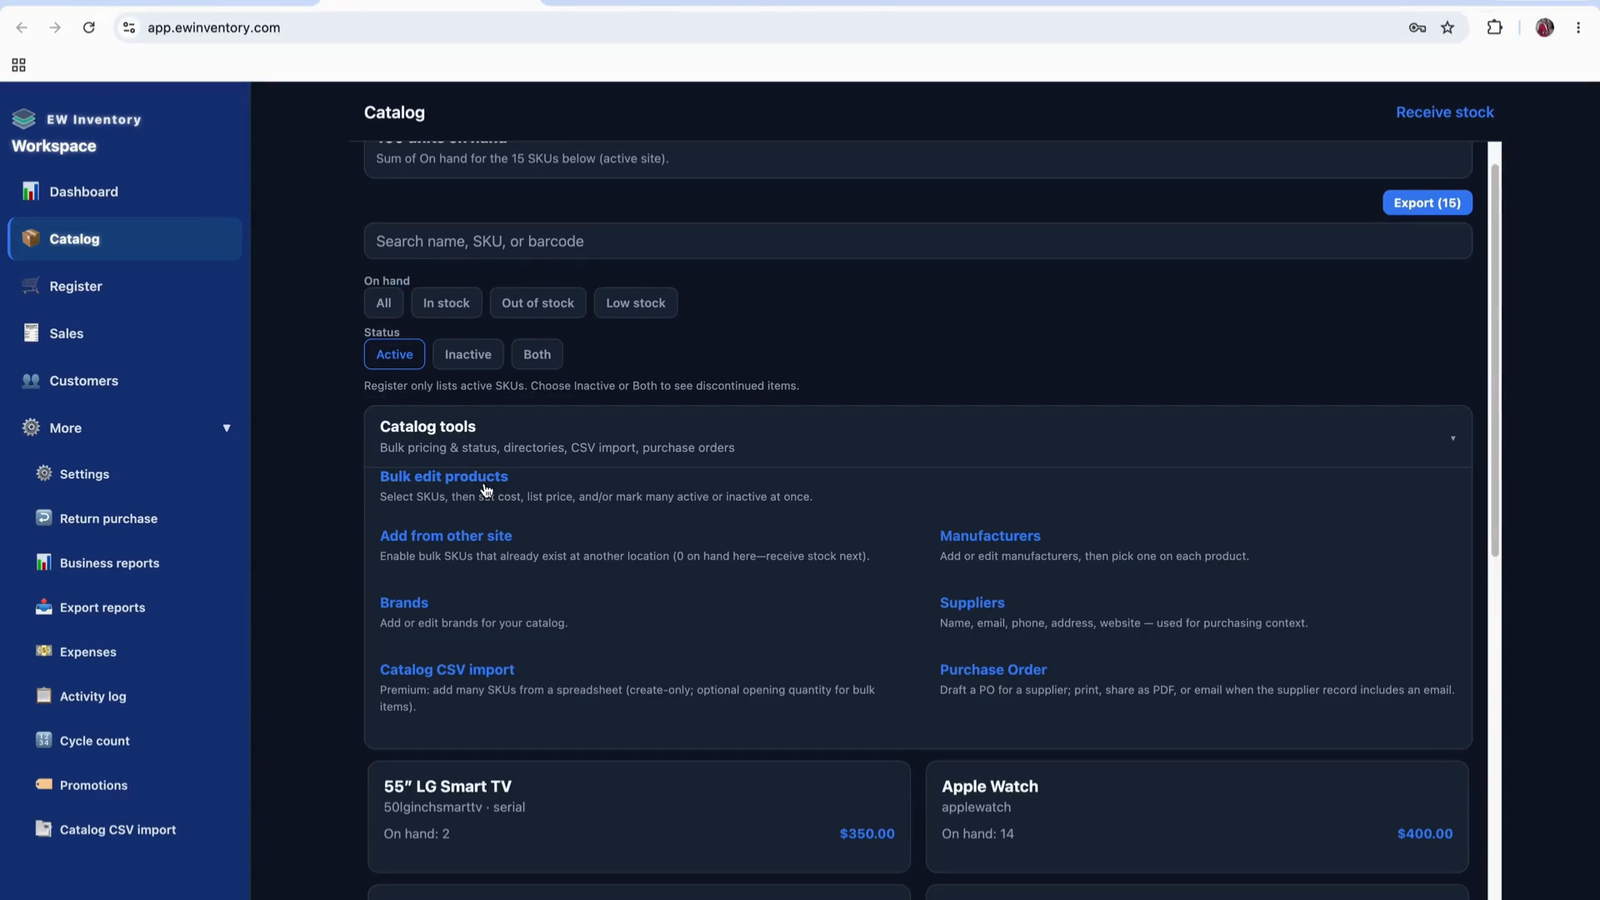

After selecting products, choose “Done” to proceed with the bulk edits.

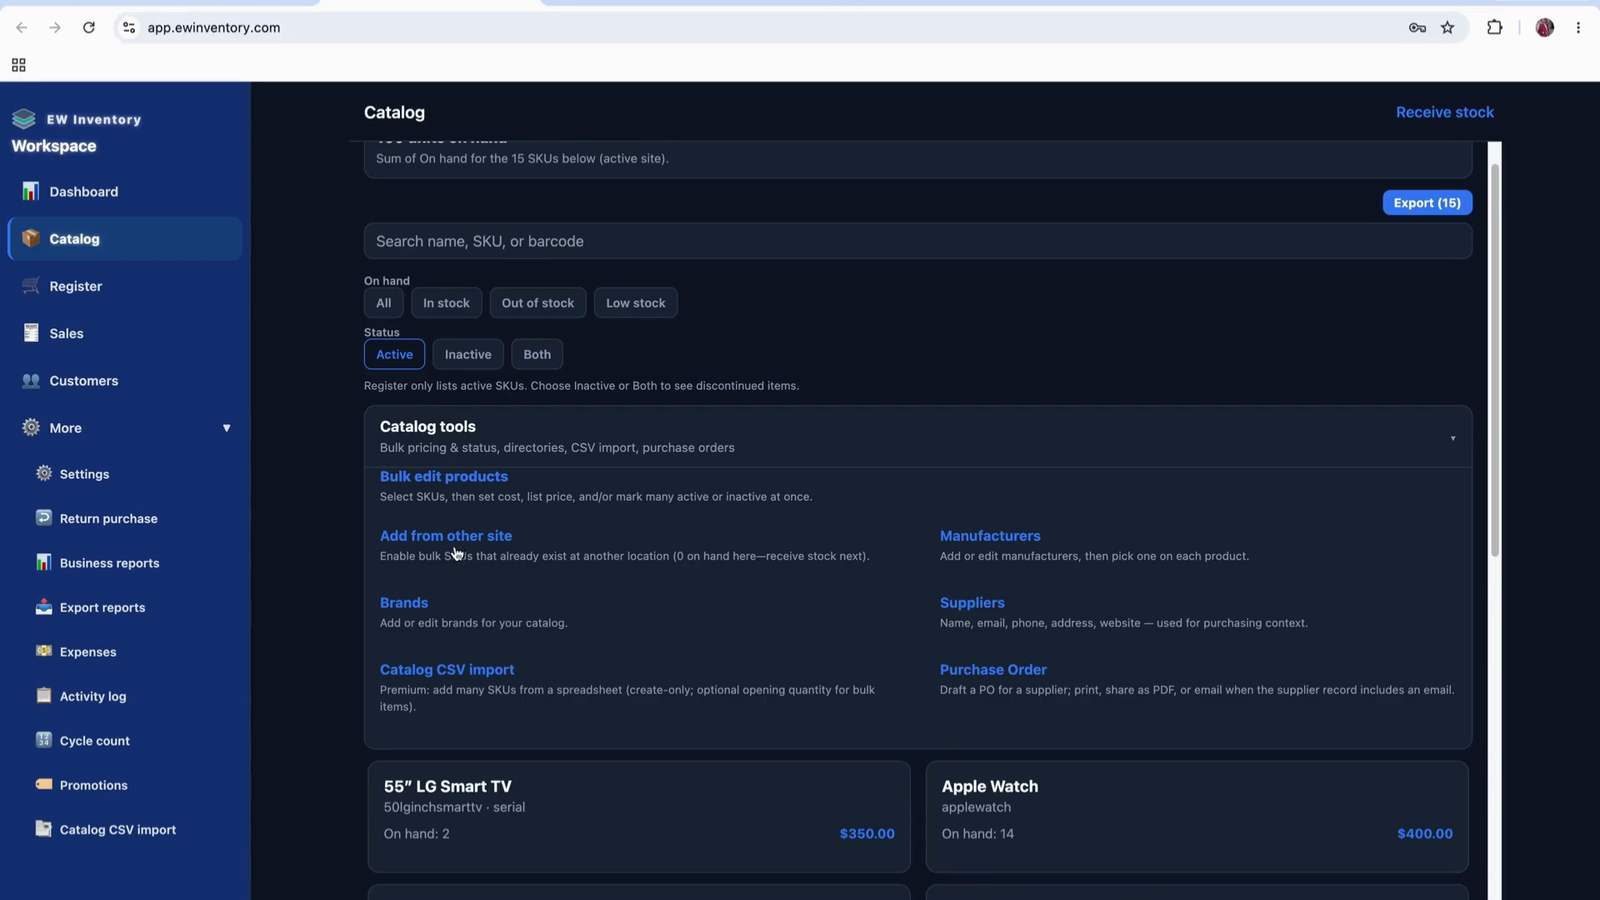
If you have products from another site that you want to add to this catalog, use the “Add from other site” option. Clicking this will show products from other sites that are available to import.
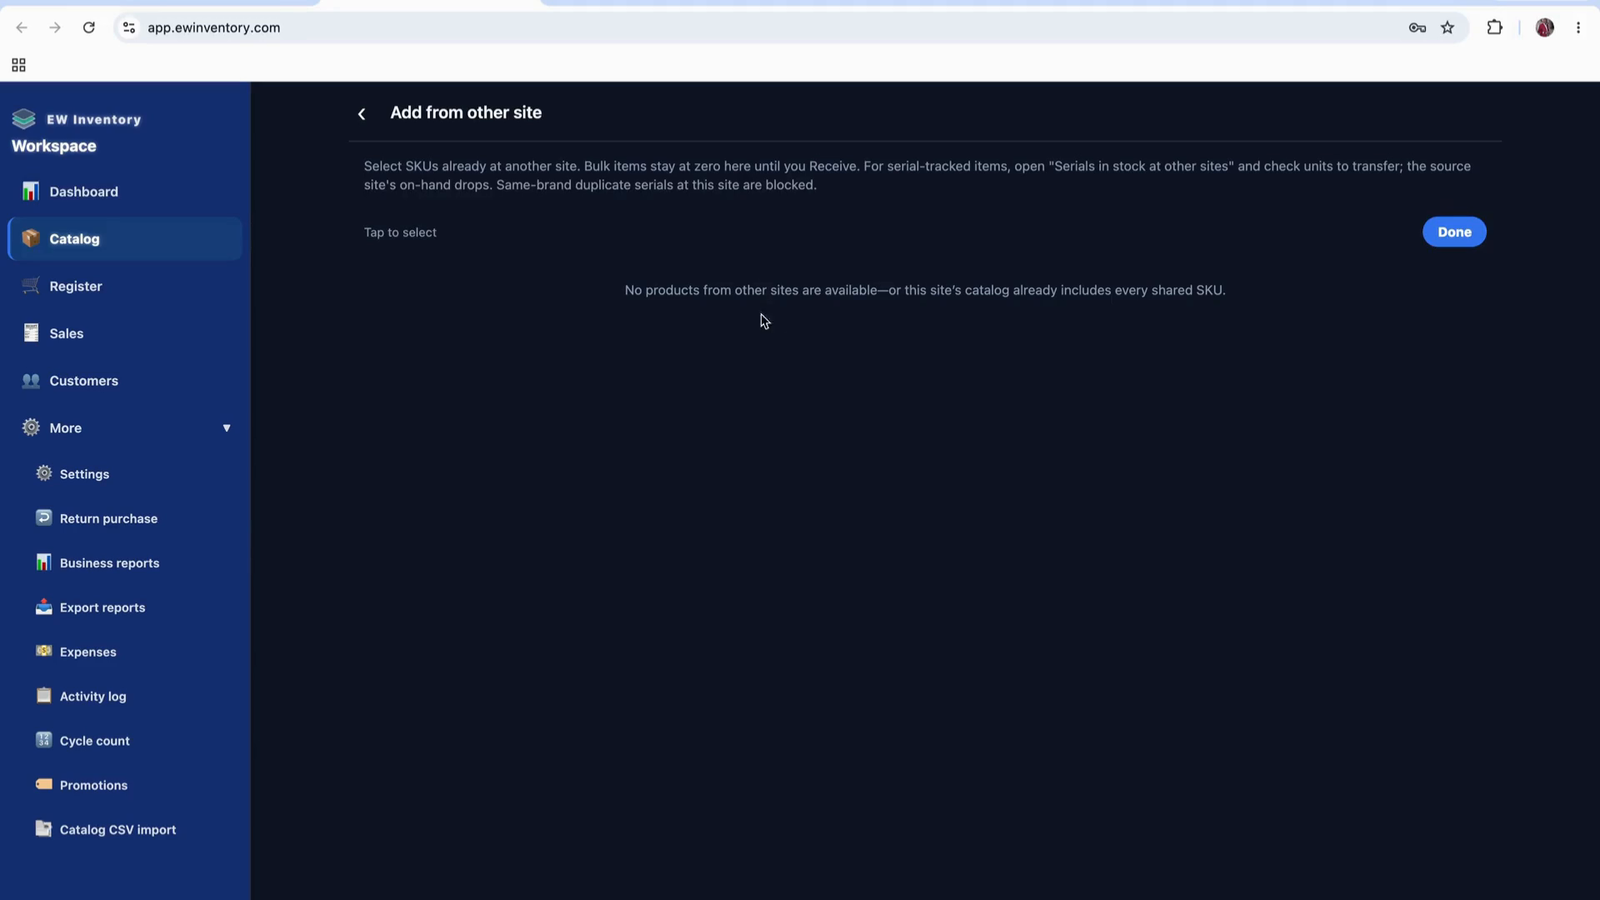
If there are no eligible products from other sites, this section will appear empty.

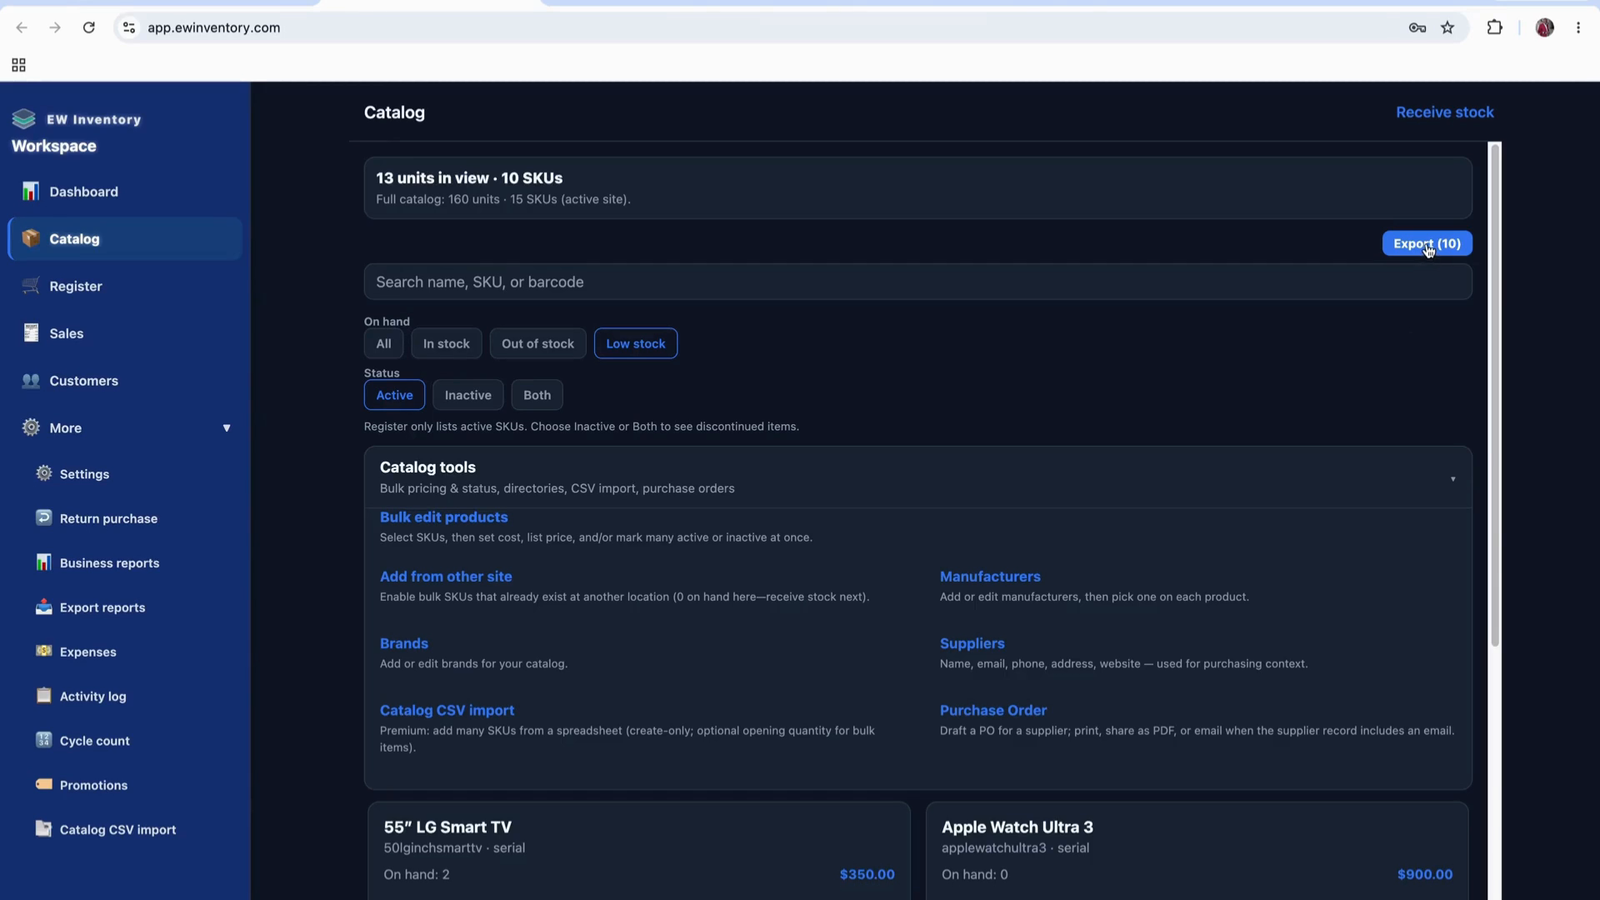
Use the filter options on the catalog page to analyze stock levels:
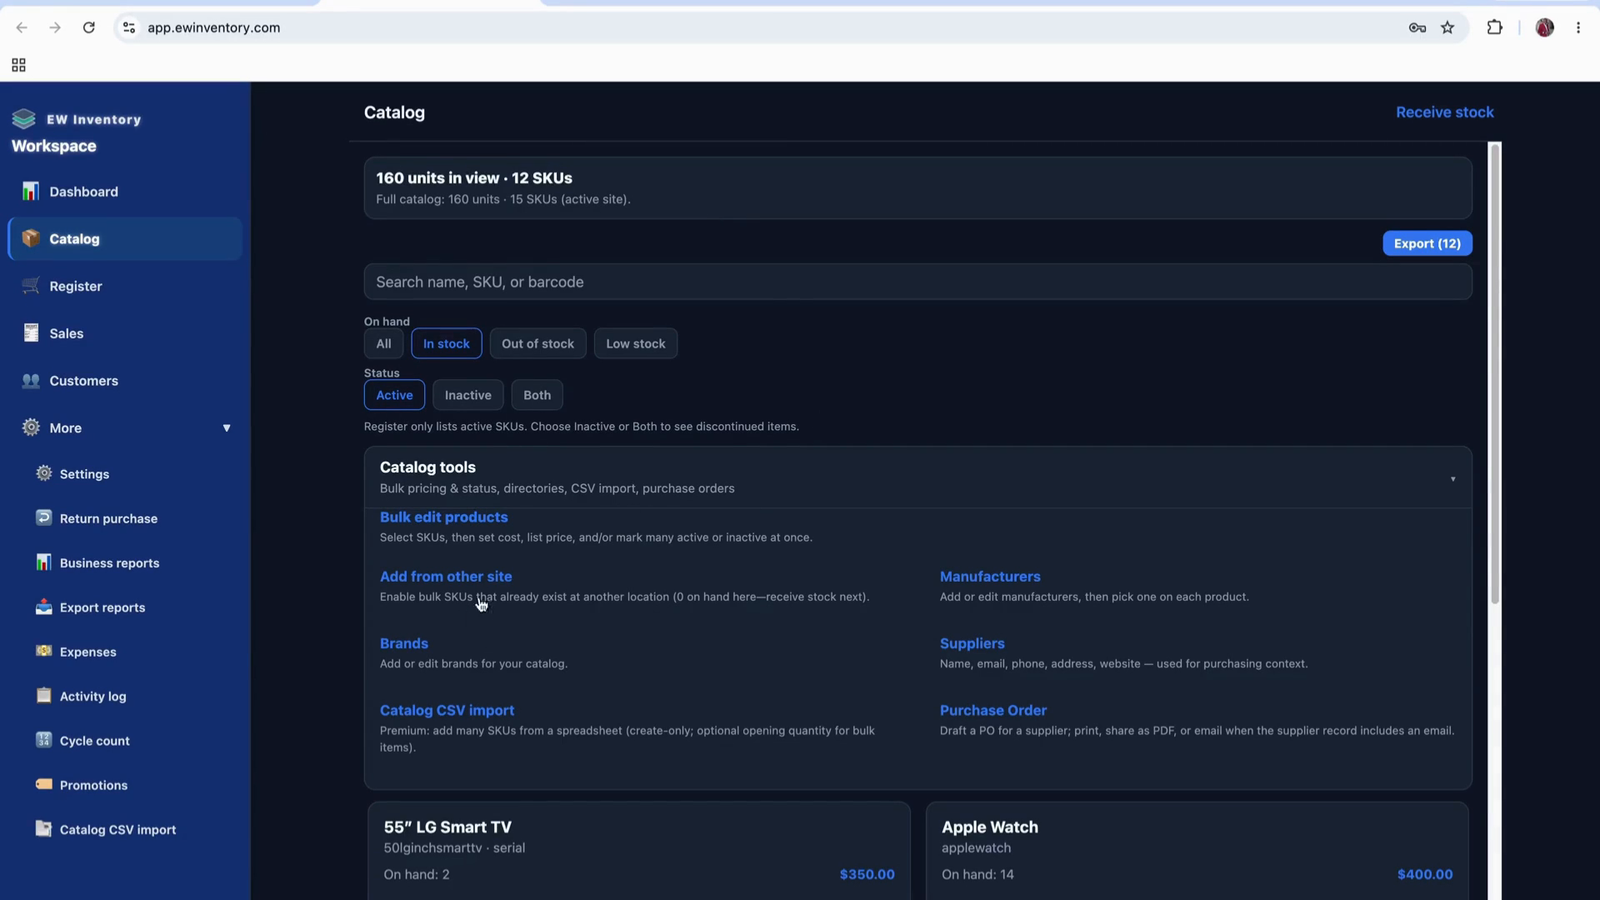
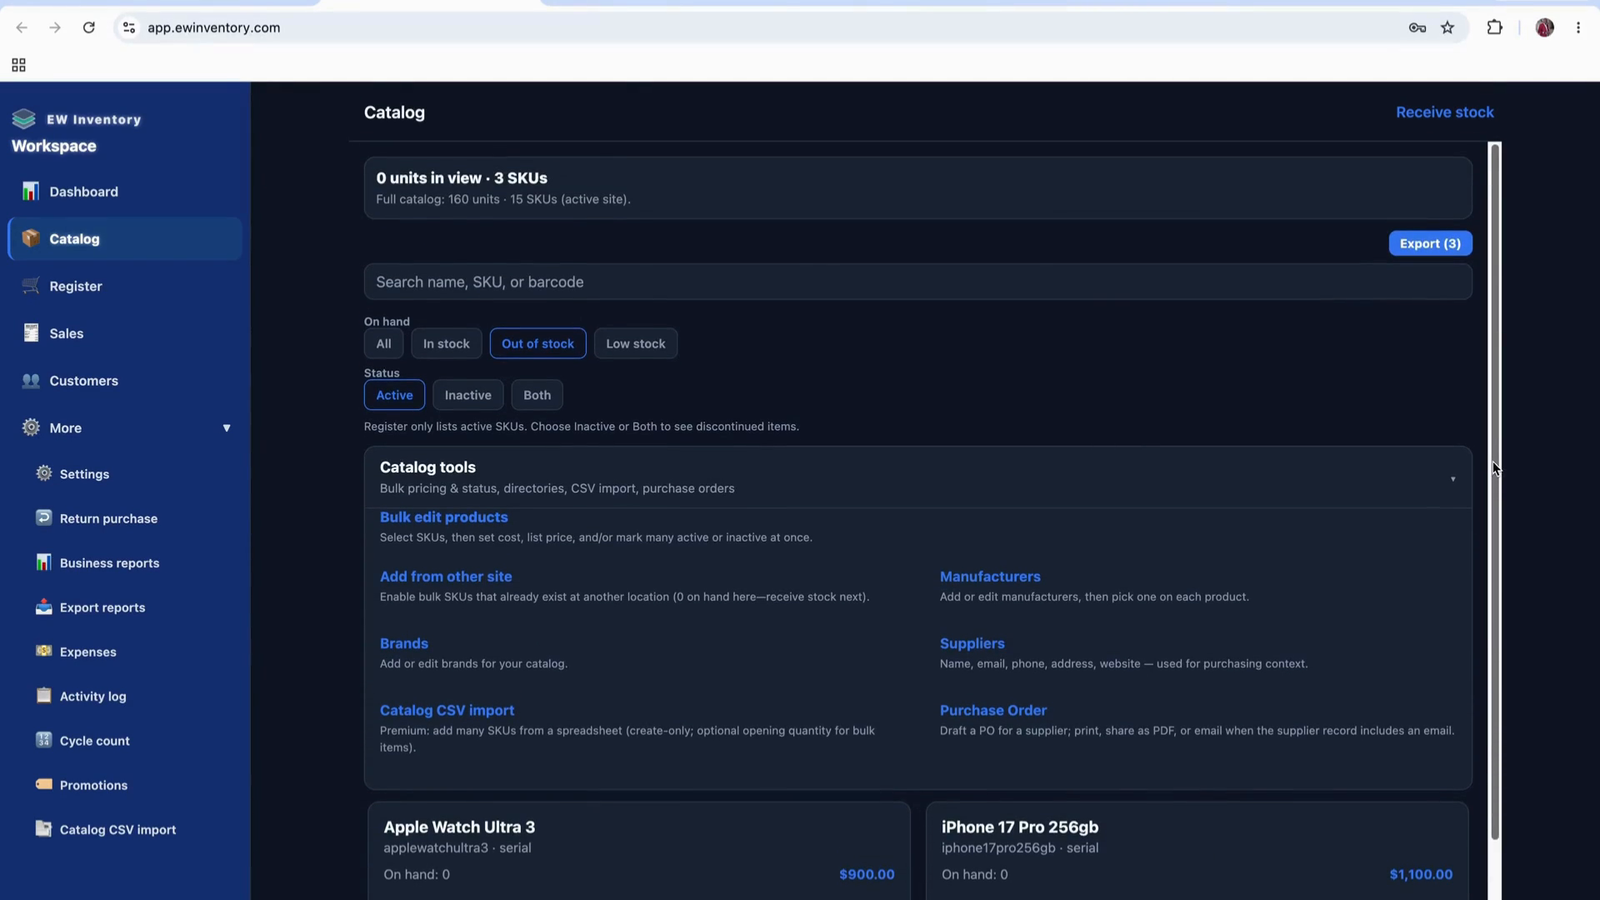
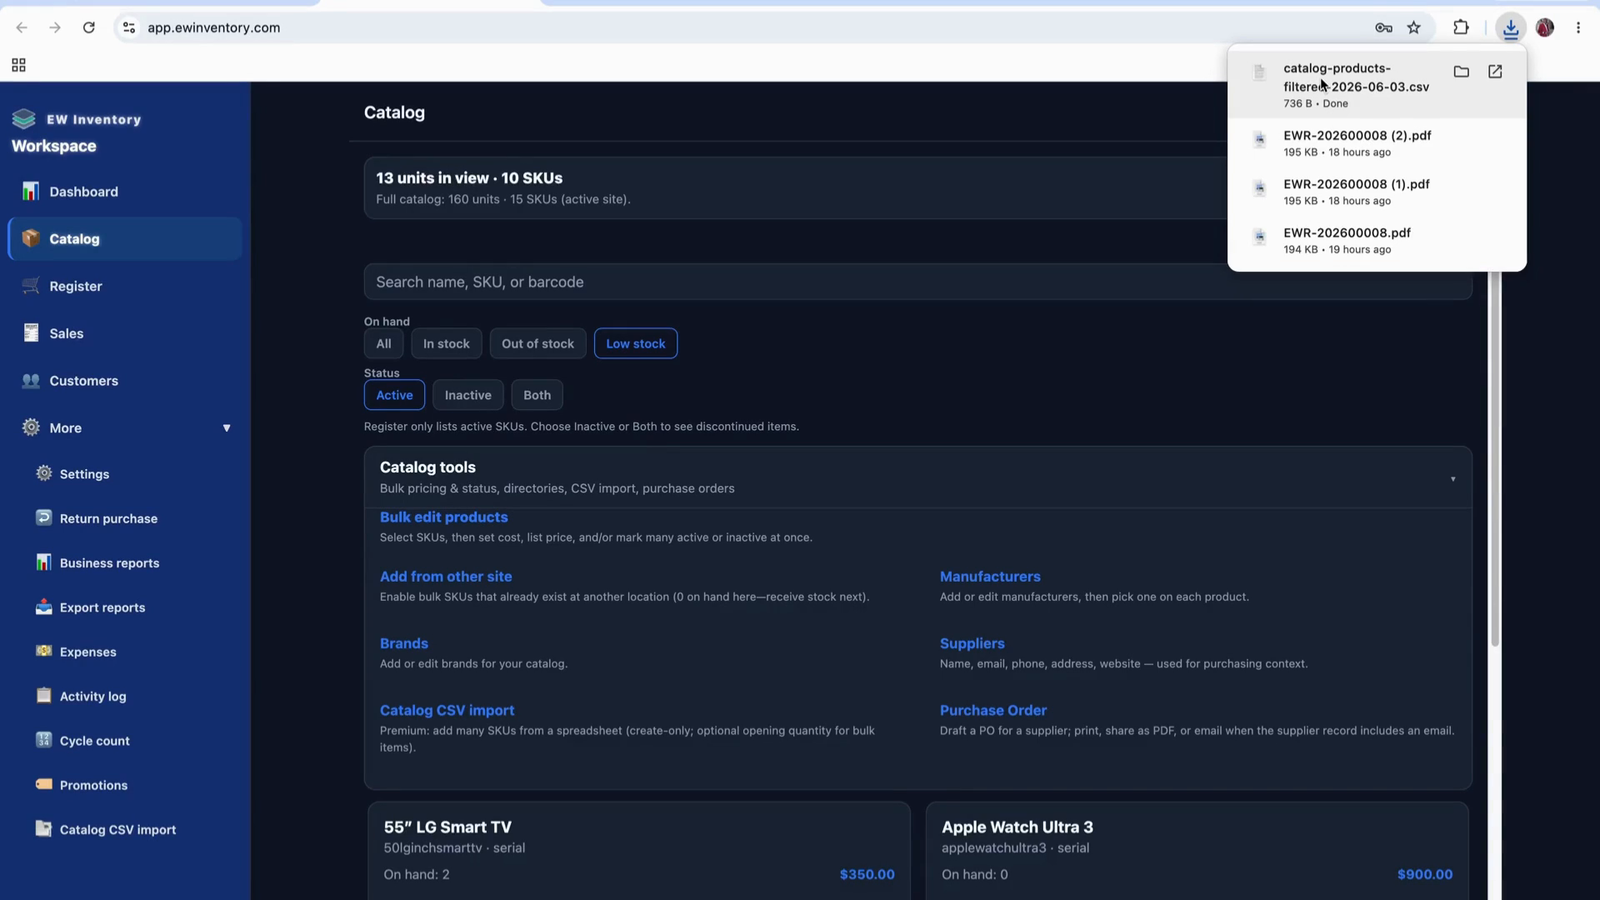
The catalog page includes an export function.
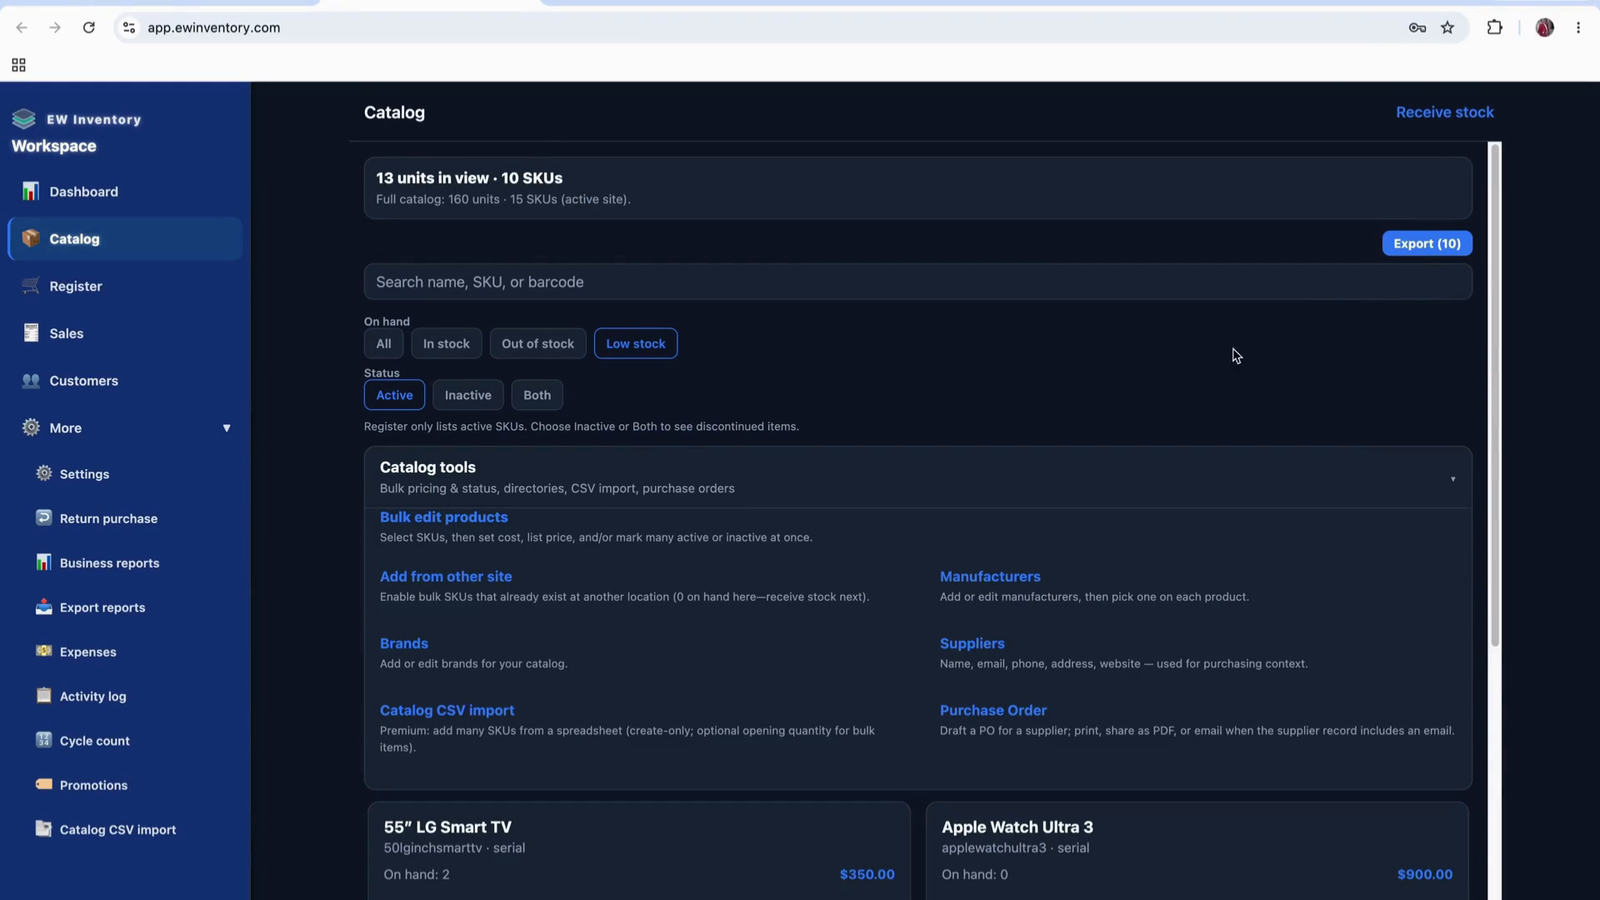
Click on “Export” to download your product list and details as a CSV file. This allows you to analyze or back up your inventory data externally.
You can also adjust the catalog view (for example, list view) as needed.
From the website/catalog page, click the “New” button to add a new product. When creating a product:


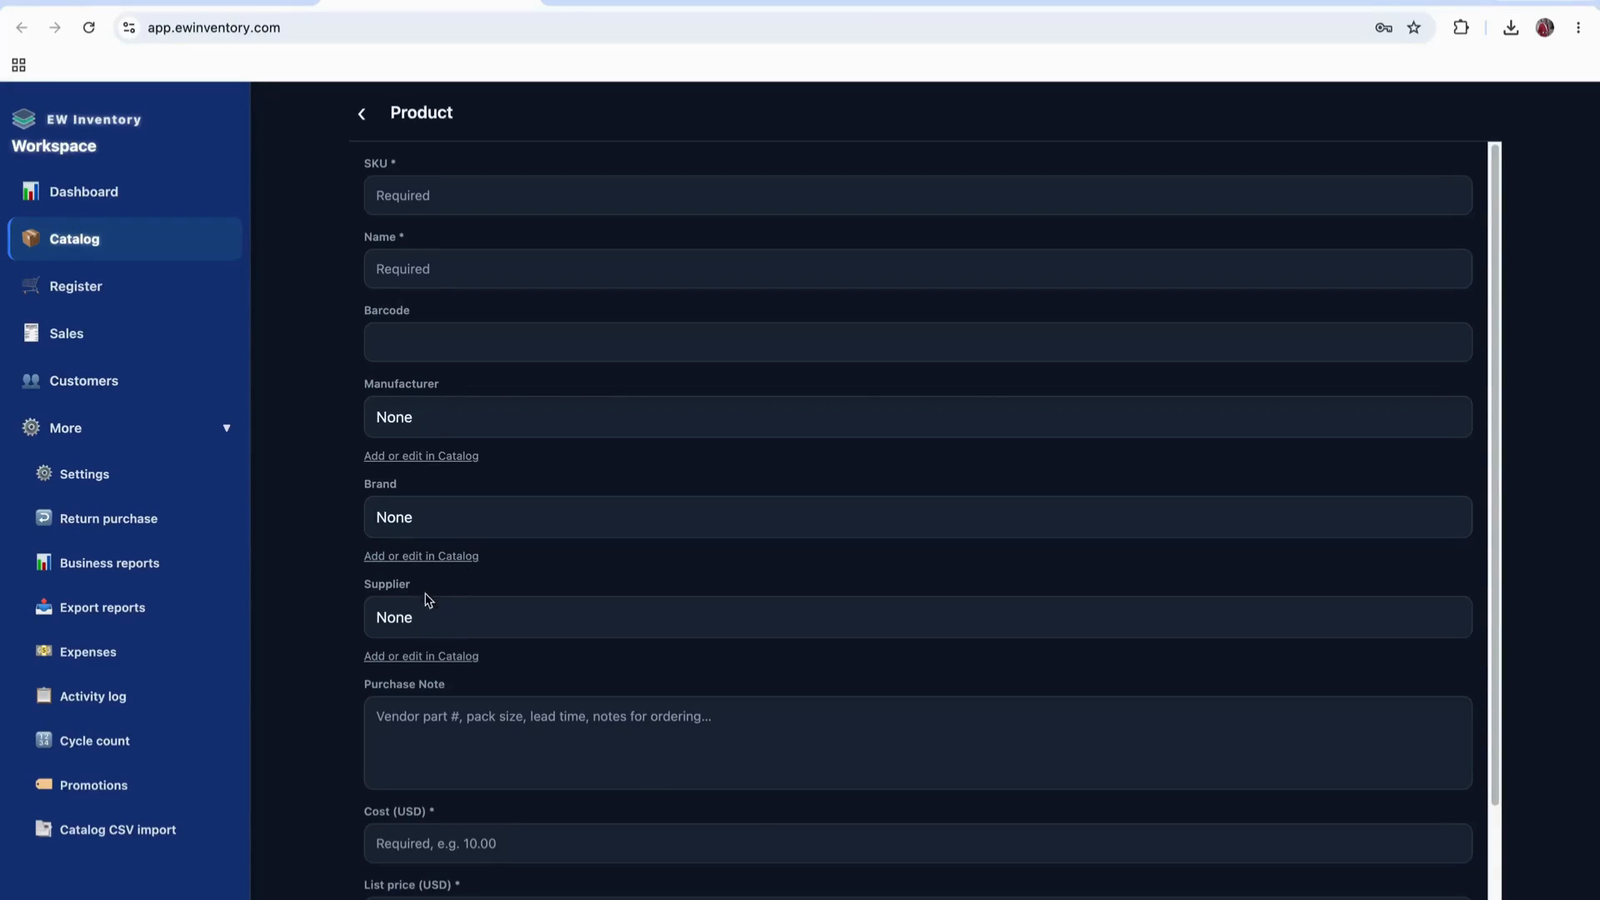
After entering all required information, save the product and return to the list view as needed.

Use the Manufacturer page to manage manufacturers and brands. There are buttons available here to add new manufacturers and brands as required.
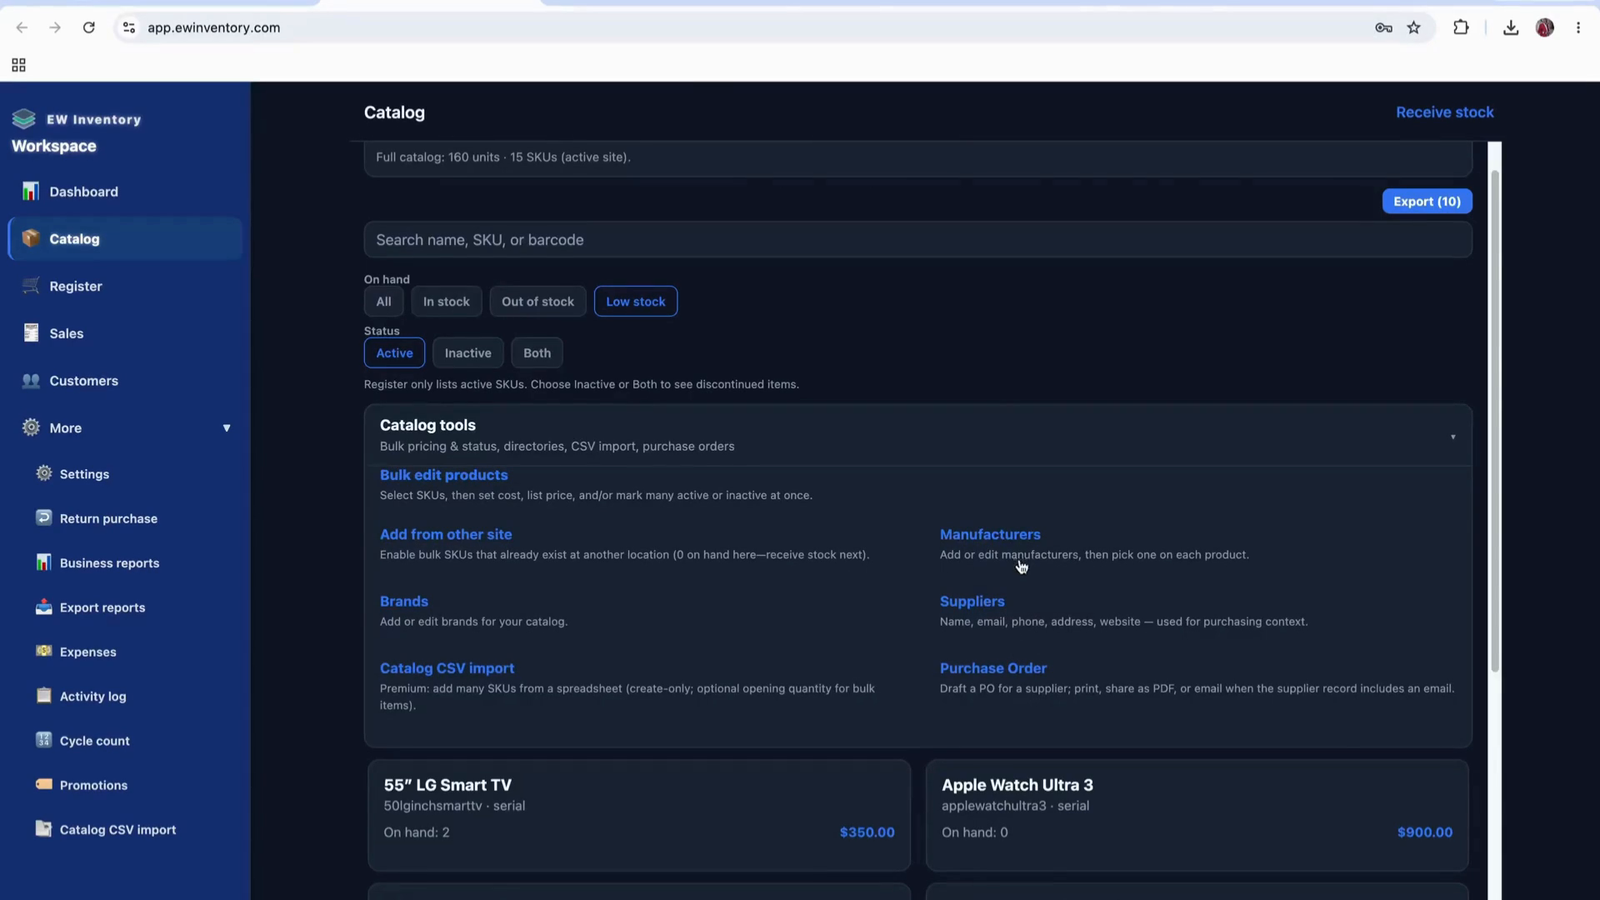
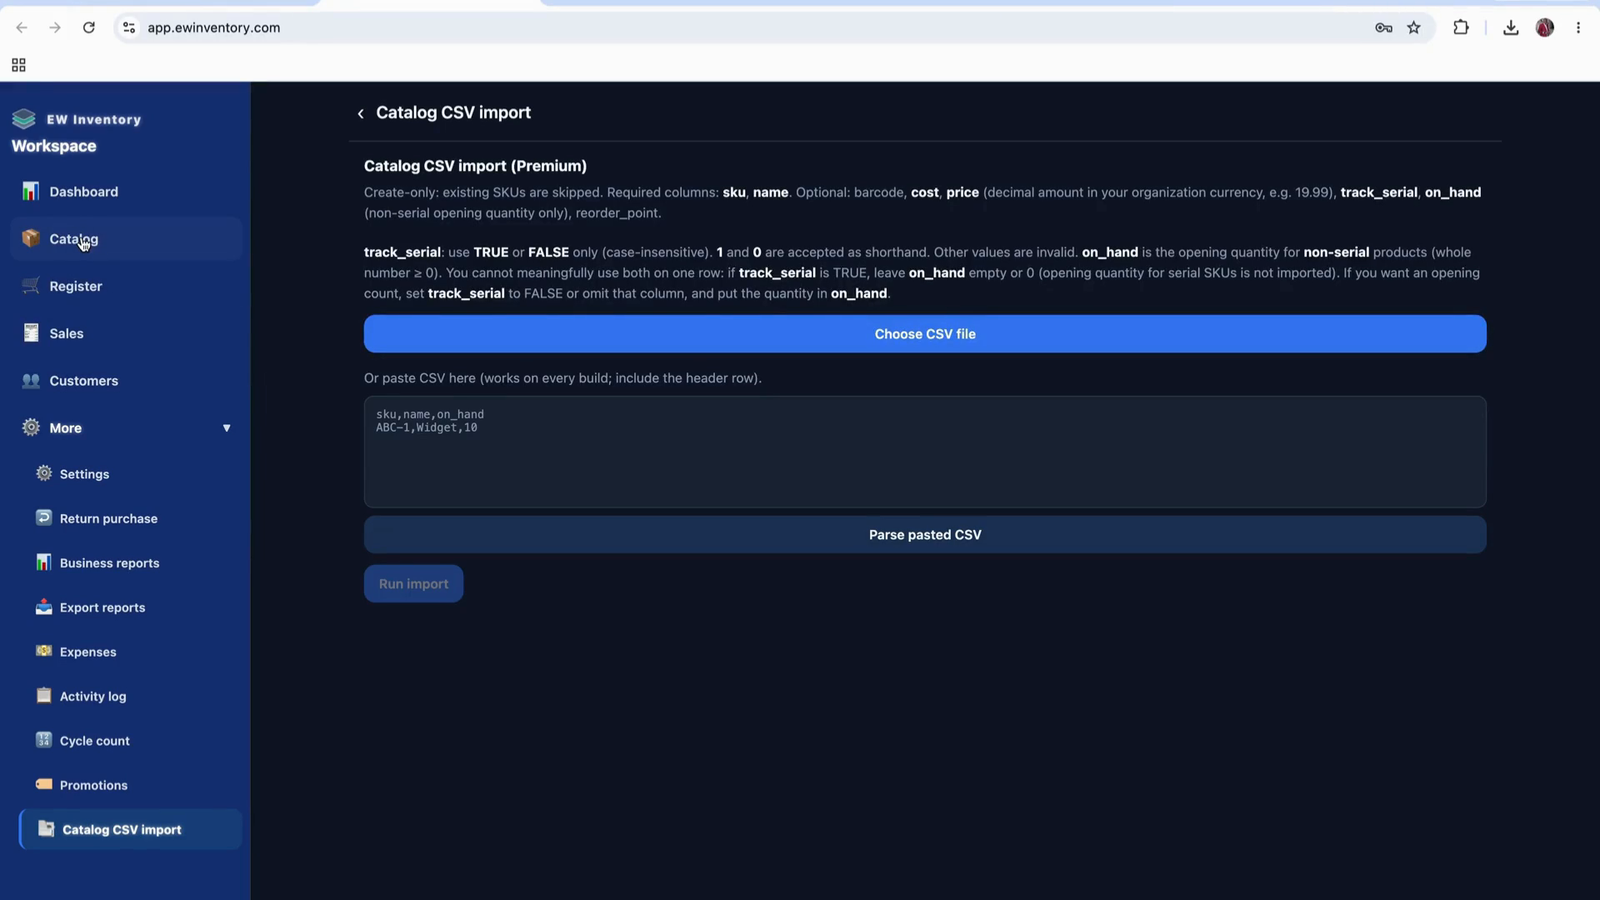
You can also access the “Catalog as CSV import” function if you want to import products from a CSV file instead of entering them manually.
Configure organization details, invite users, assign roles, customize appearance, set taxes, and design PDF templates.
This document explains how to import products, manage serial numbers, process sales with discounts, handle receipts and invoices, manage customers and customer groups, track sales and gross margin, set up shipping, and configure users and roles.
Prepare a CSV file containing all product details to be imported into the system.
Import the CSV file through the product import function in your app.
When importing:
After the import is completed, proceed to receive the products into stock.

Open the “Receive in Stock” option for the imported products.
On the receive screen, start entering the serial numbers for products that require them.

Use the “Add Serial” option to input each serial number.
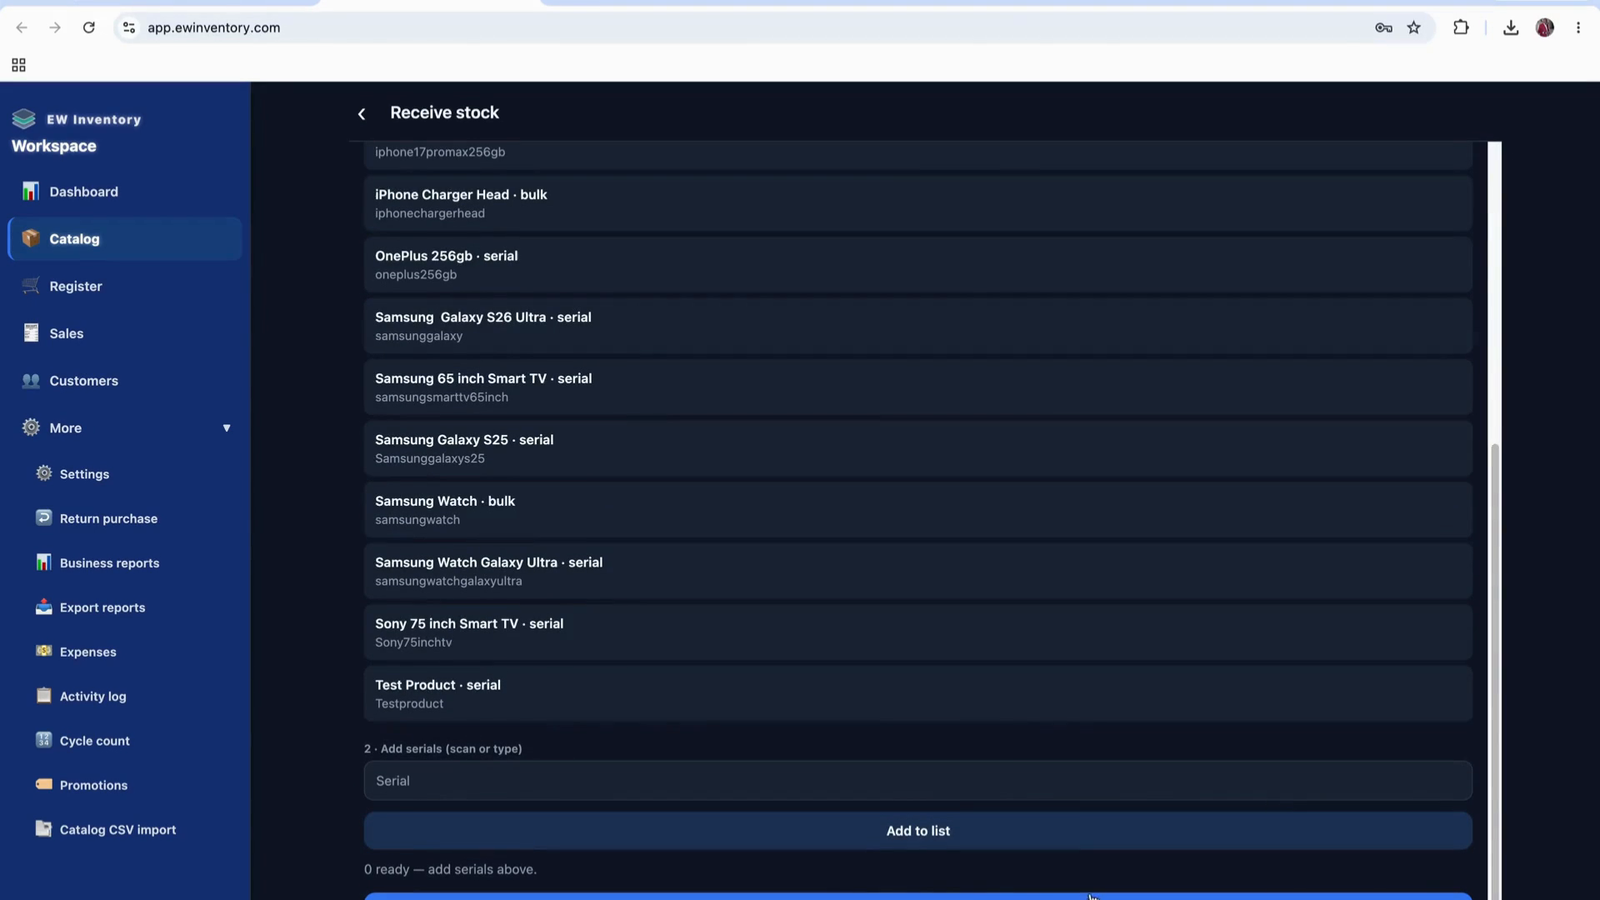
Continue adding serial numbers until all product serials have been captured.
This completes the product catalog setup.
Navigate to the Register page, where you will reconcile sales and process transactions.
Before reconciling or taking payment, ensure the customer information is correctly entered.
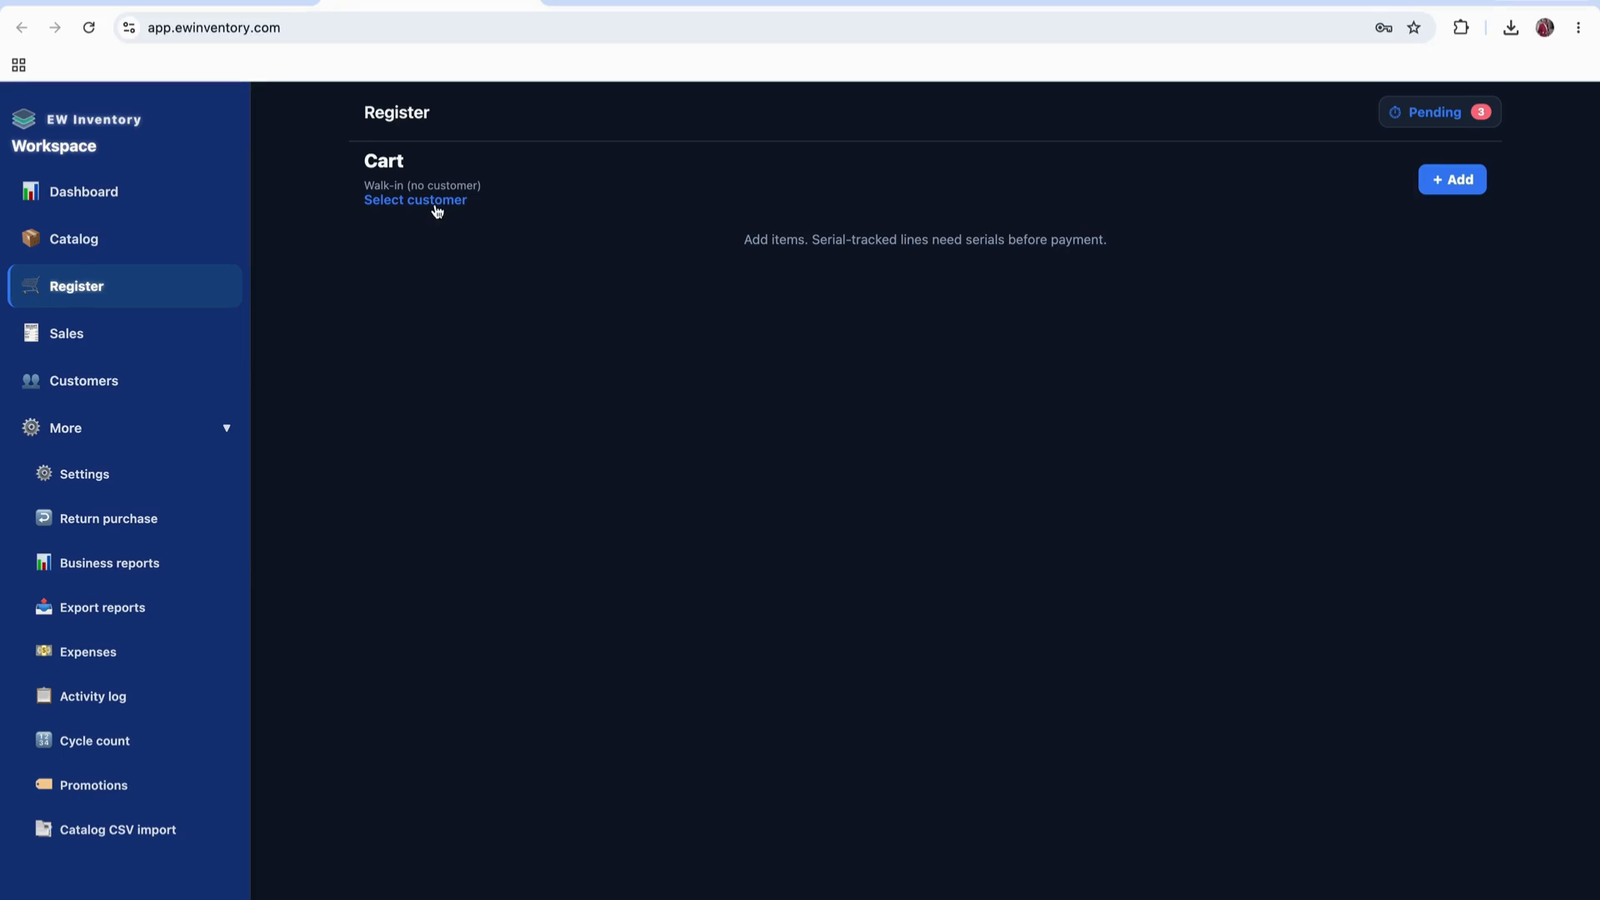
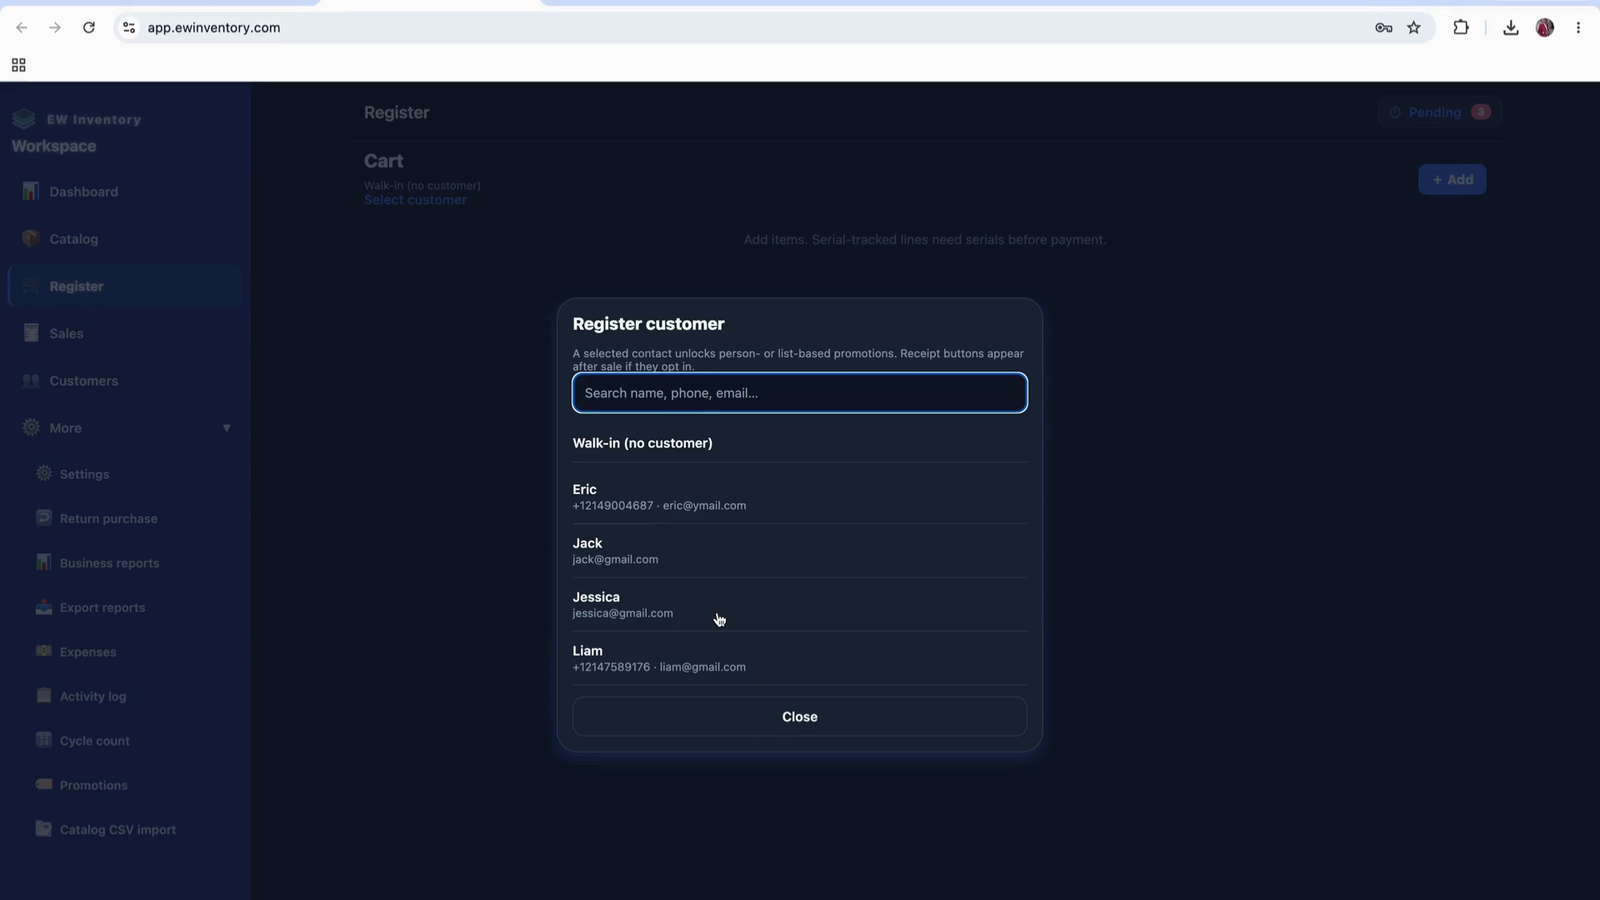
On the Customer tab in the register, enter or select the customer details.
If a customer prefers not to share personal details (like name and email), you can treat them as a walk-in customer and still check them out. However, it is recommended to at least collect an email address.
From the Customer section, choose the option to add a new customer.

Fill in the customer details (name, email, and any other required fields).
Click Save to store the new customer record.
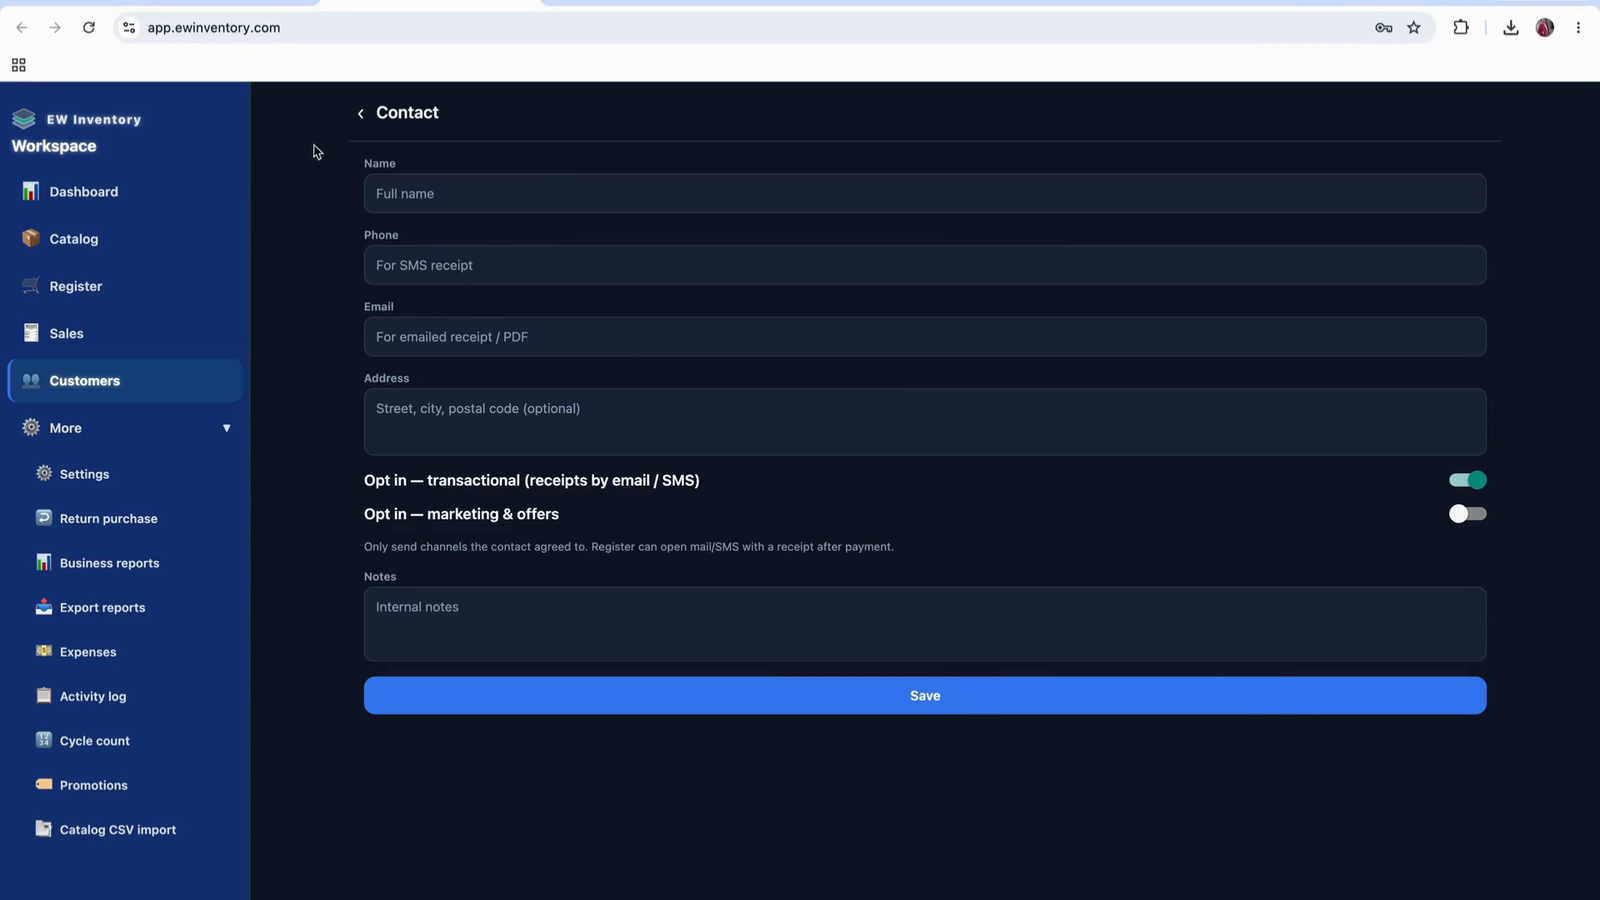
Once saved, the customer becomes available in the register for selection during checkout.
On the register screen, identify the icon that represents pending payments.
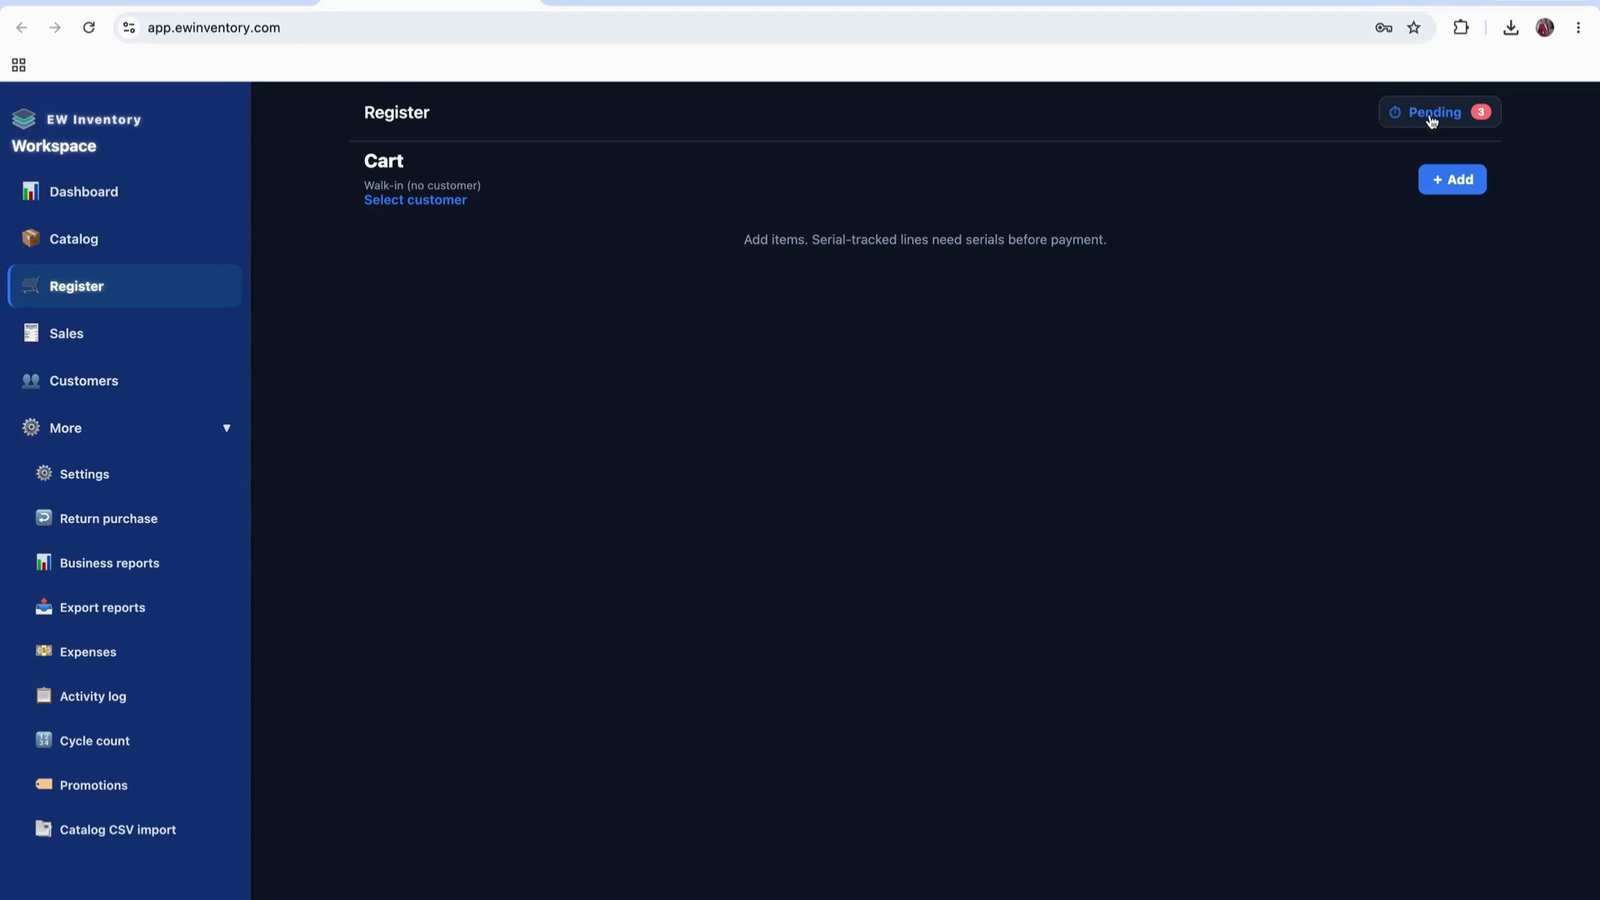
These are transactions where an invoice has been issued at checkout, but the buyer has not yet paid.
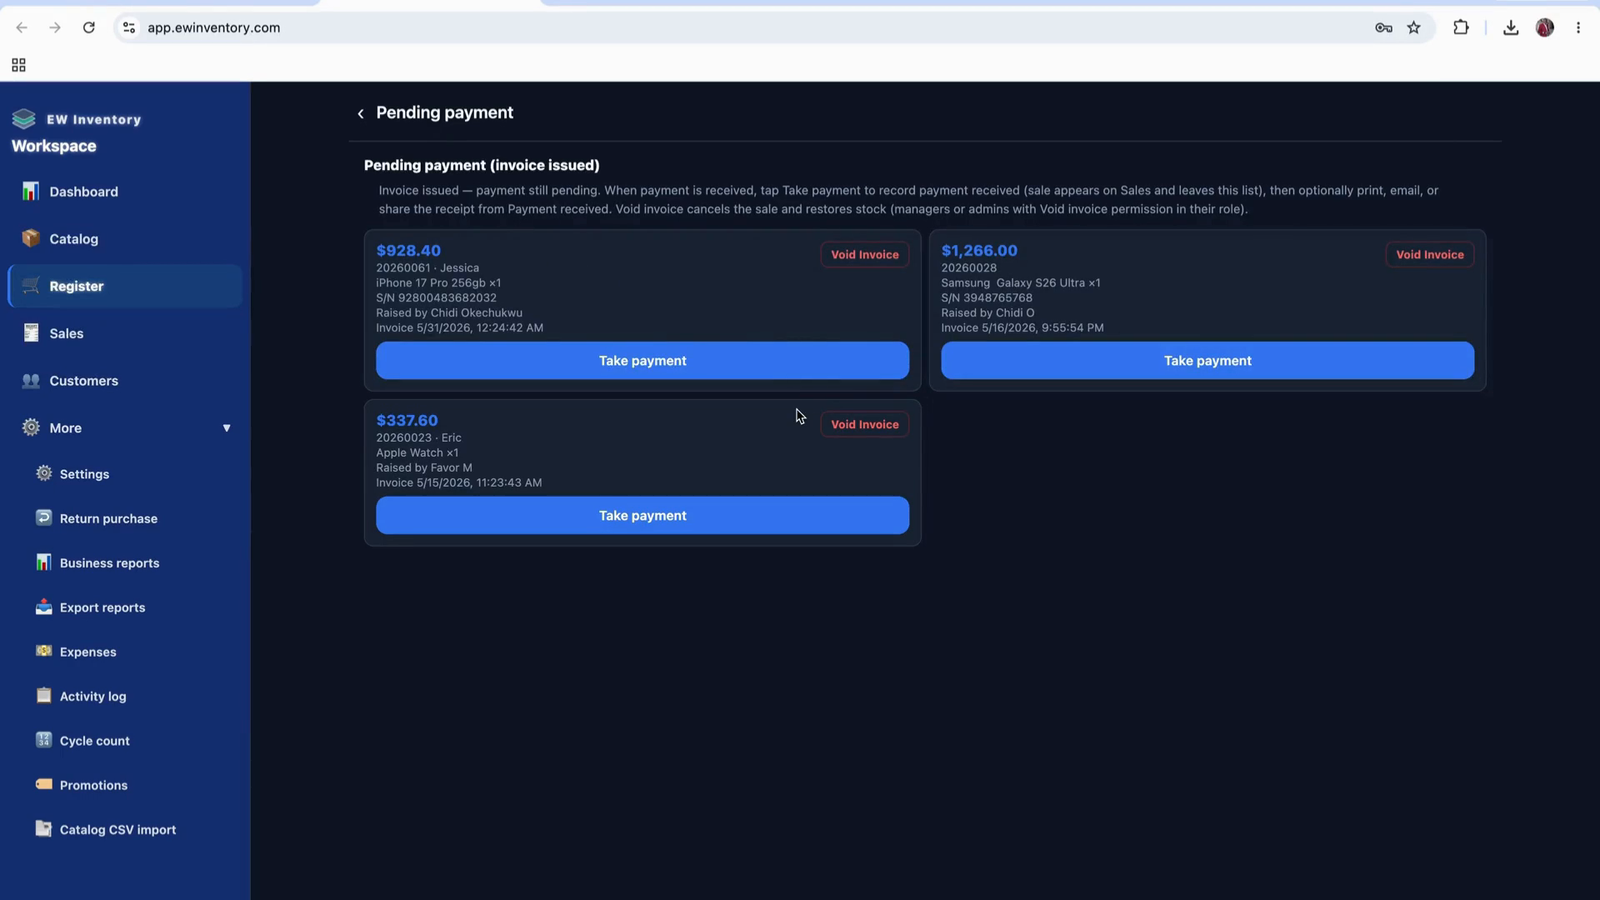
In this system:
From the register screen, start a new sale and select the customer for the transaction.

Choose the desired customer (for example, select “Eric”).

Confirm that Eric is set as the current customer for the sale.
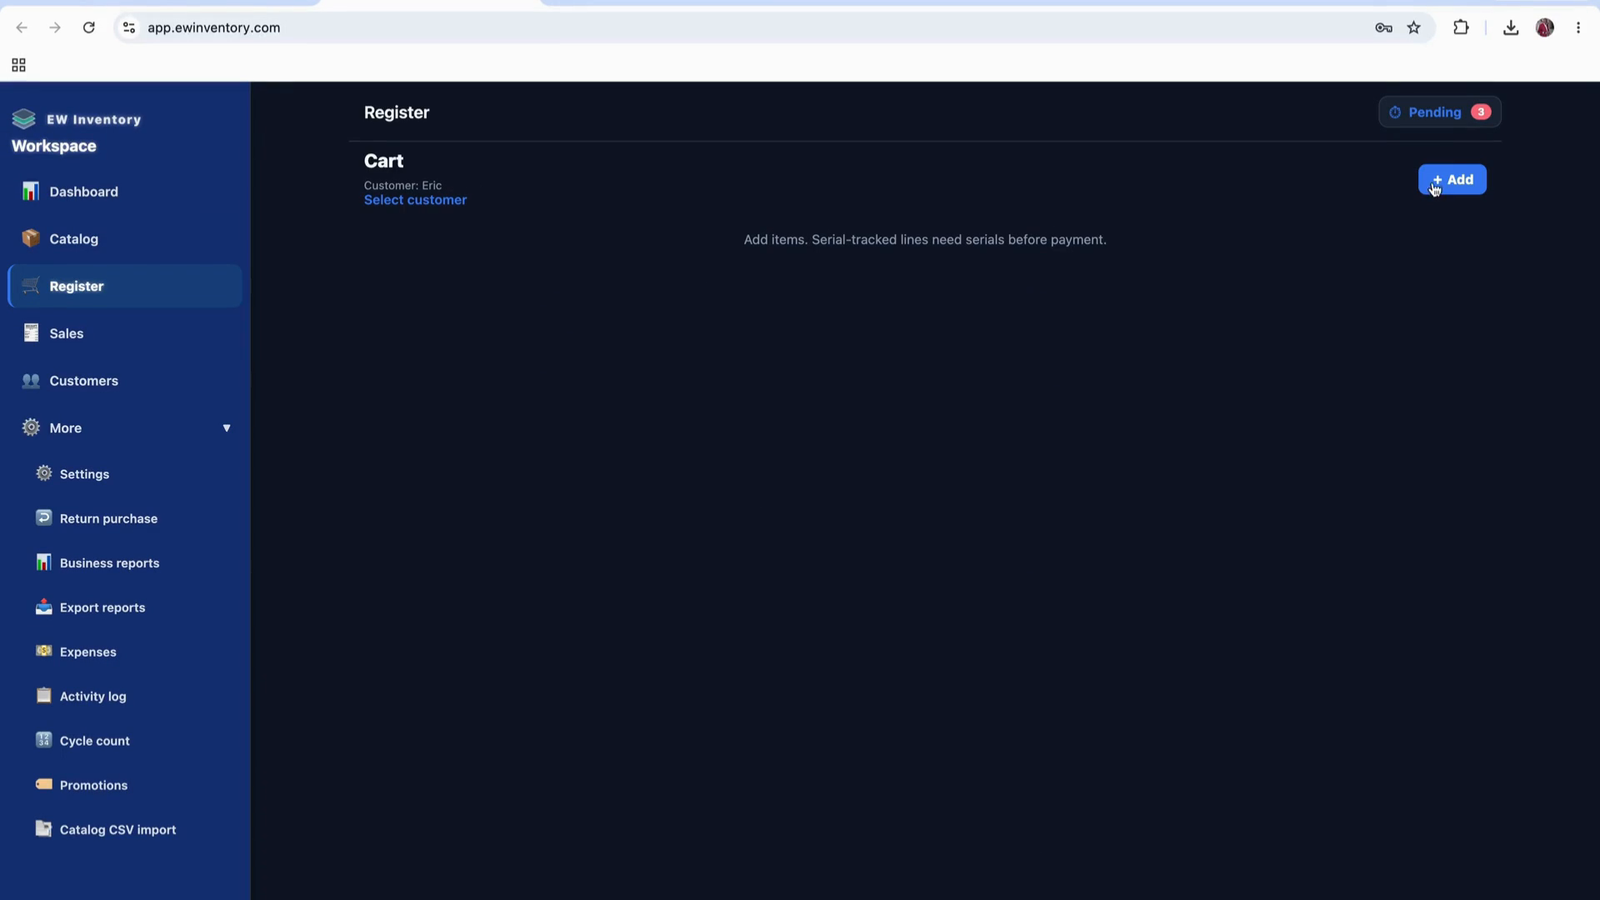
Add products to the sale from your product list.
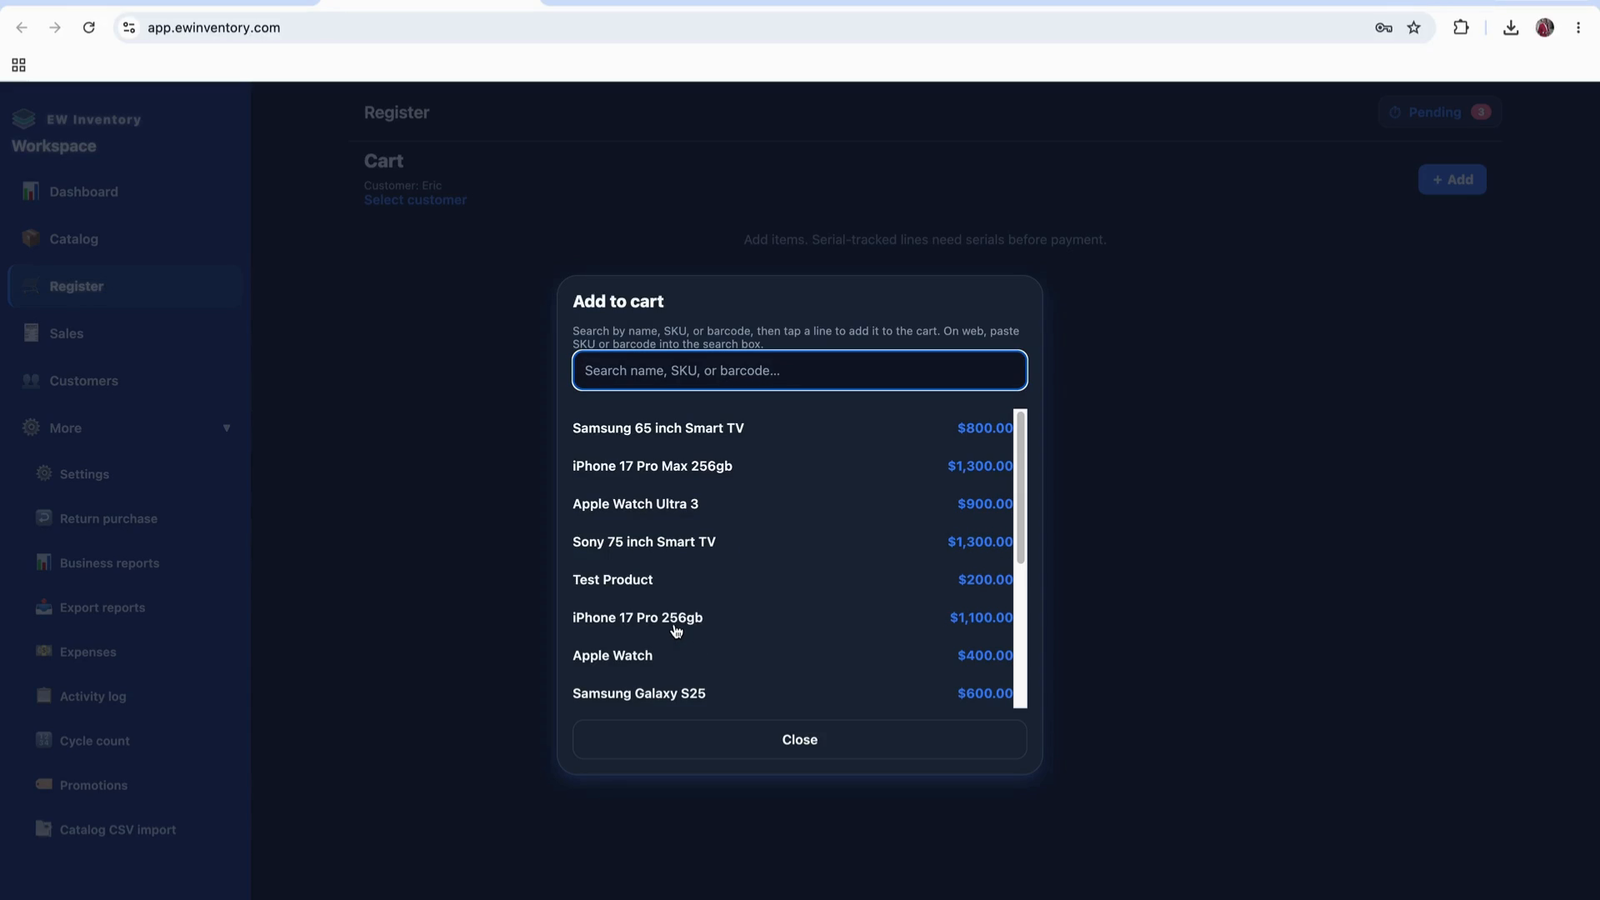
If a product is out of stock, select a different product that is available.
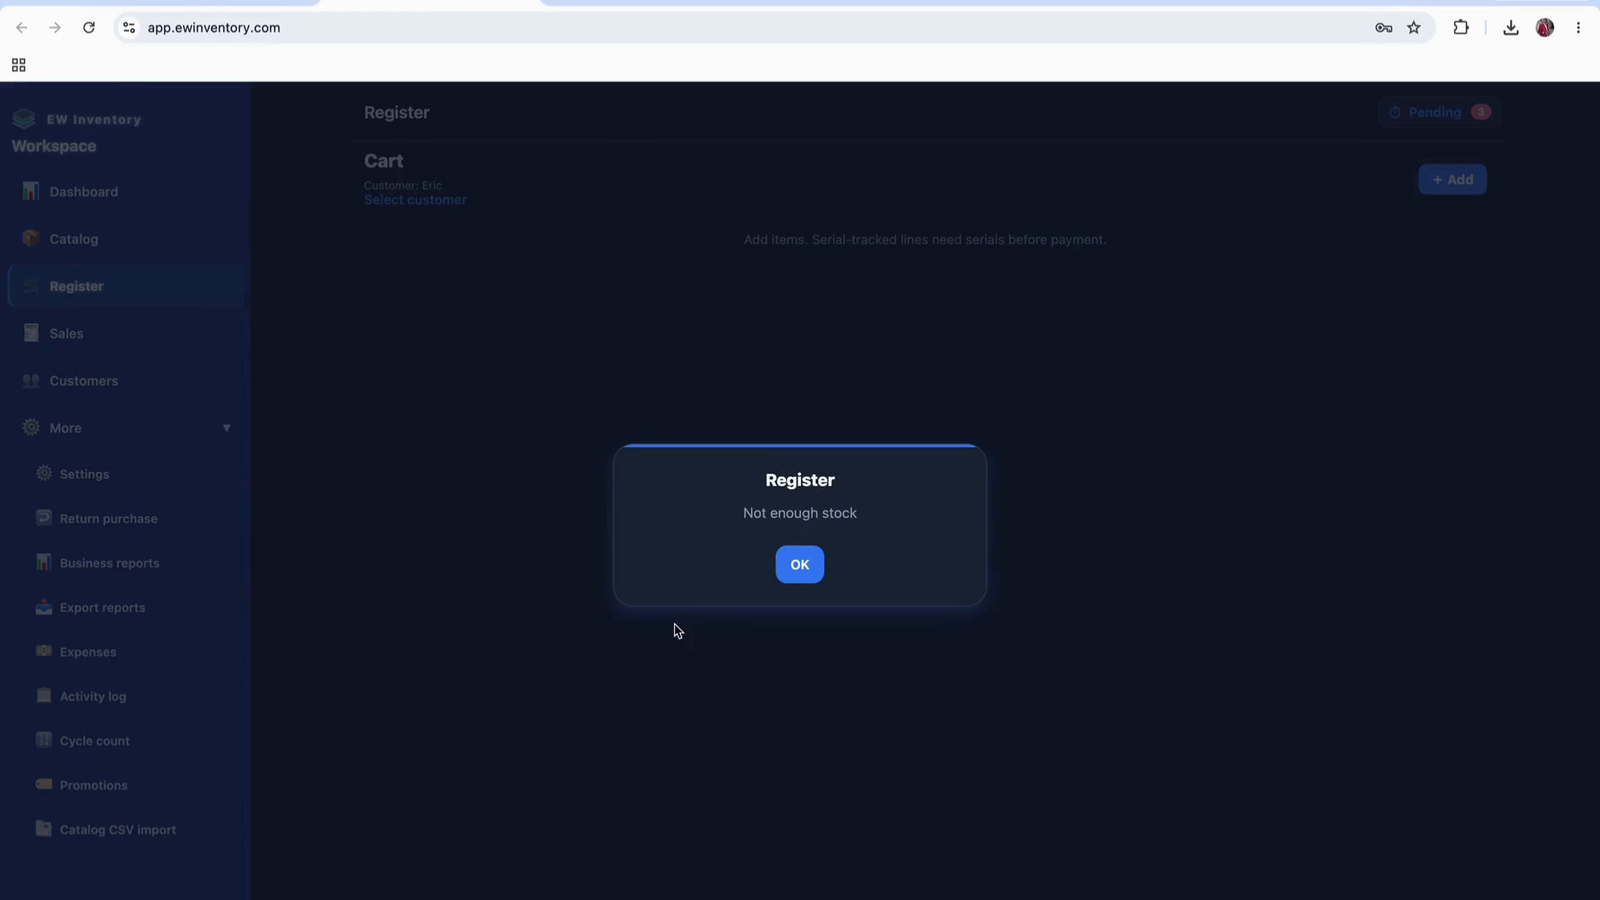
Search for or browse to find a product that has stock available.
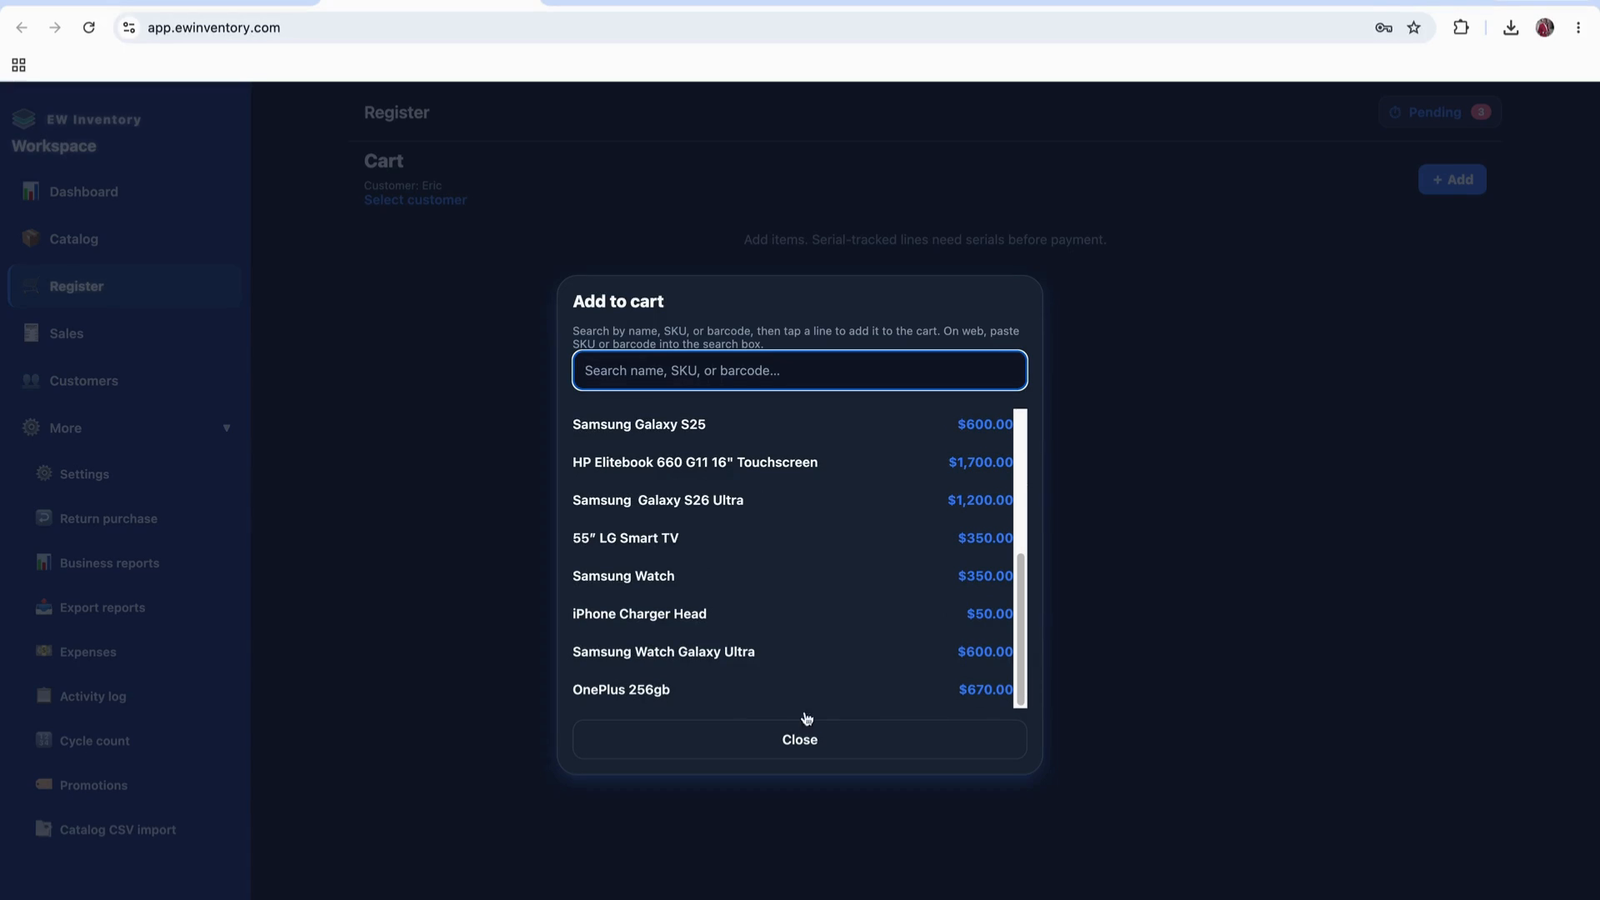
Select the product by its serial number when applicable.

Confirm that this is the product you will use for the sale.
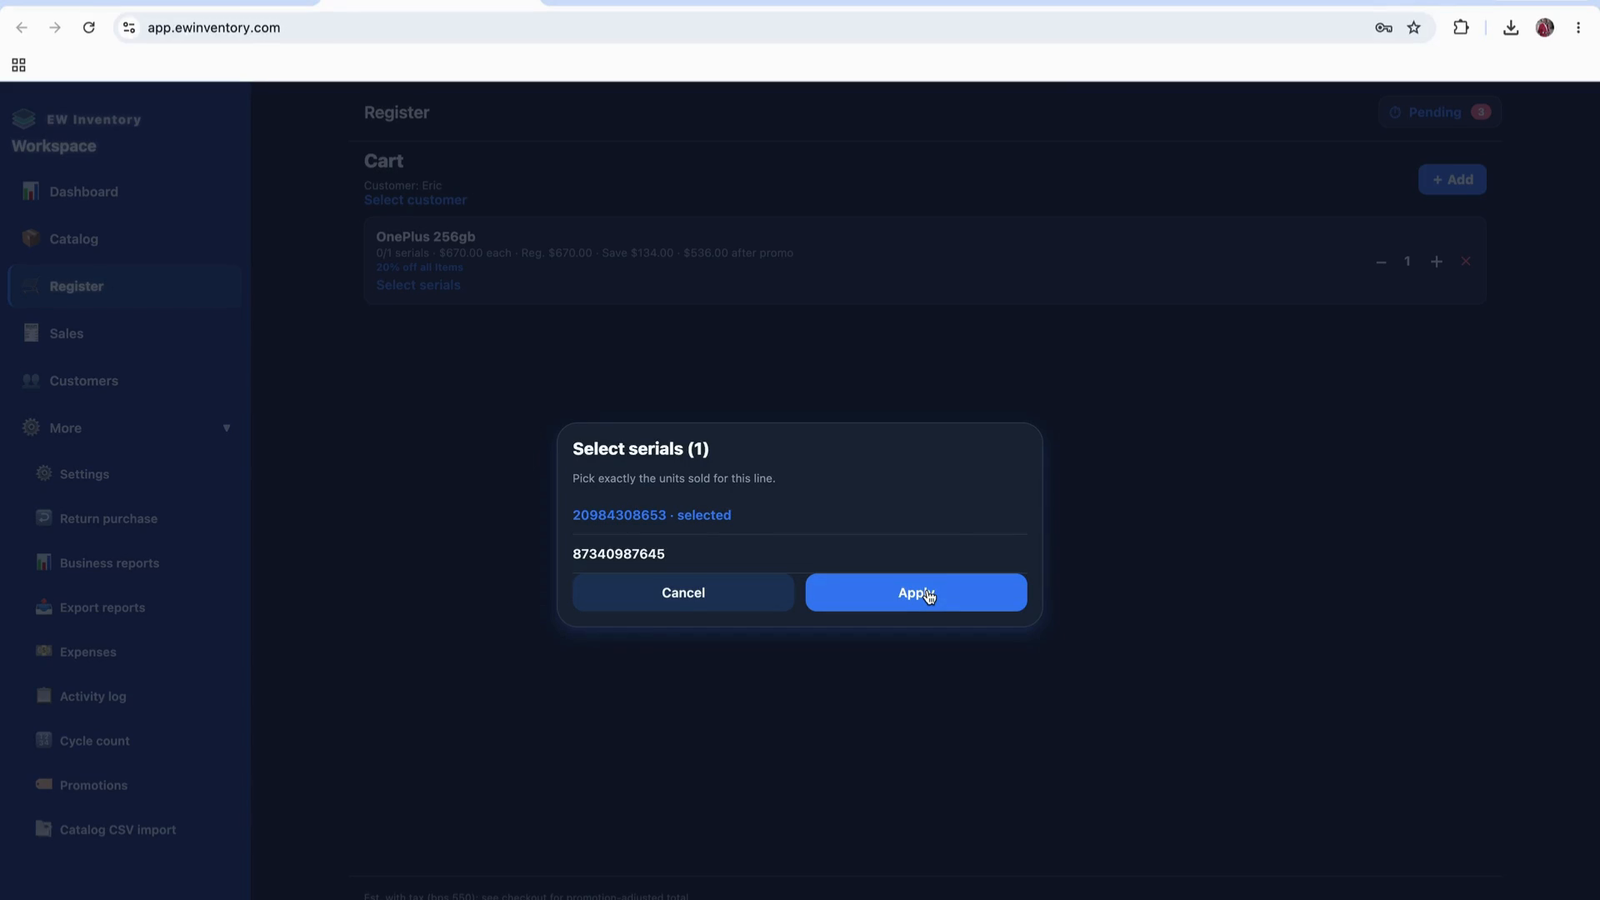
Finalize the product selection and proceed with the sale.

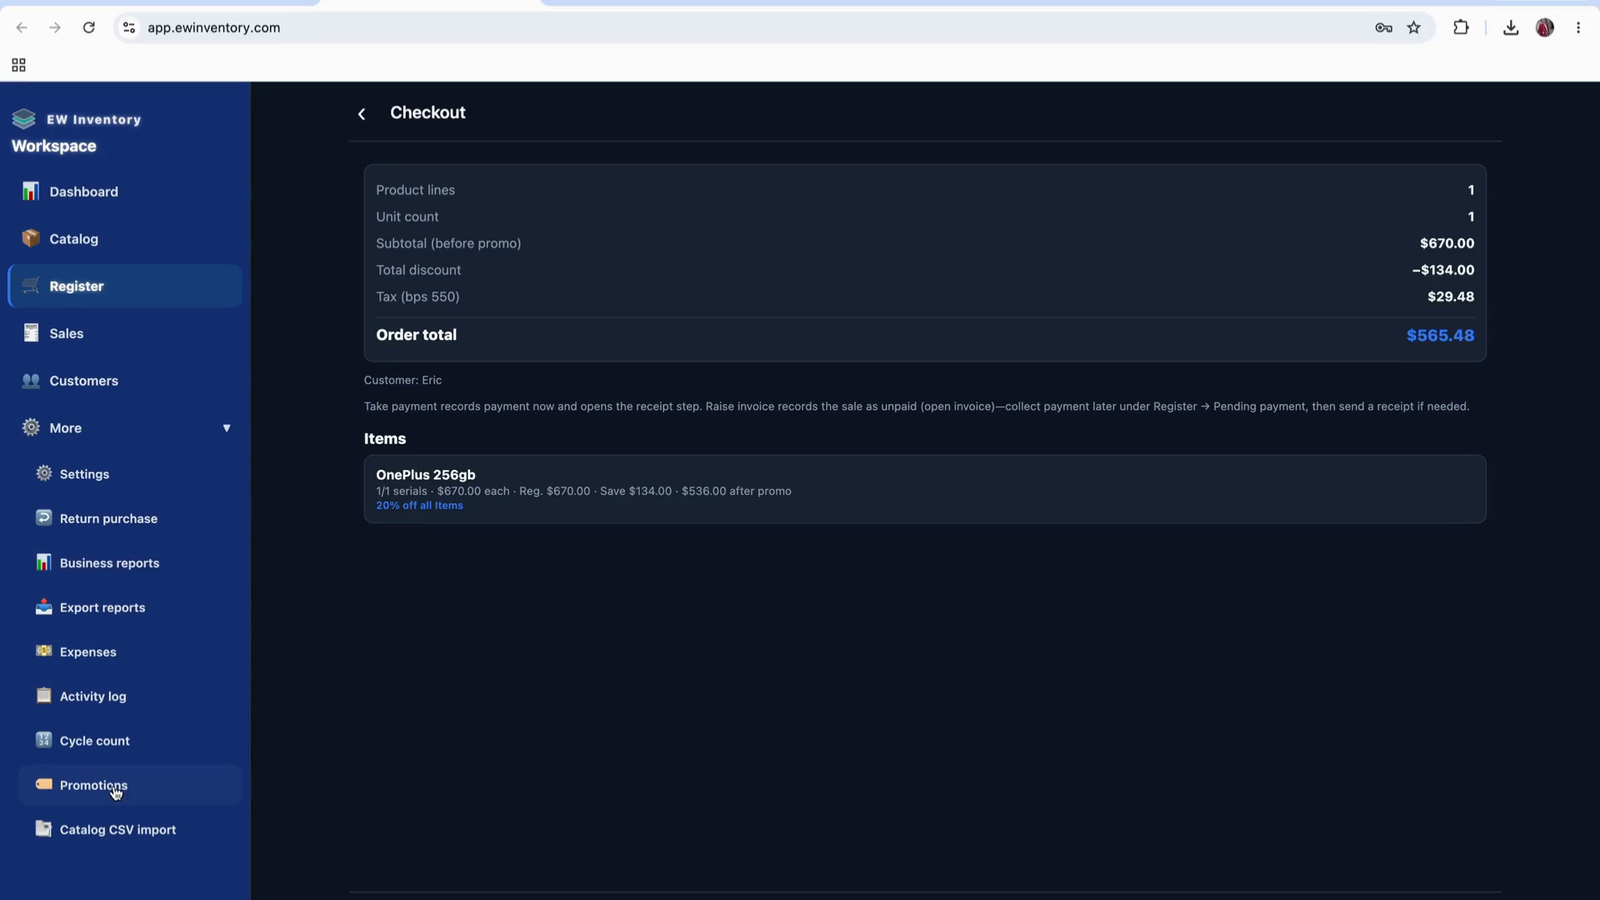
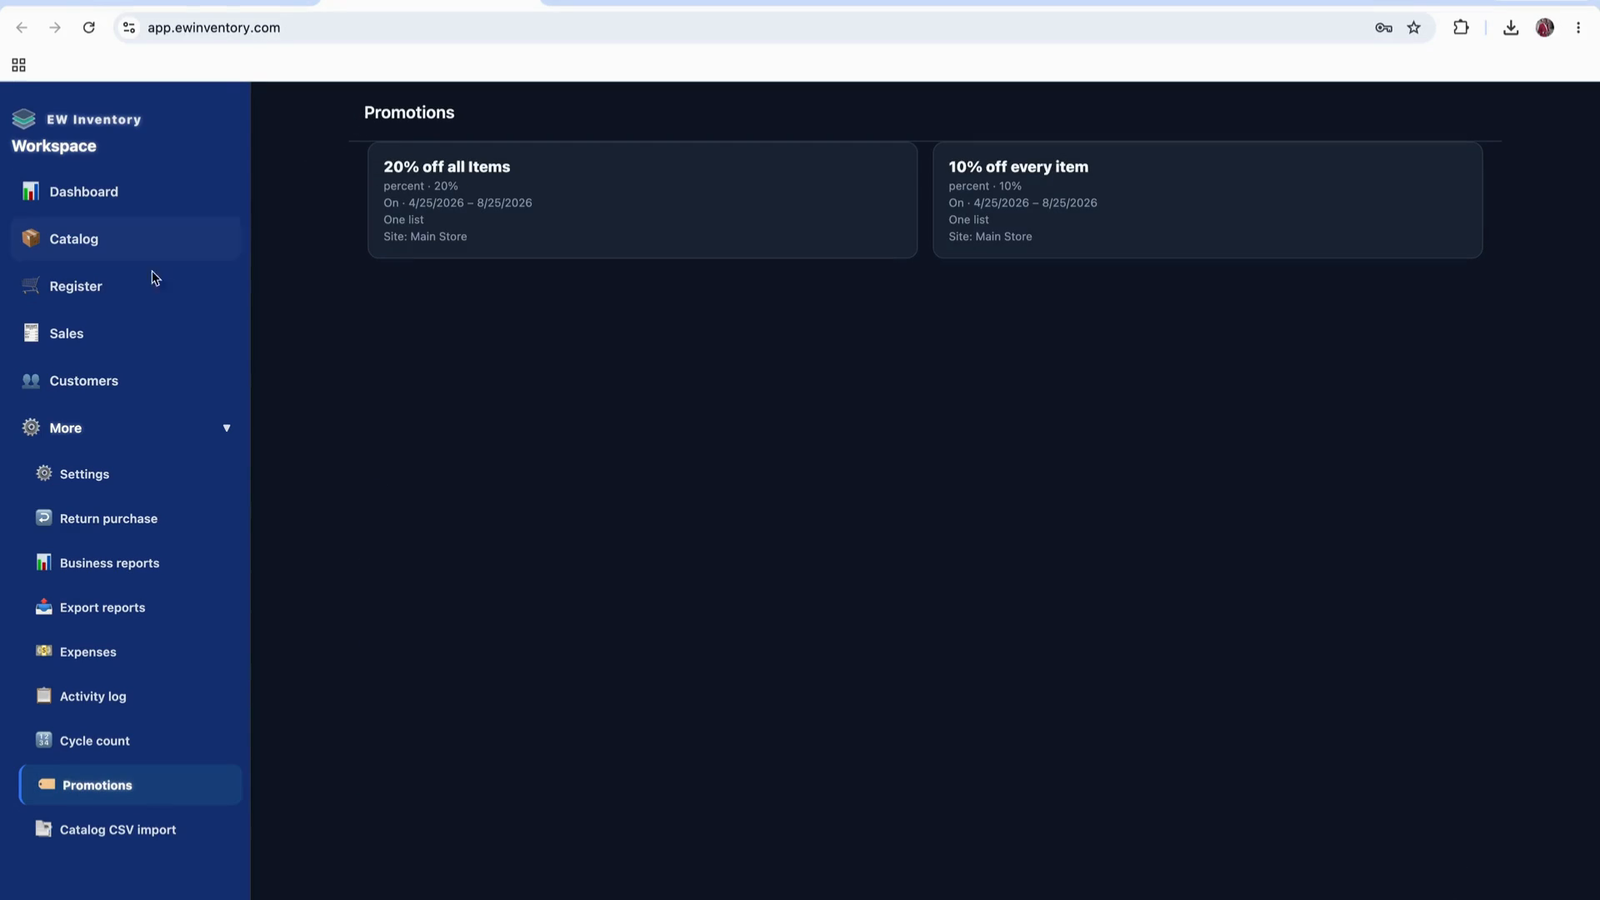
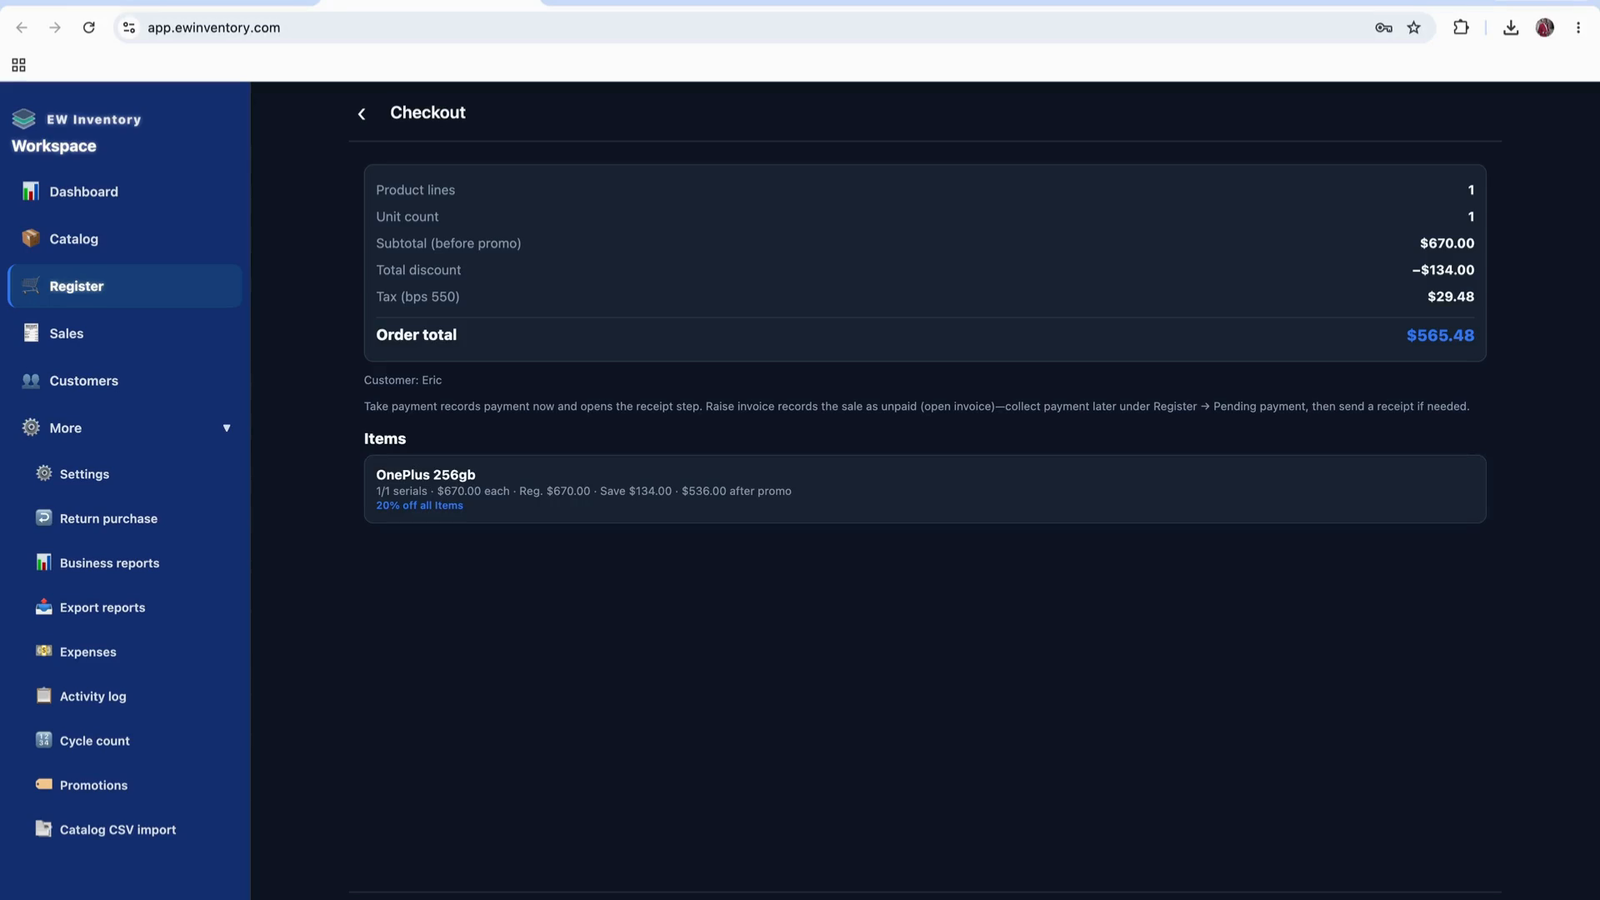
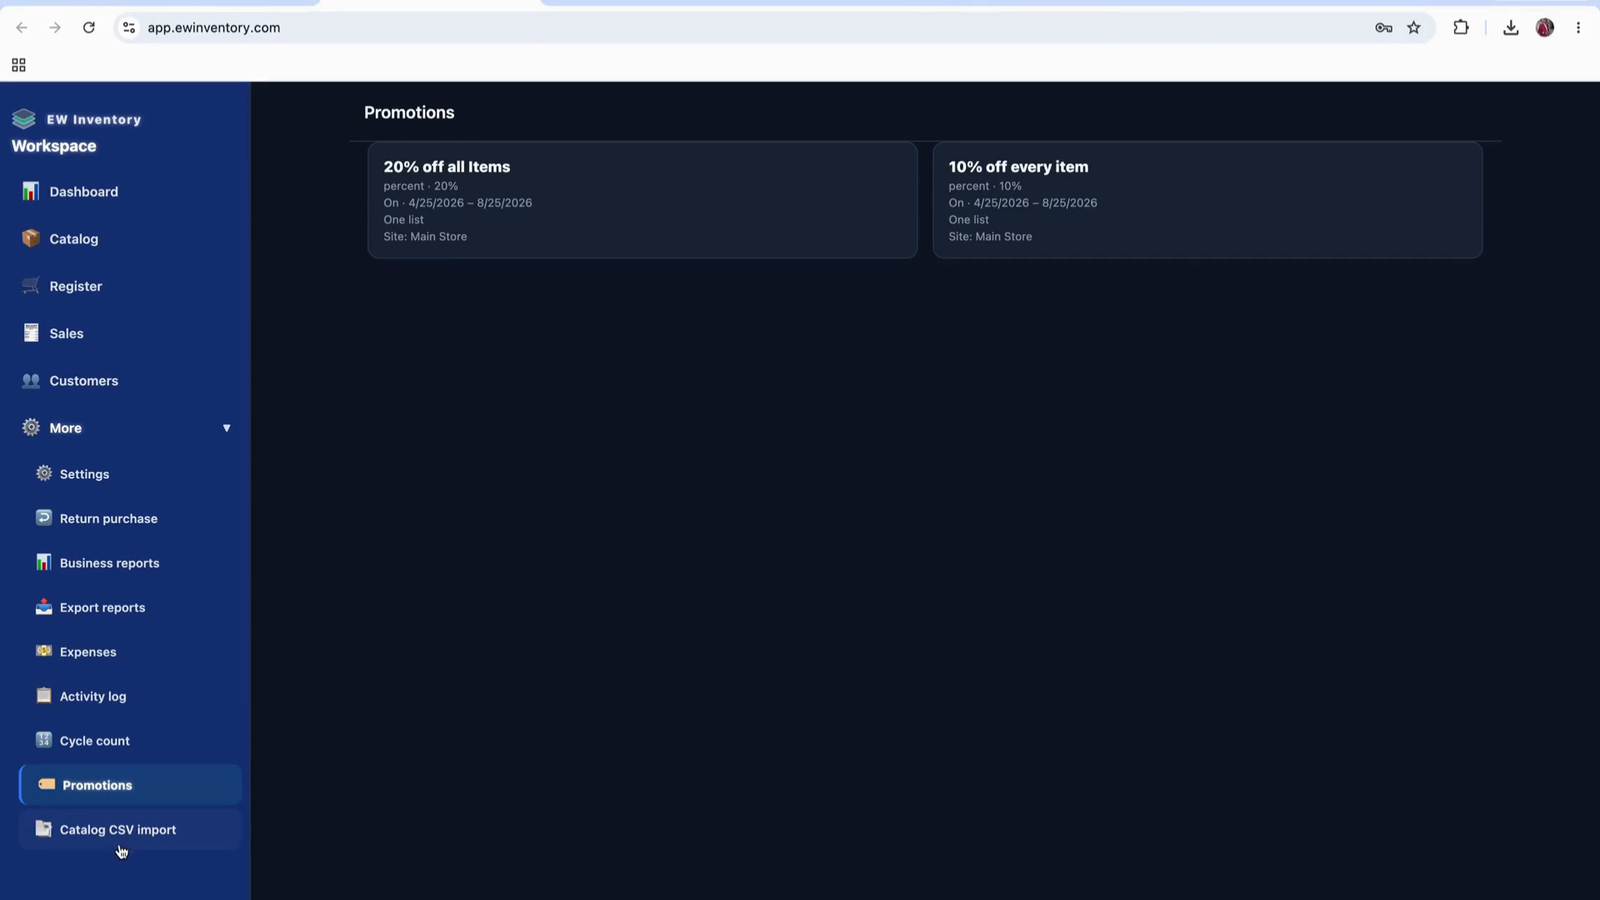
Go to the checkout screen. Any applicable discounts will be automatically applied based on active promotions. The discount shown may be coming from a promotion you configured earlier.
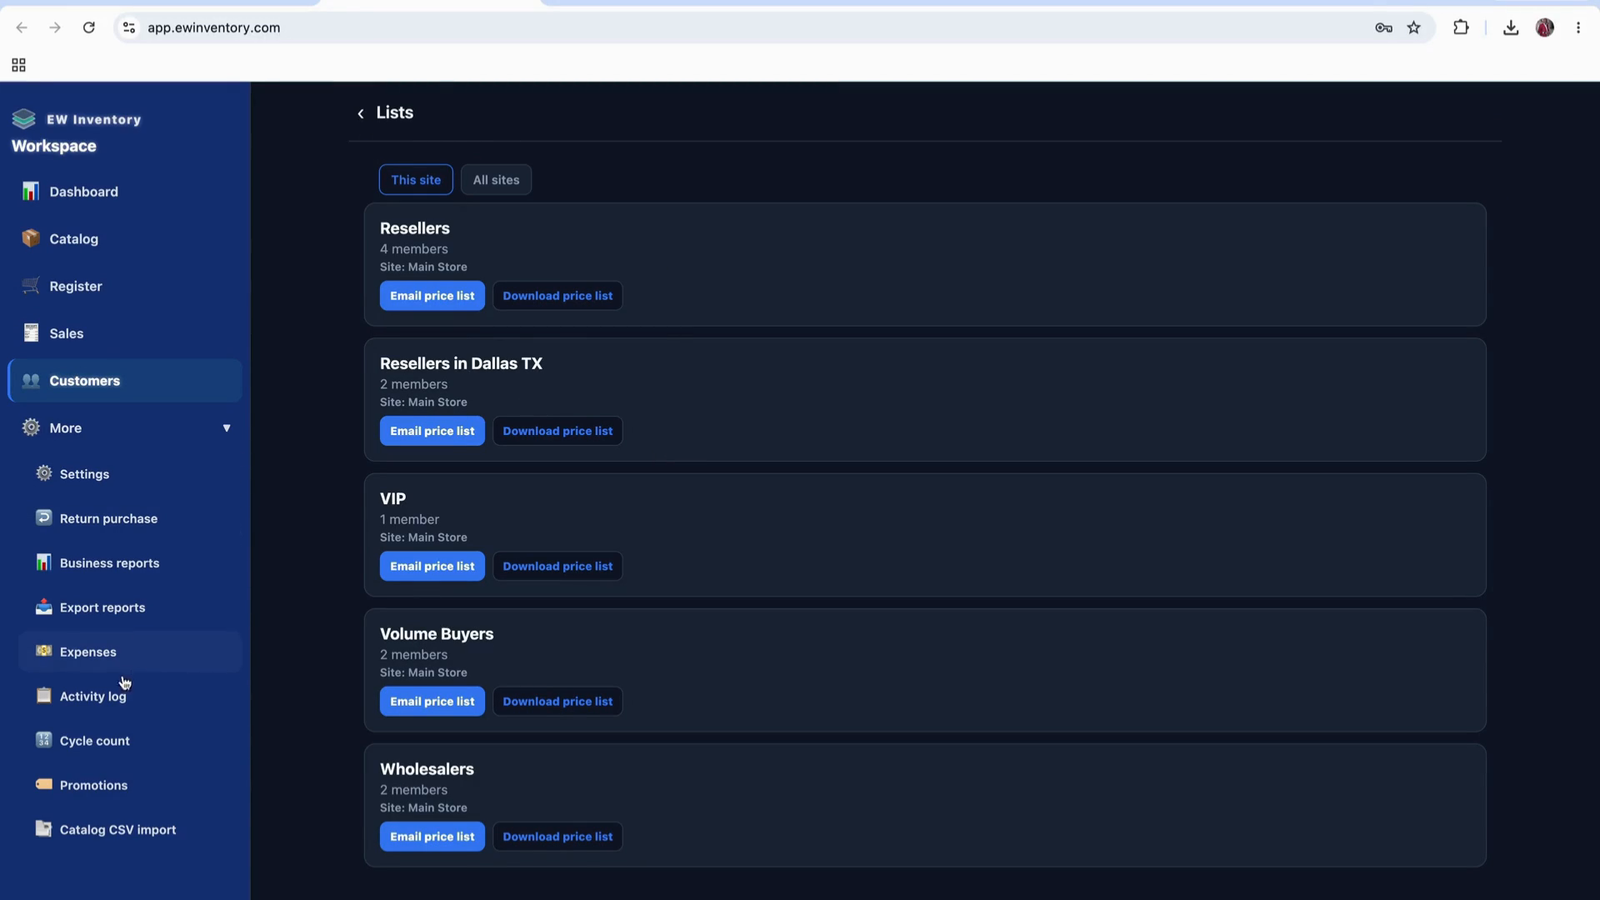
In the Promo section, you can set up discounts per customer or per customer group.
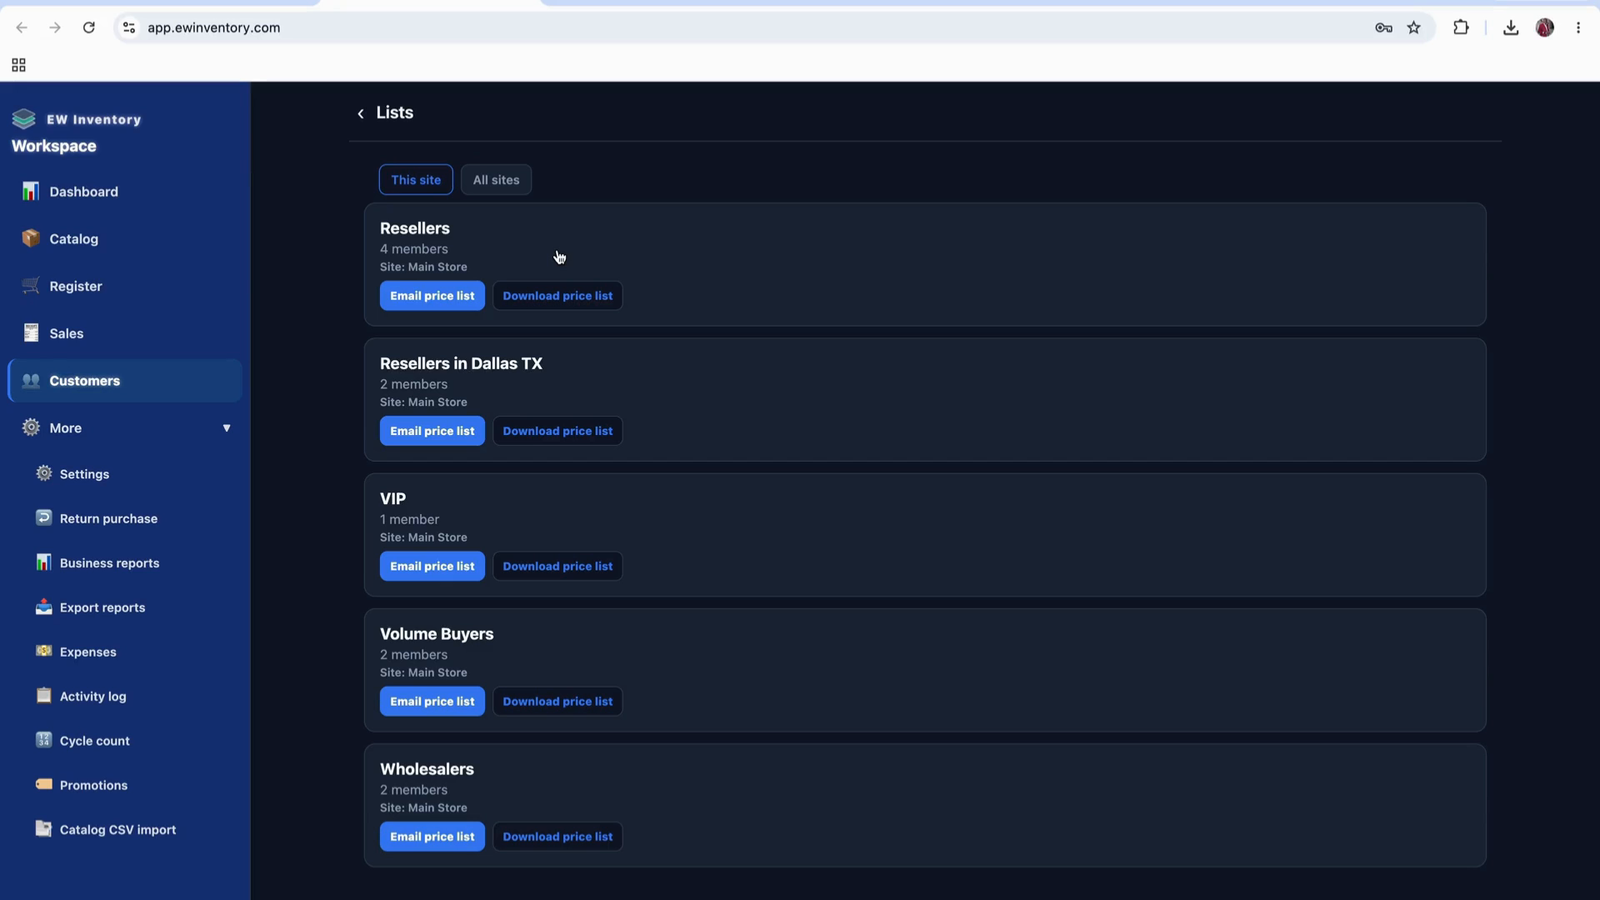
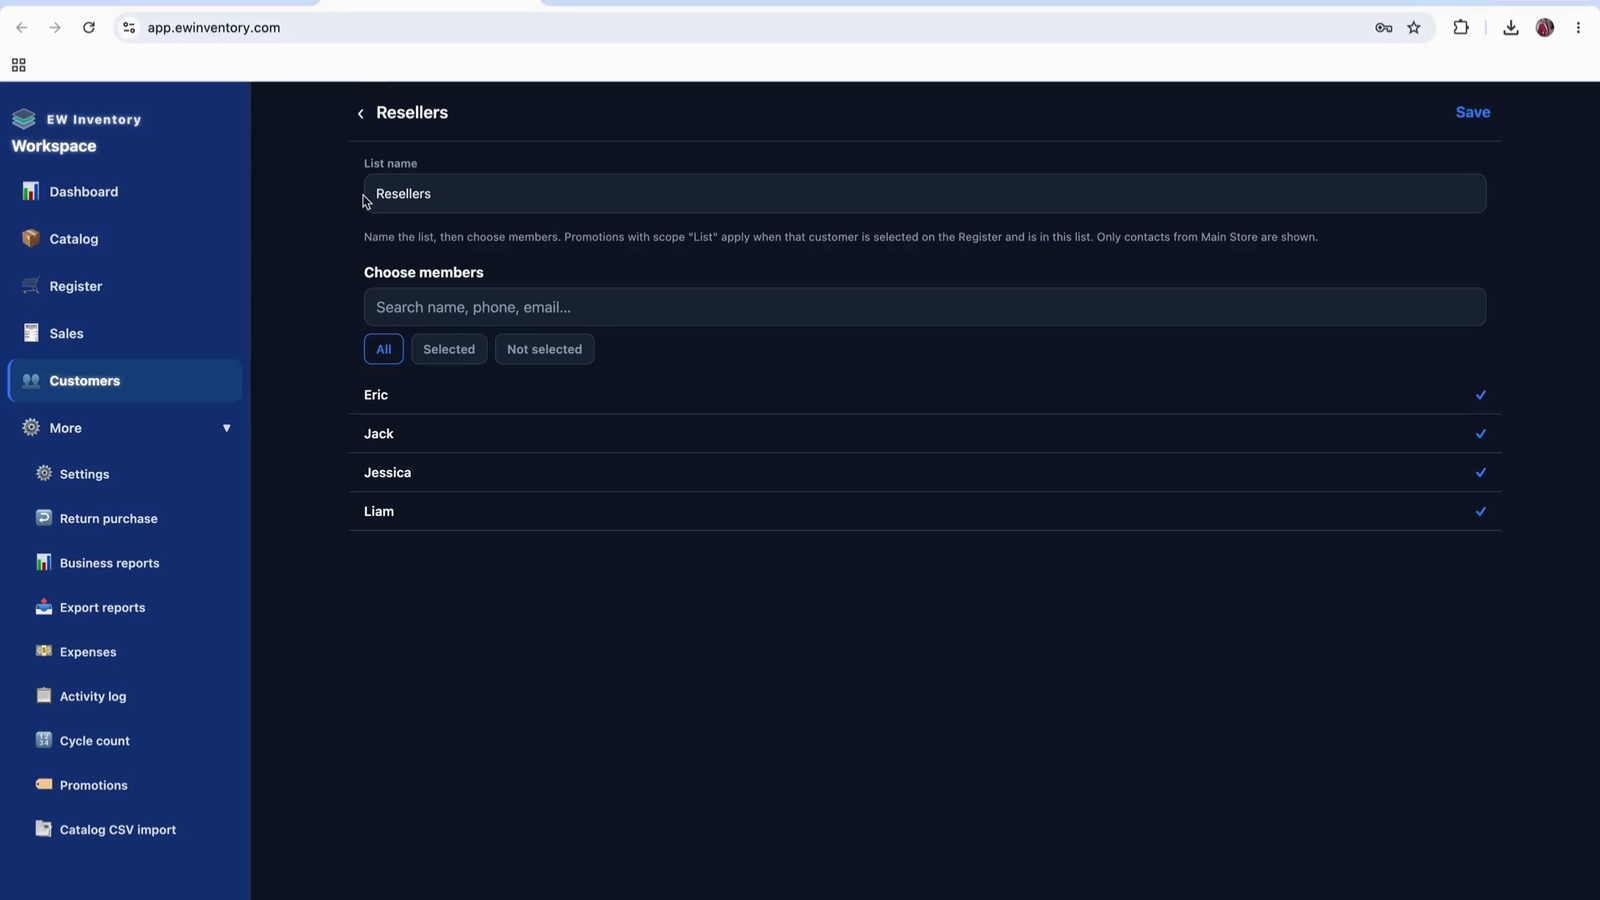
To manage these customer groups, go to Customer Management and open the customer list view.

Here you will see “view list” / customer list, which are groups of customers.

You can name a list (e.g., “Resellers”) and add multiple customers to that list to give group-based discounts.
Once a customer group is created, you can apply a promotion to that group (Apply Promotion).
Alternatively, you can apply a promotion directly from the promotion page:

Use the selector here to choose the specific customer to receive the promotion.
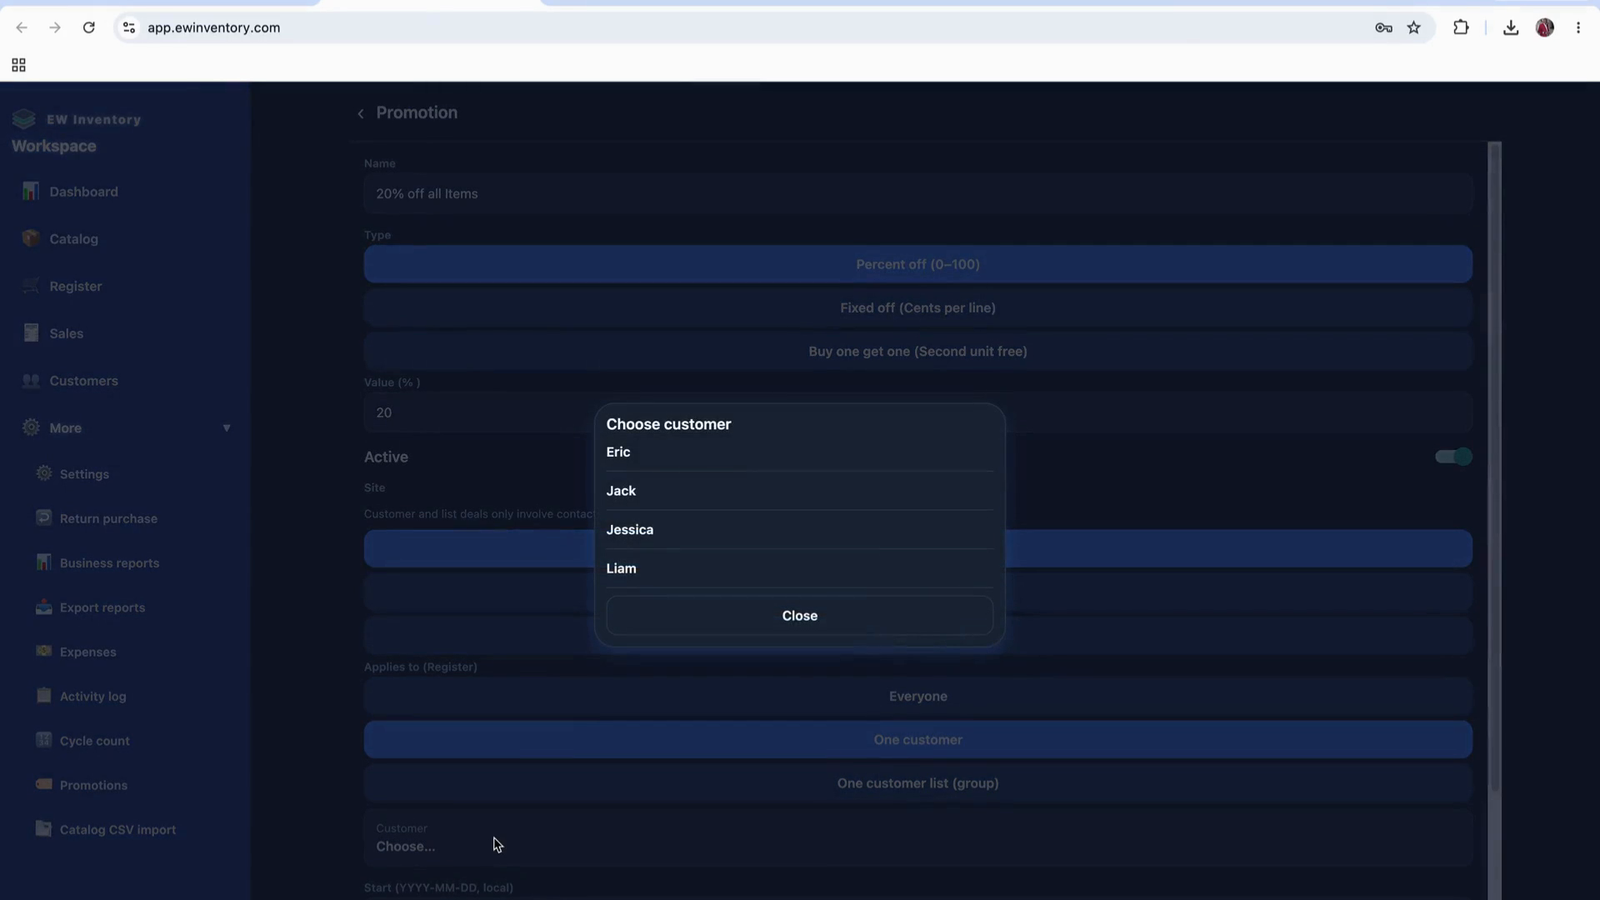
In this example, the promotion was applied to a customer list (a group), so any customer in that group automatically receives the discount.
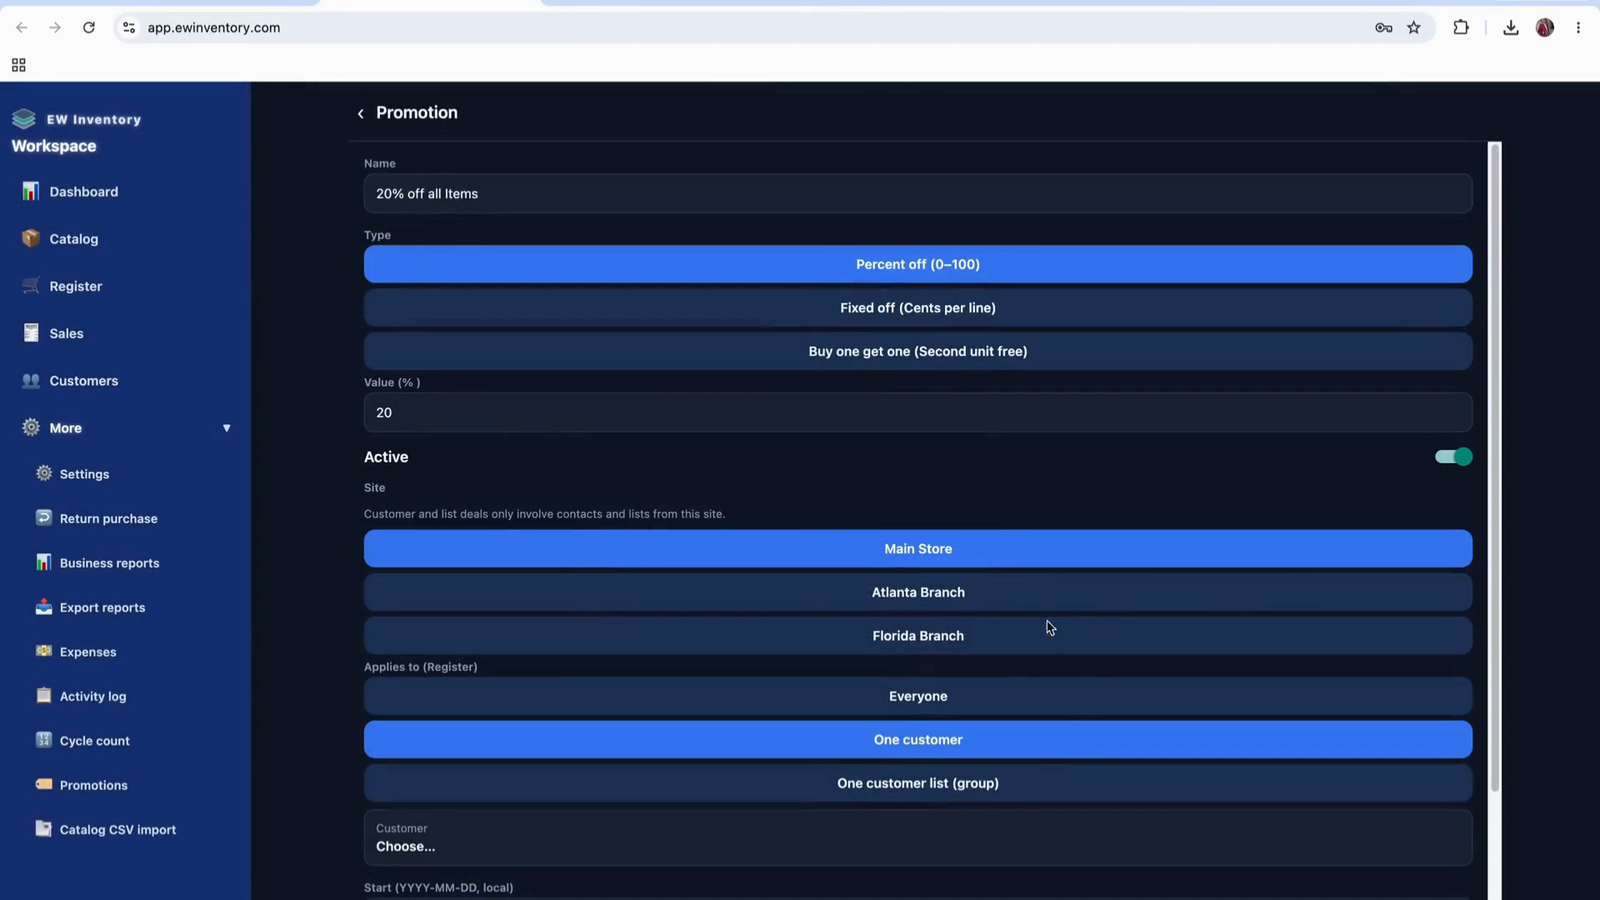
The promotion here is configured as a 20% discount on the product. When you return to the register, this is how the discount is applied to the sale.
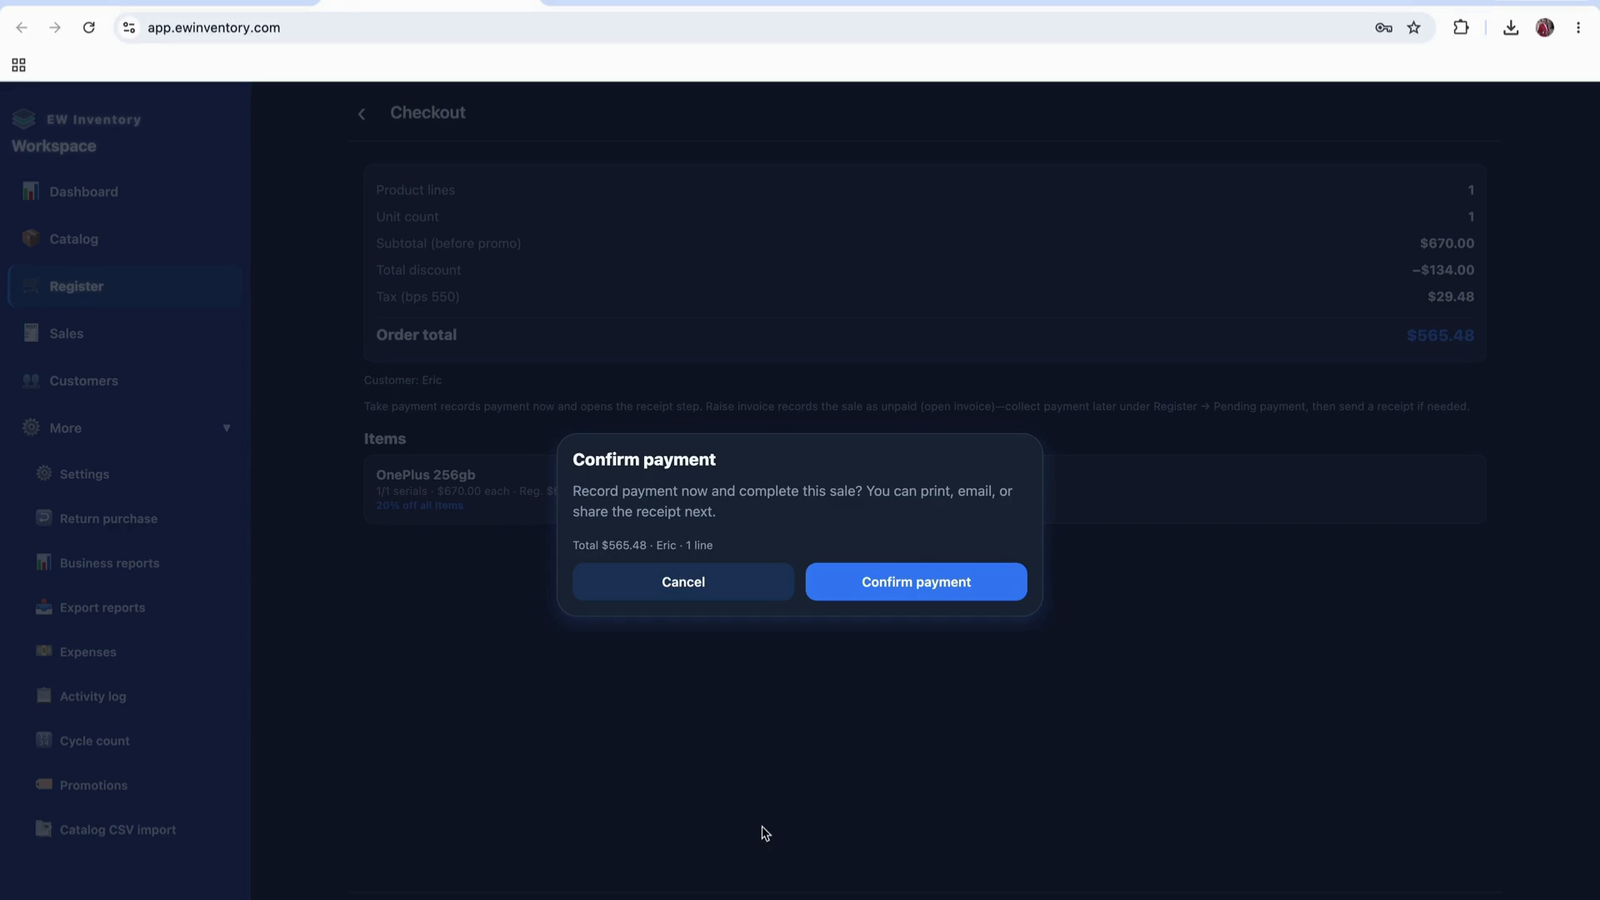
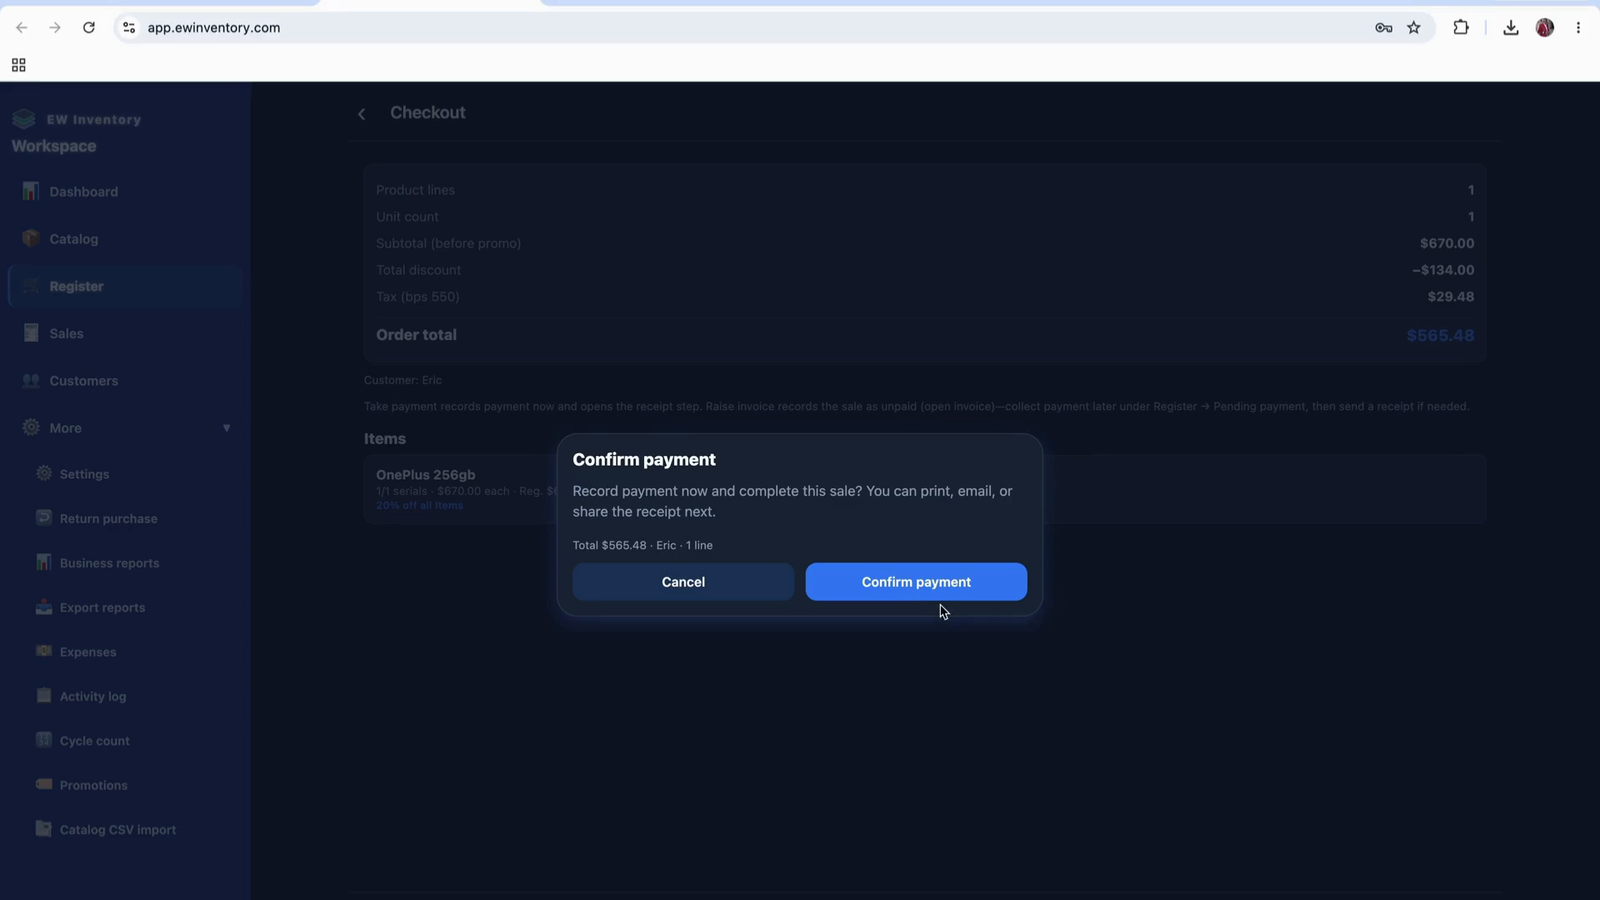
From the register checkout screen, proceed to take payment.
Confirm and record the payment in the system.
There is no physical POS machine integrated directly with the app. When a customer pays via external means (POS terminal, bank transfer, cash, etc.), you:
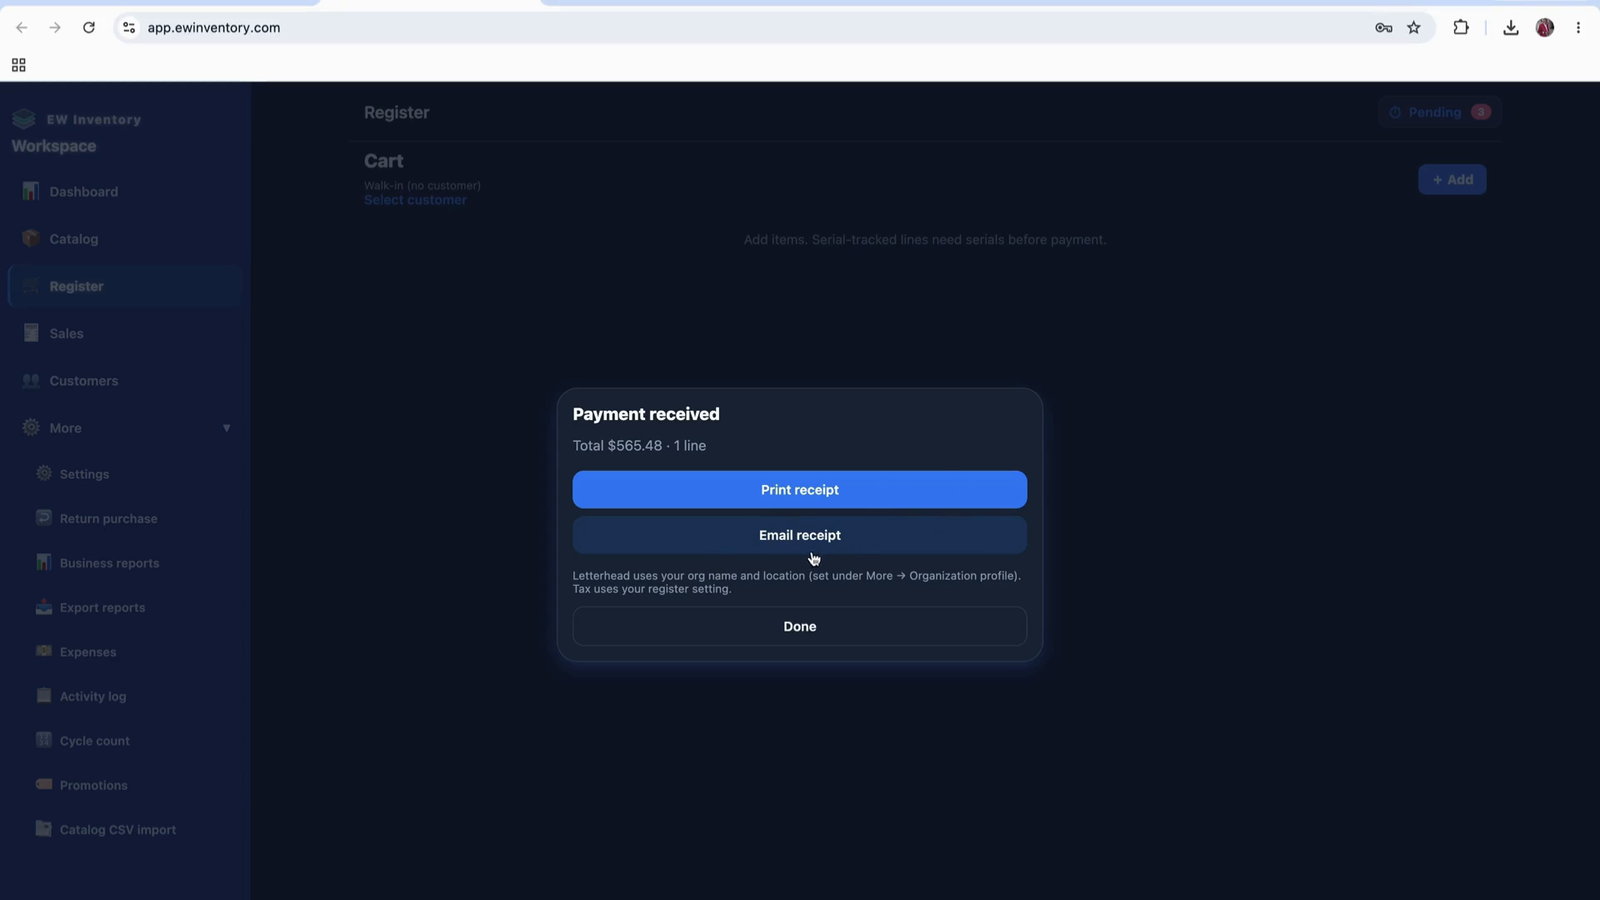
Use the payment confirmation option to finalize the transaction.
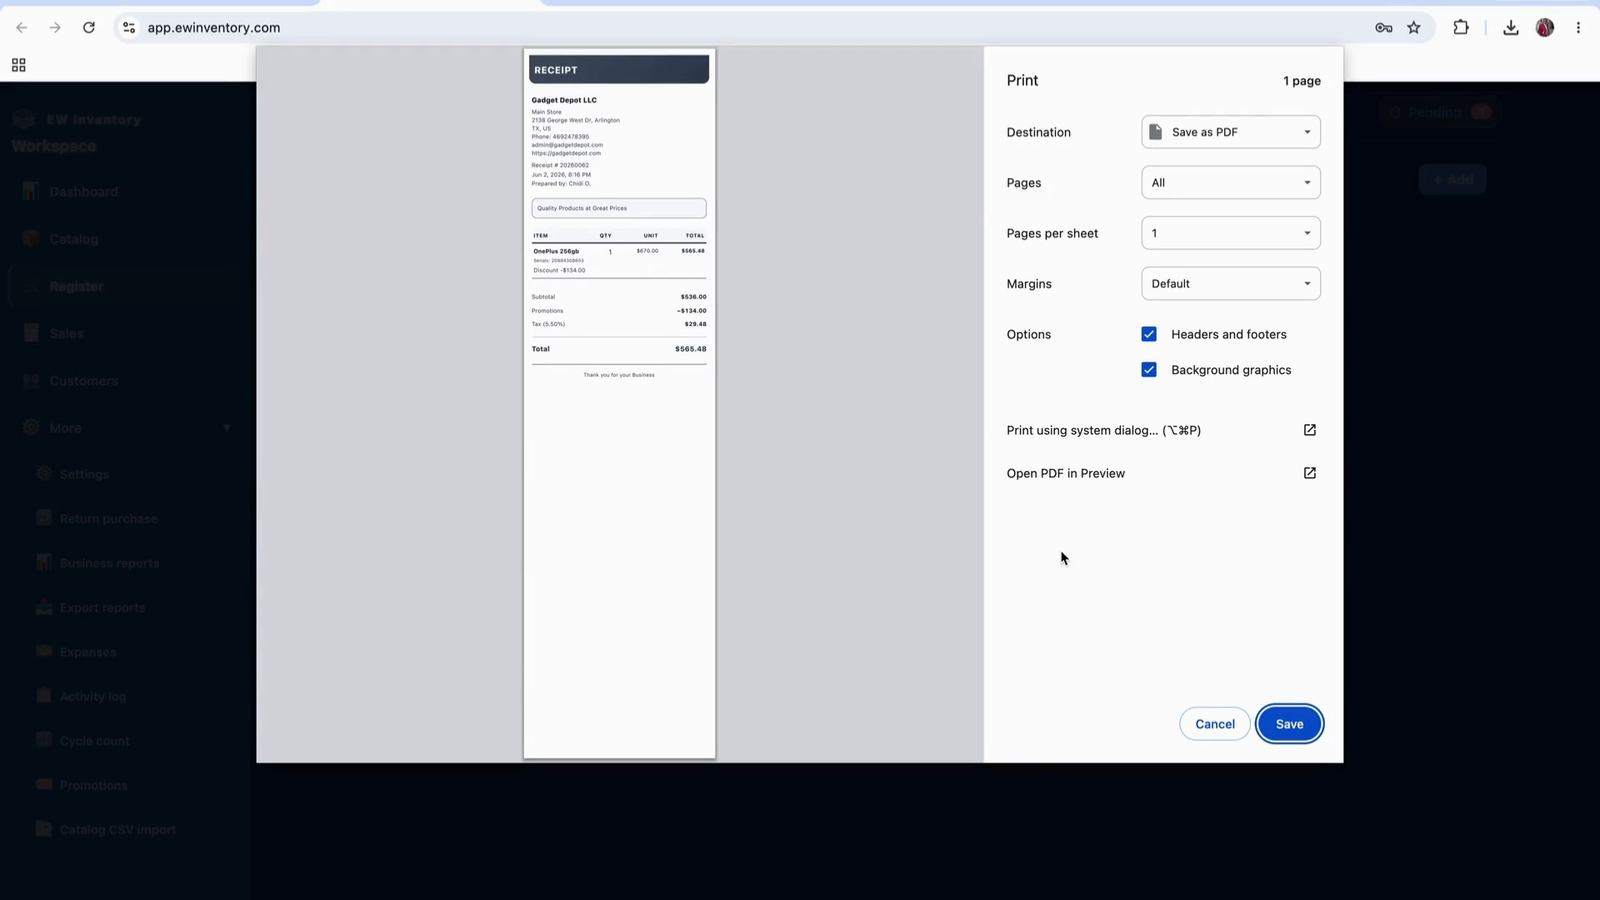
Once confirmed, a pop-up opens allowing you to print or email the receipt.
Use the Print Receipt option to print a receipt using your printer.

The receipt format shown is configured for an 80 mm thermal printer. The system supports:
If you do not have integrated payment or do not wish to finalize, you can leave the payment unconfirmed.
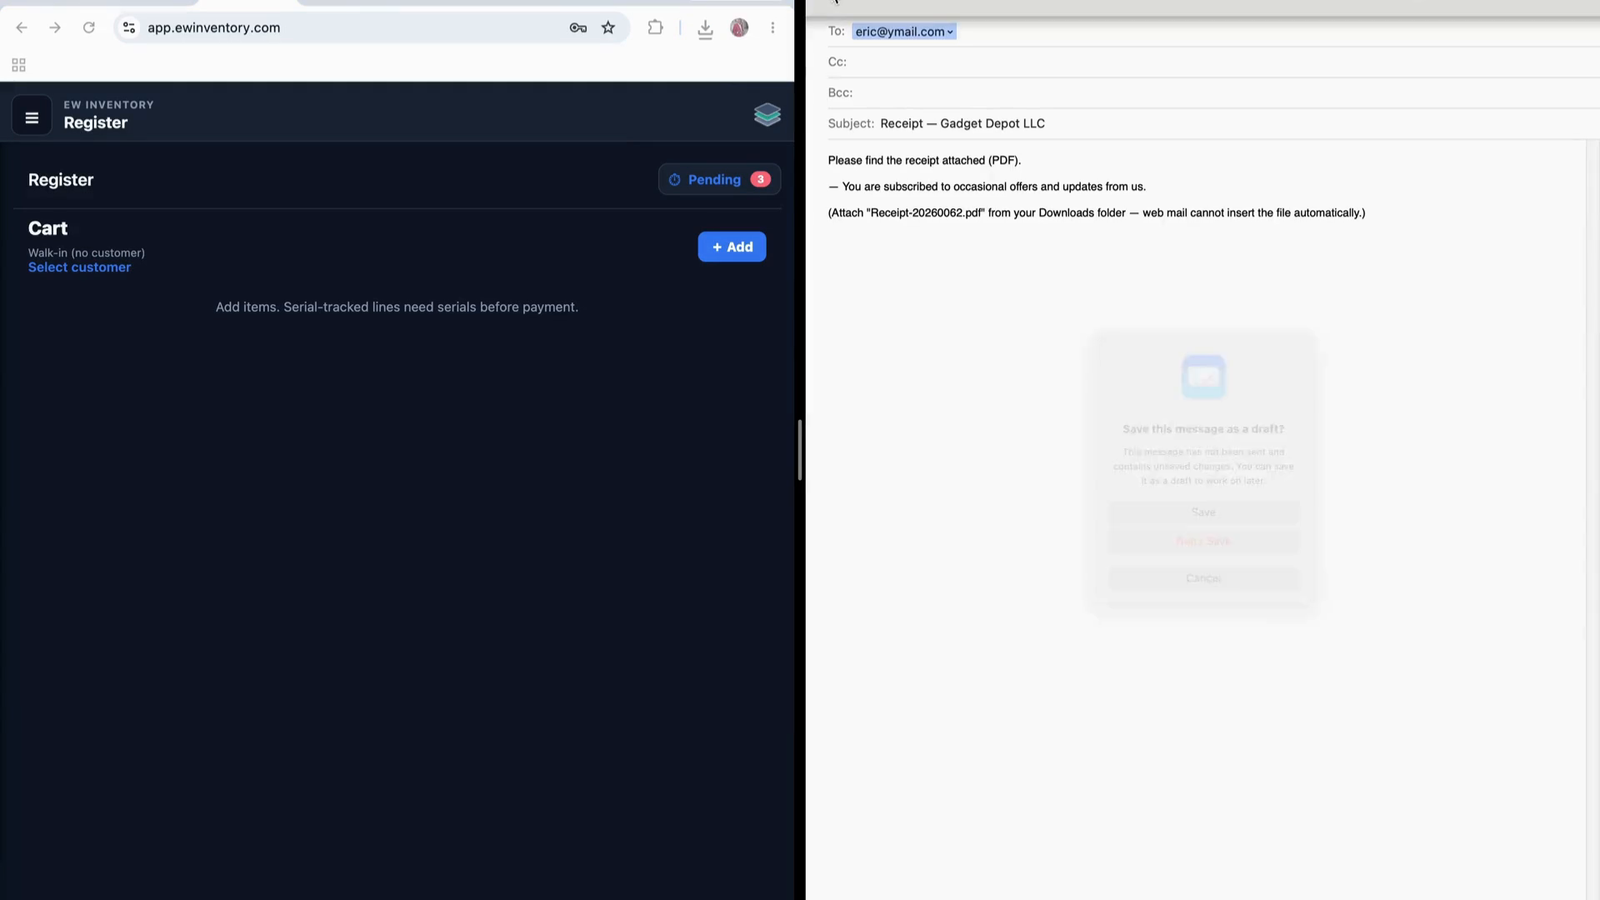
If you want to email the receipt to the customer, click the Email option.
This opens an email window where you can:
After sending the email, click Done/Save to close and finalize.
Once completed, the transaction is recorded, and the register is cleared for the next sale.
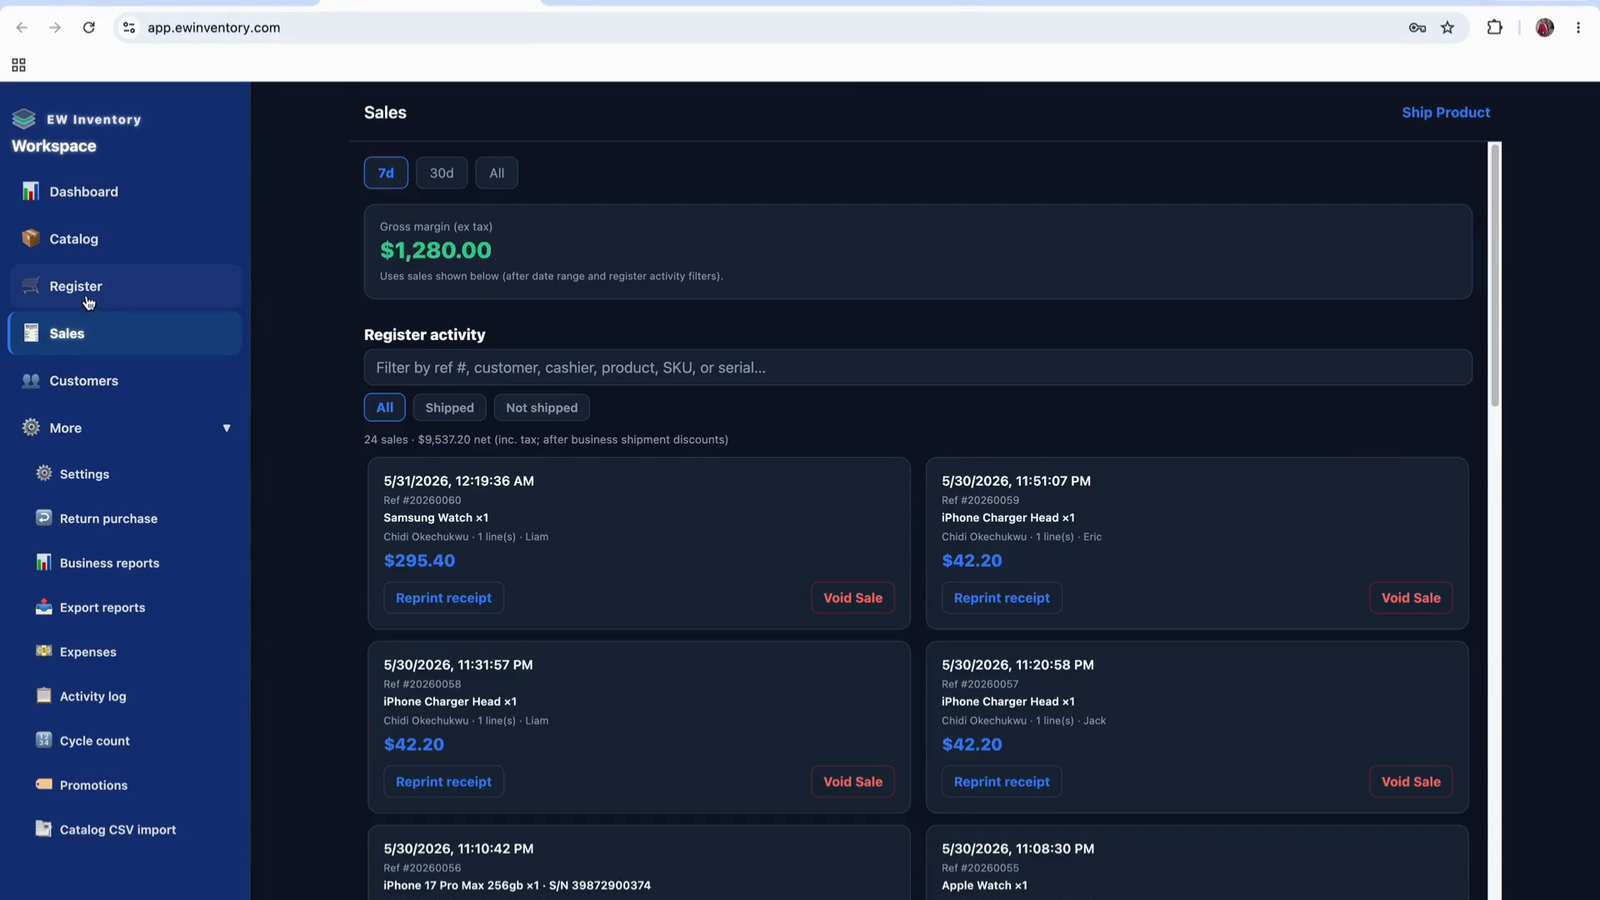
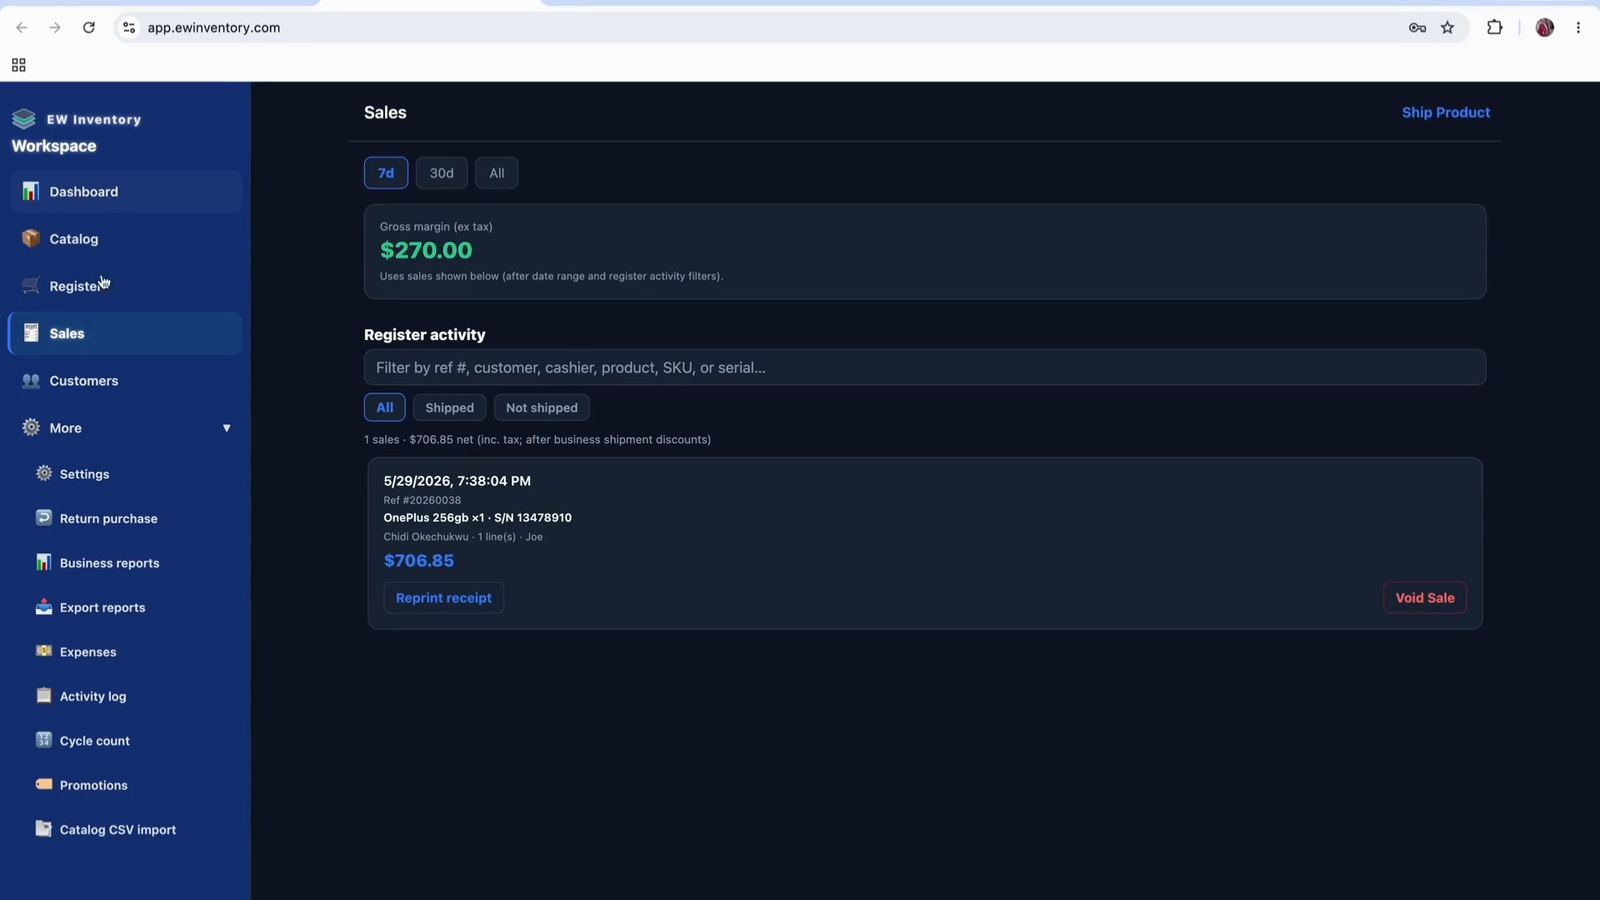
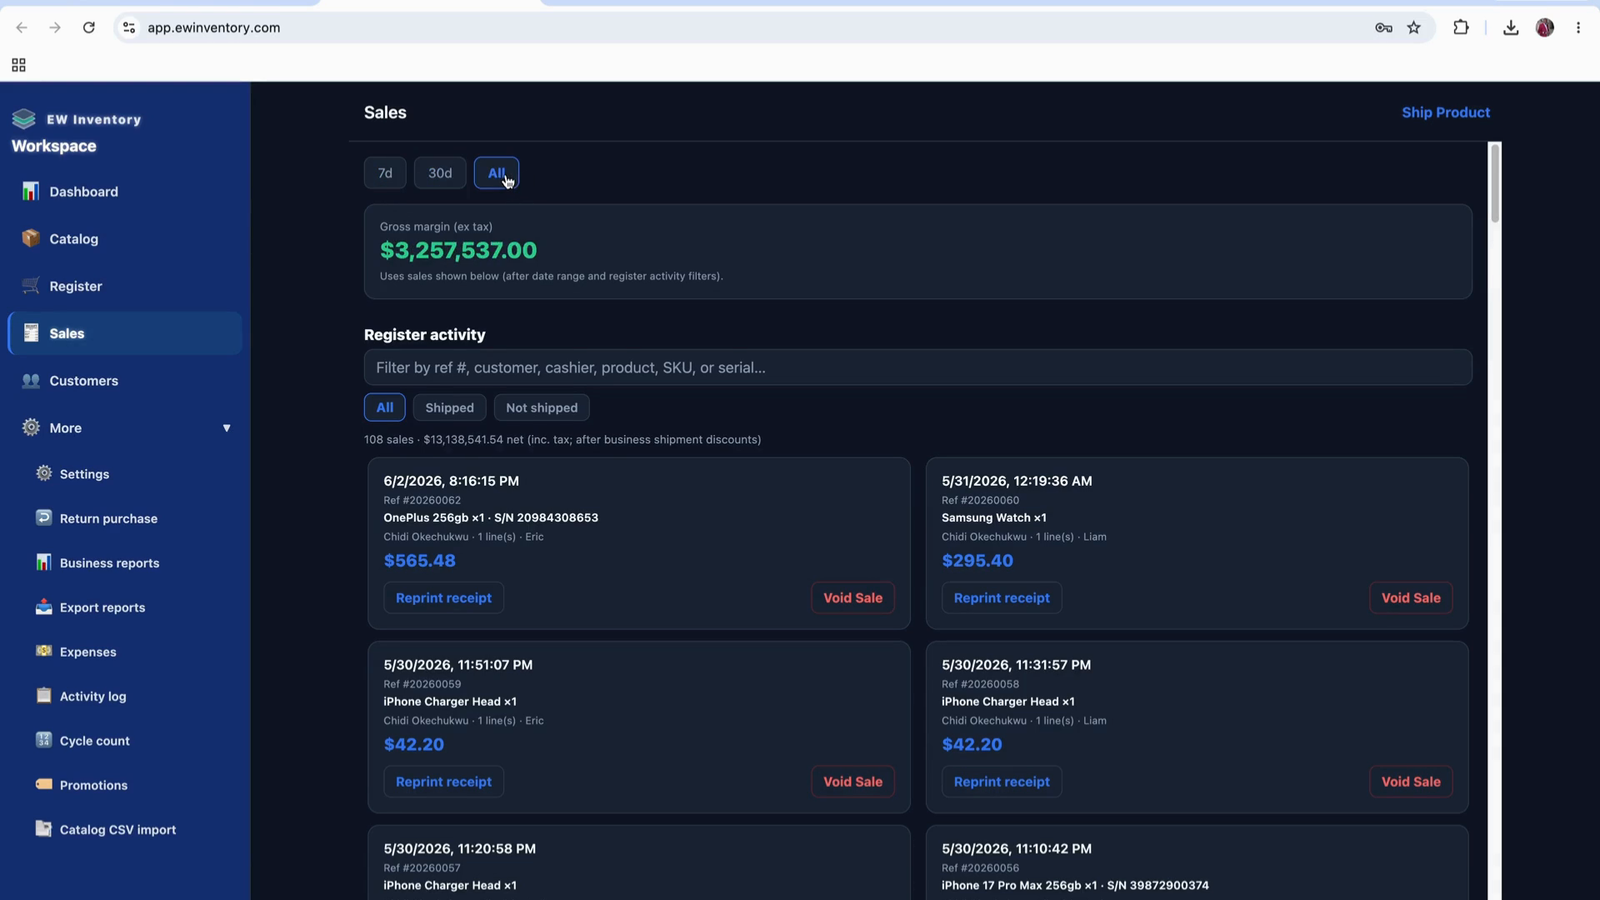
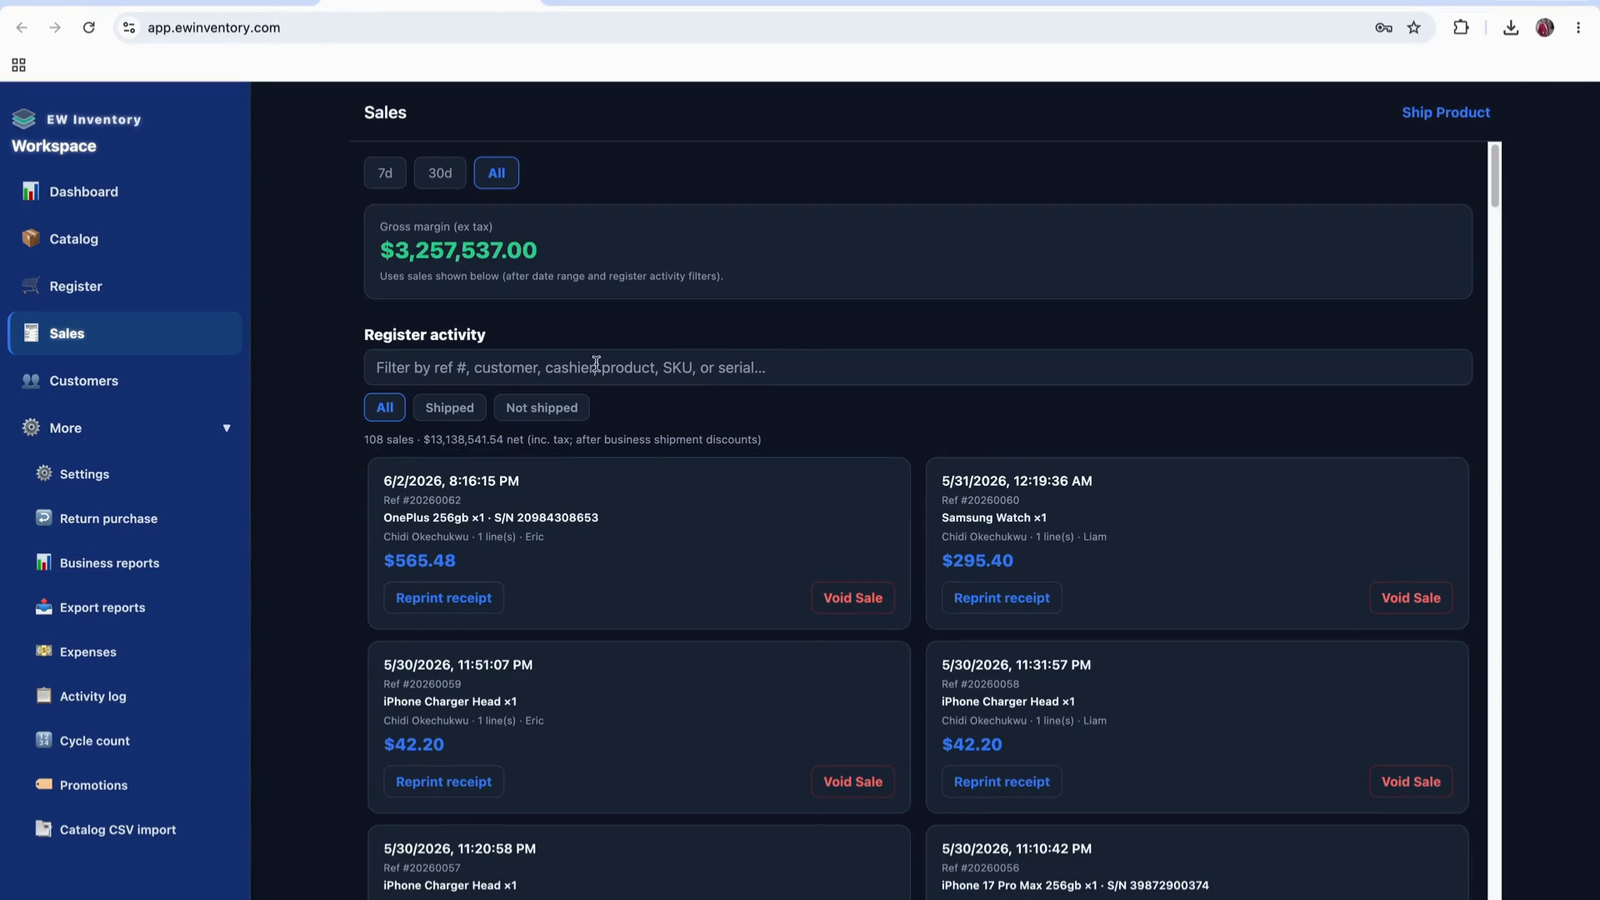
Go to the Sales section to view recorded sales.
Open the Dashboard to see summary statistics, such as total sales for the current day (e.g., “one sale today”).

In the Sales view, you can see detailed information for each sale:
For business owners, the dashboard also shows gross margin information.
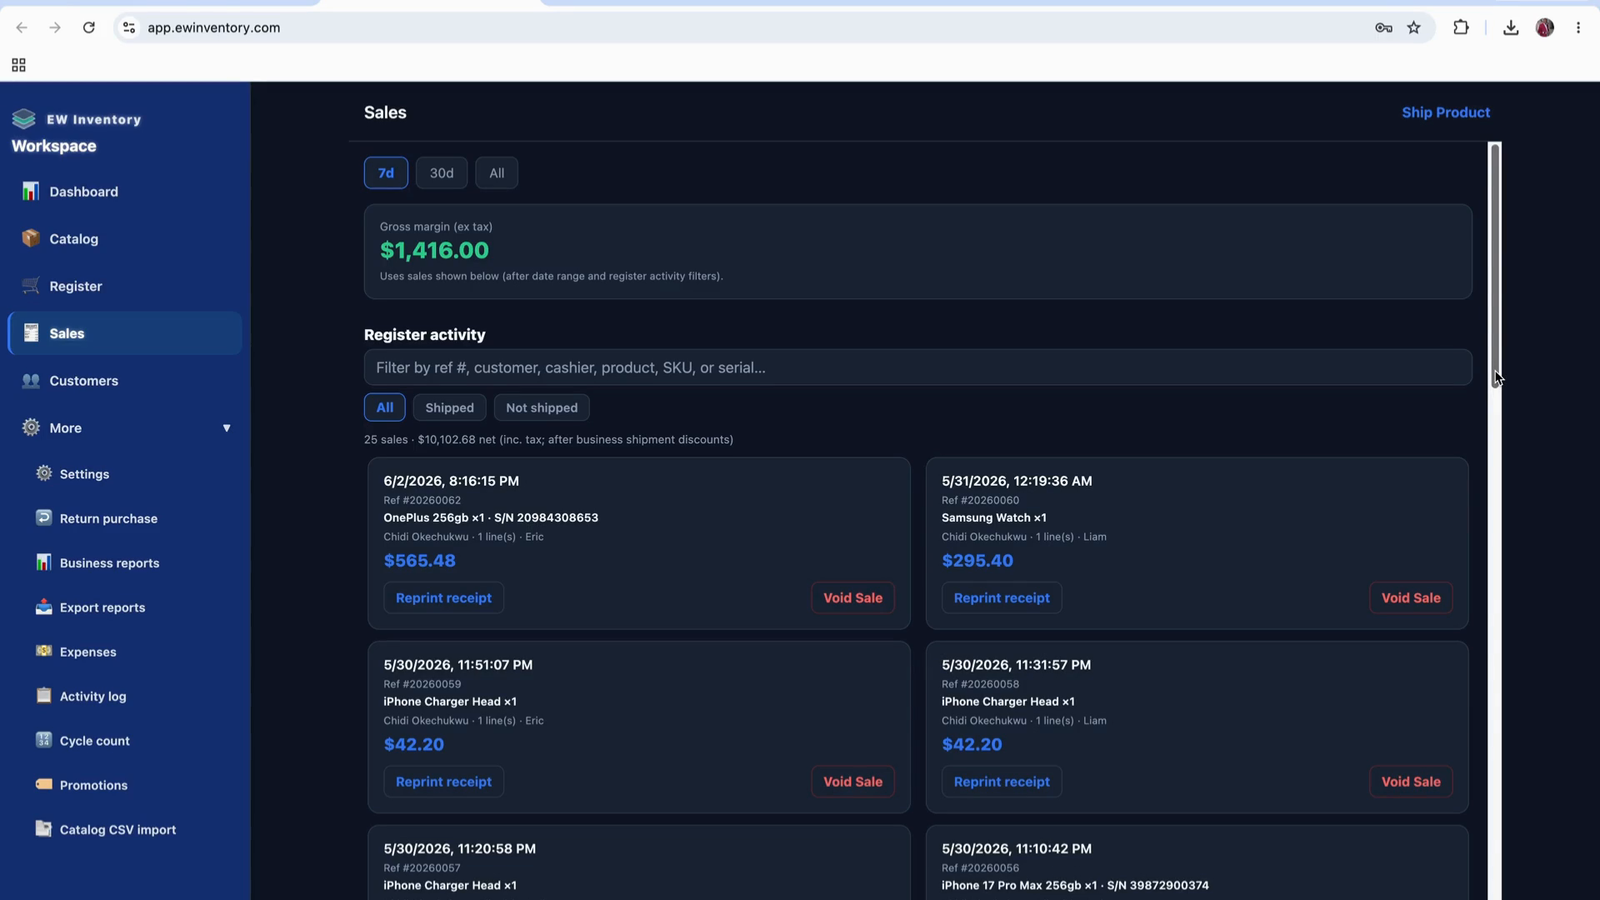
You can track gross margin over different periods such as the last 7 days,

30 days, and more.

Here you can see your gross margin (difference between selling price and cost price) to understand profitability.
If a customer requests shipping, use the Ship Product section to manage shipments.

Enter all shipping and tracking details for the product, then click Save Shipment to record the shipment.
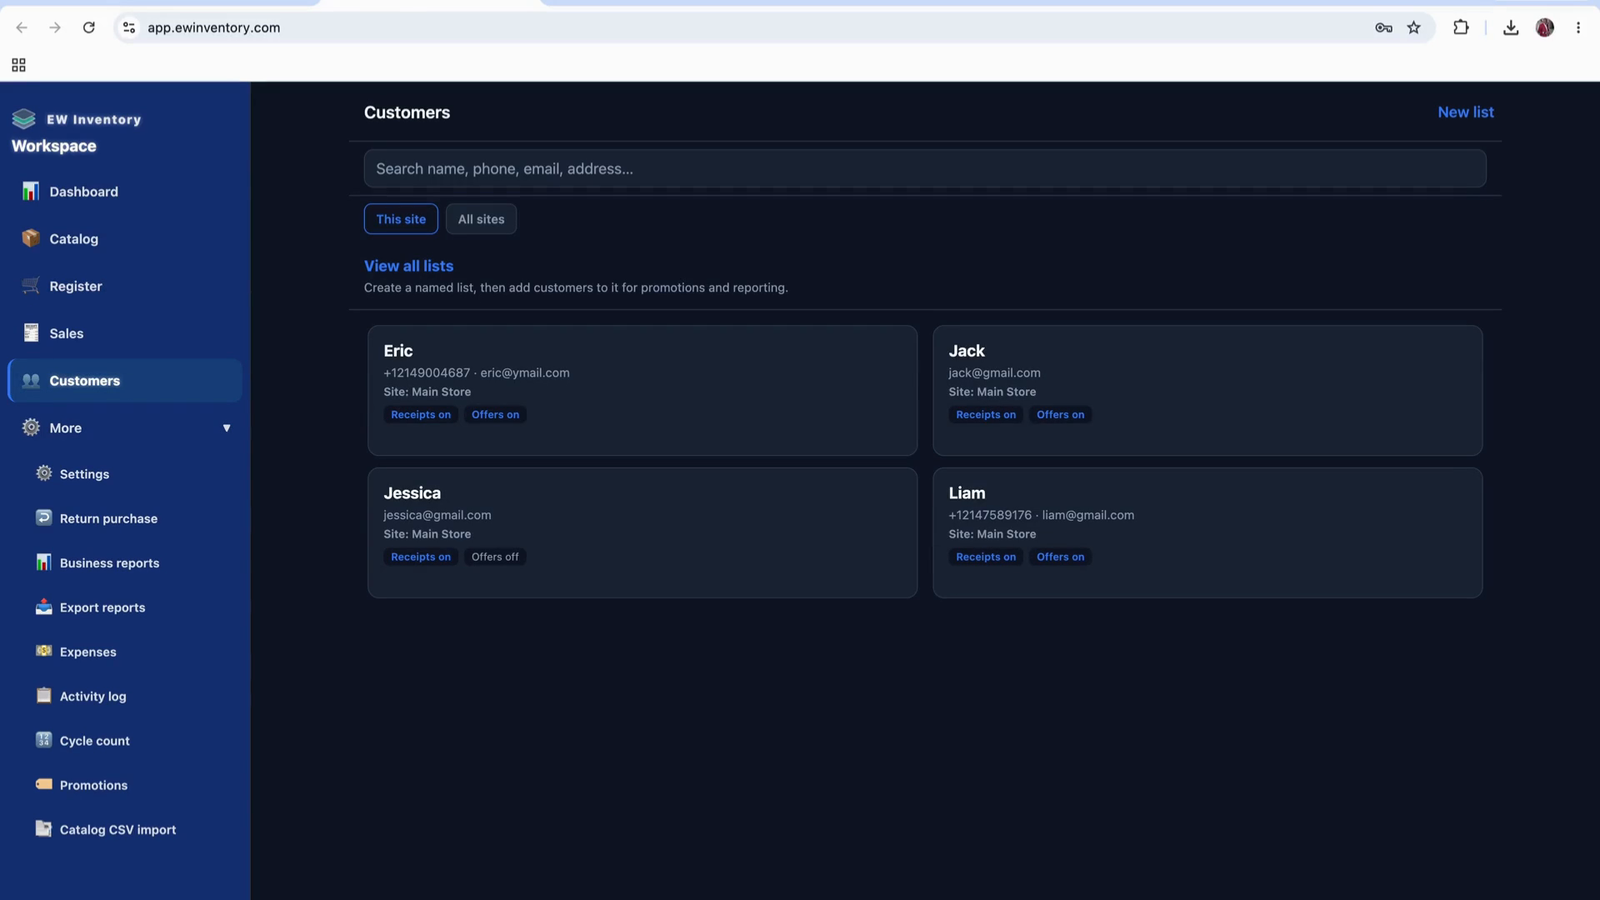
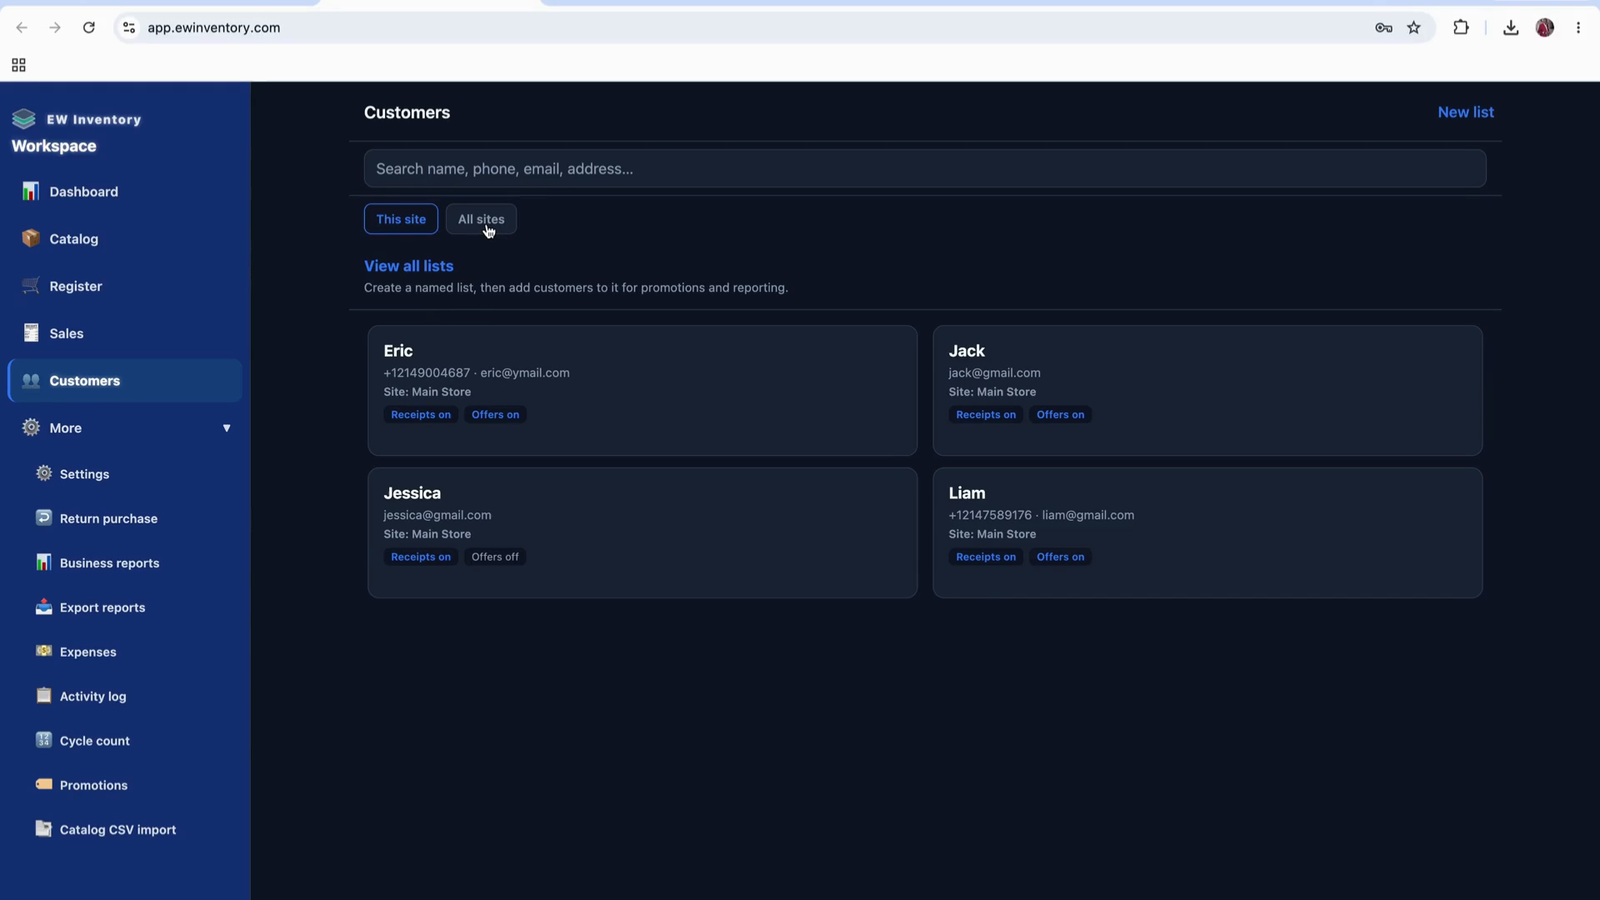
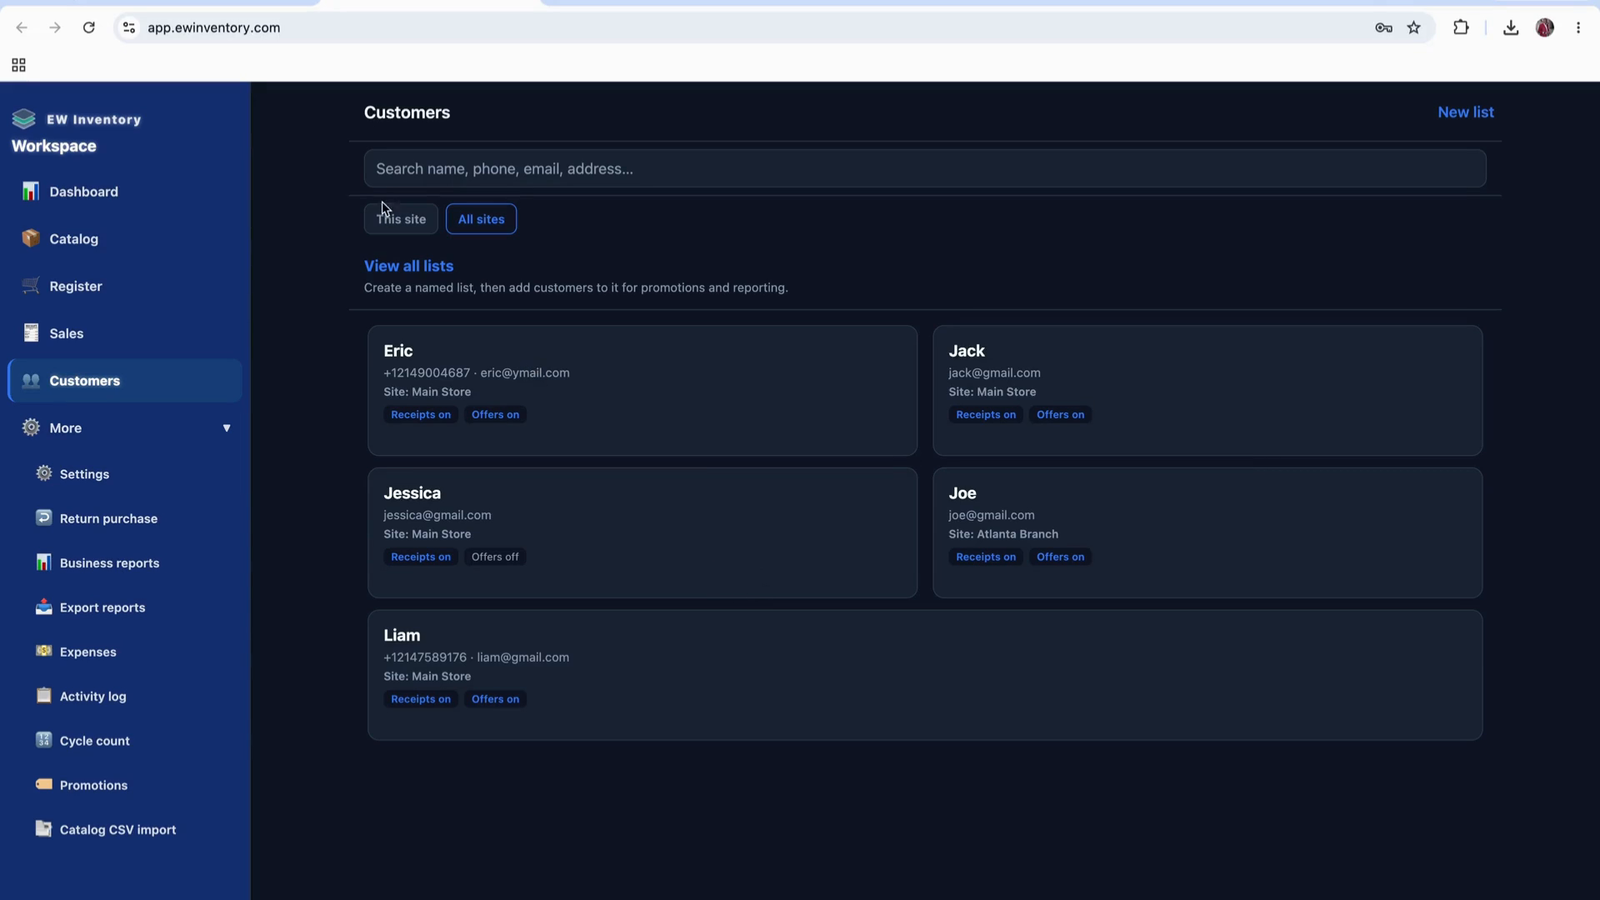
In Customer Management, you can view all customers in a list format.

For multi-site setups, you can switch between sites to see all customers associated with each site.
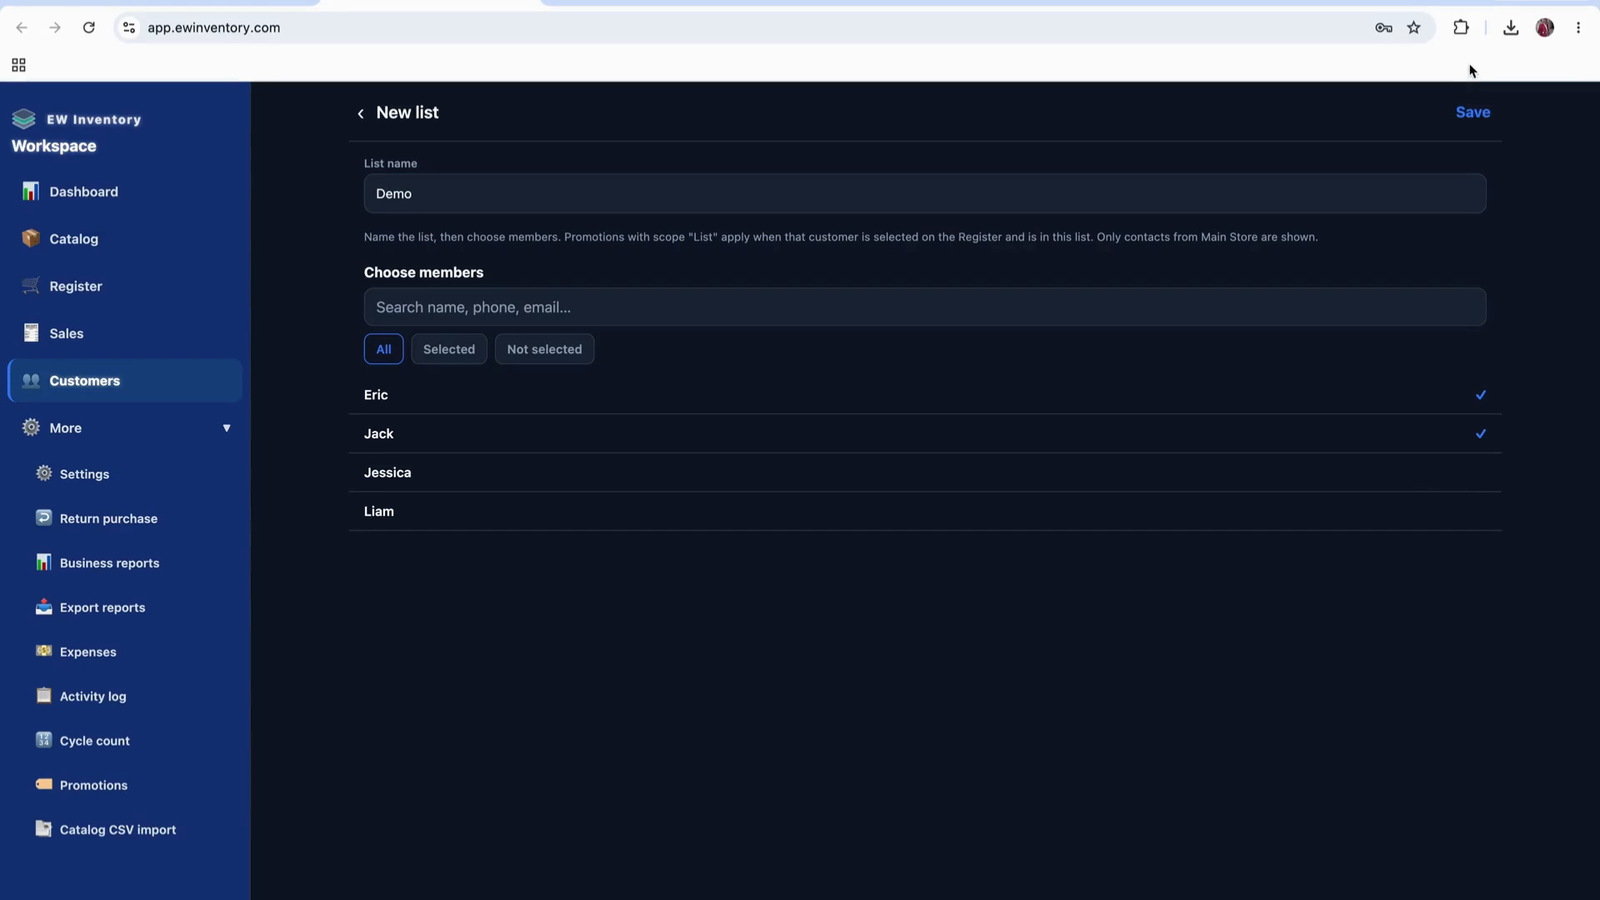
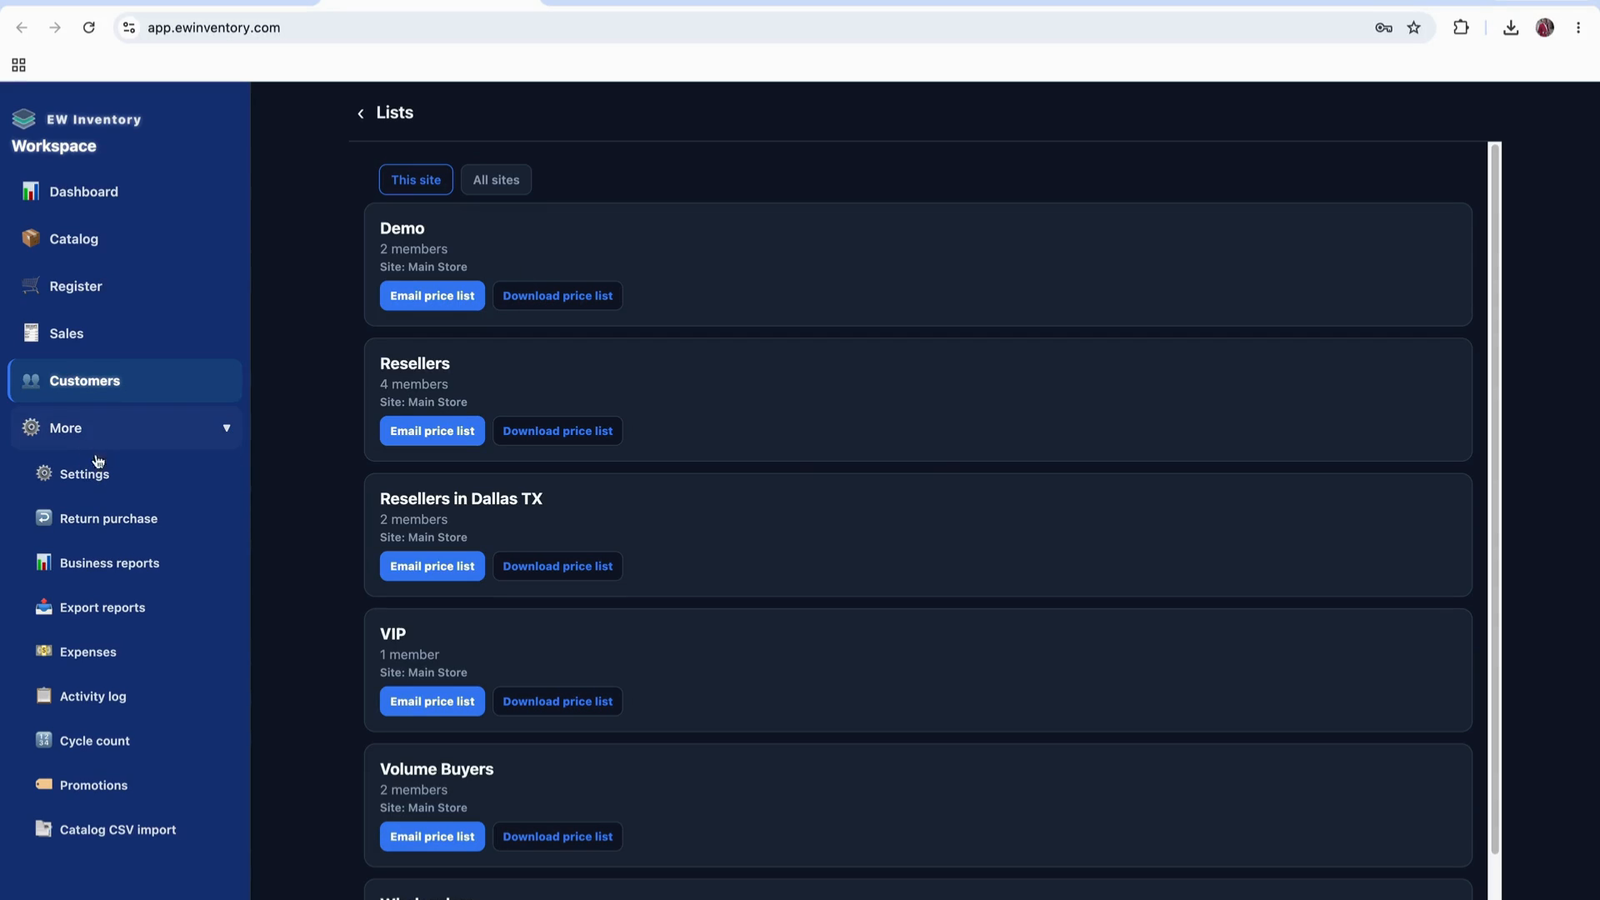
You can also work with customer lists (groups) from this area.

To create a new customer group (list), choose New List.

Enter a list name (e.g., “Demo”) and select which customers should belong to this group. You can select a few customers or all customers as needed.
Click Save to create the list.
Once created, you can apply promotions to the entire group or to individual customers.
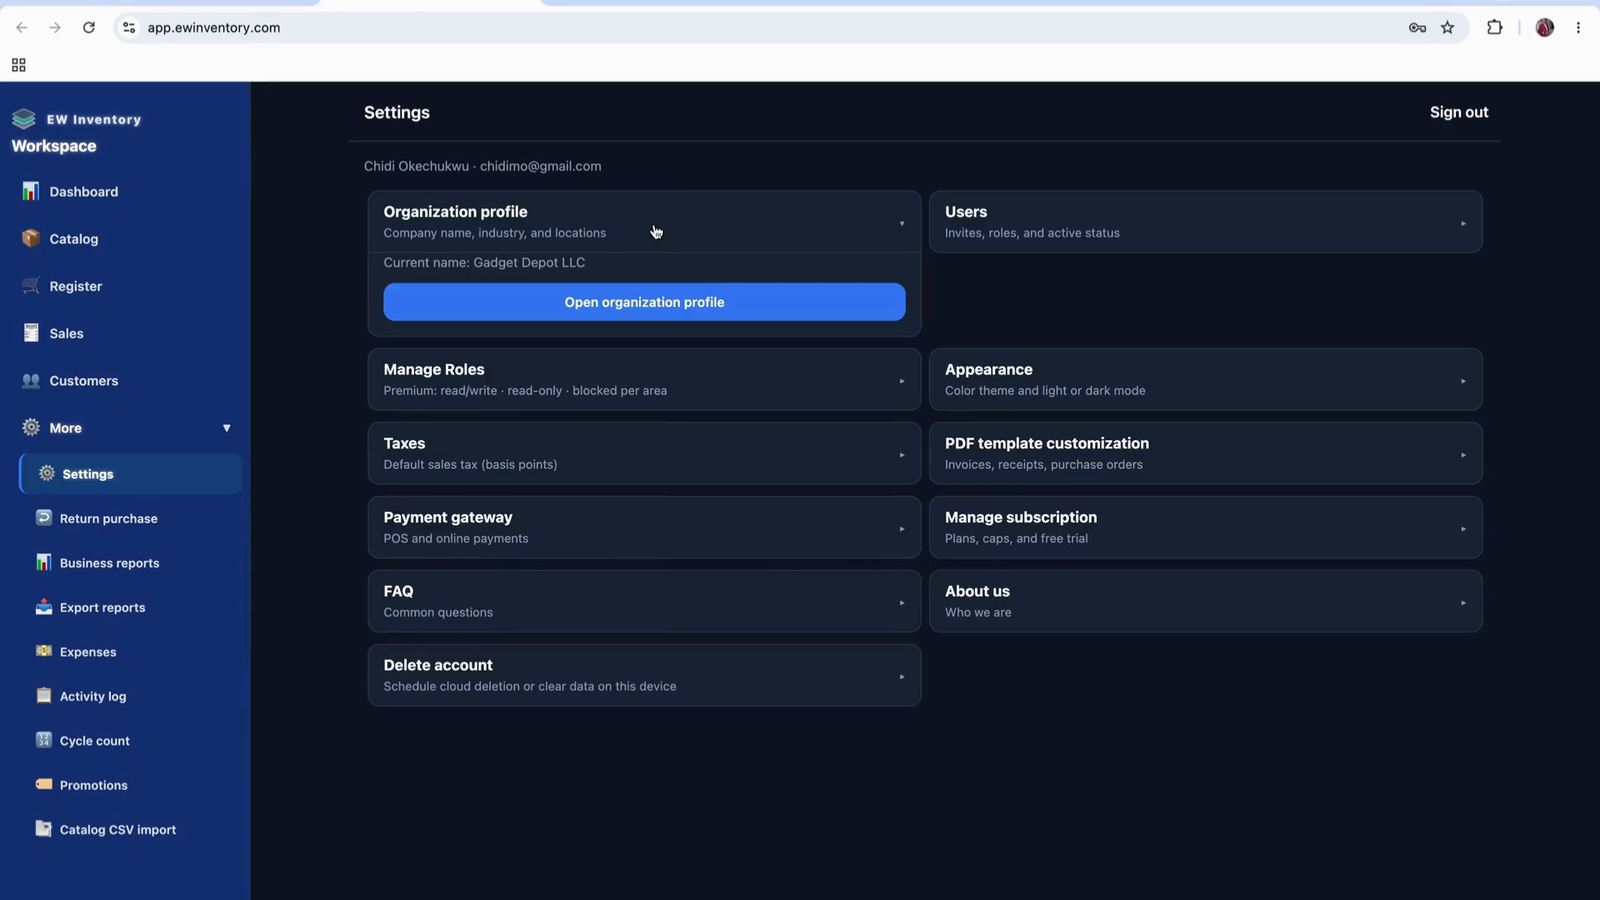
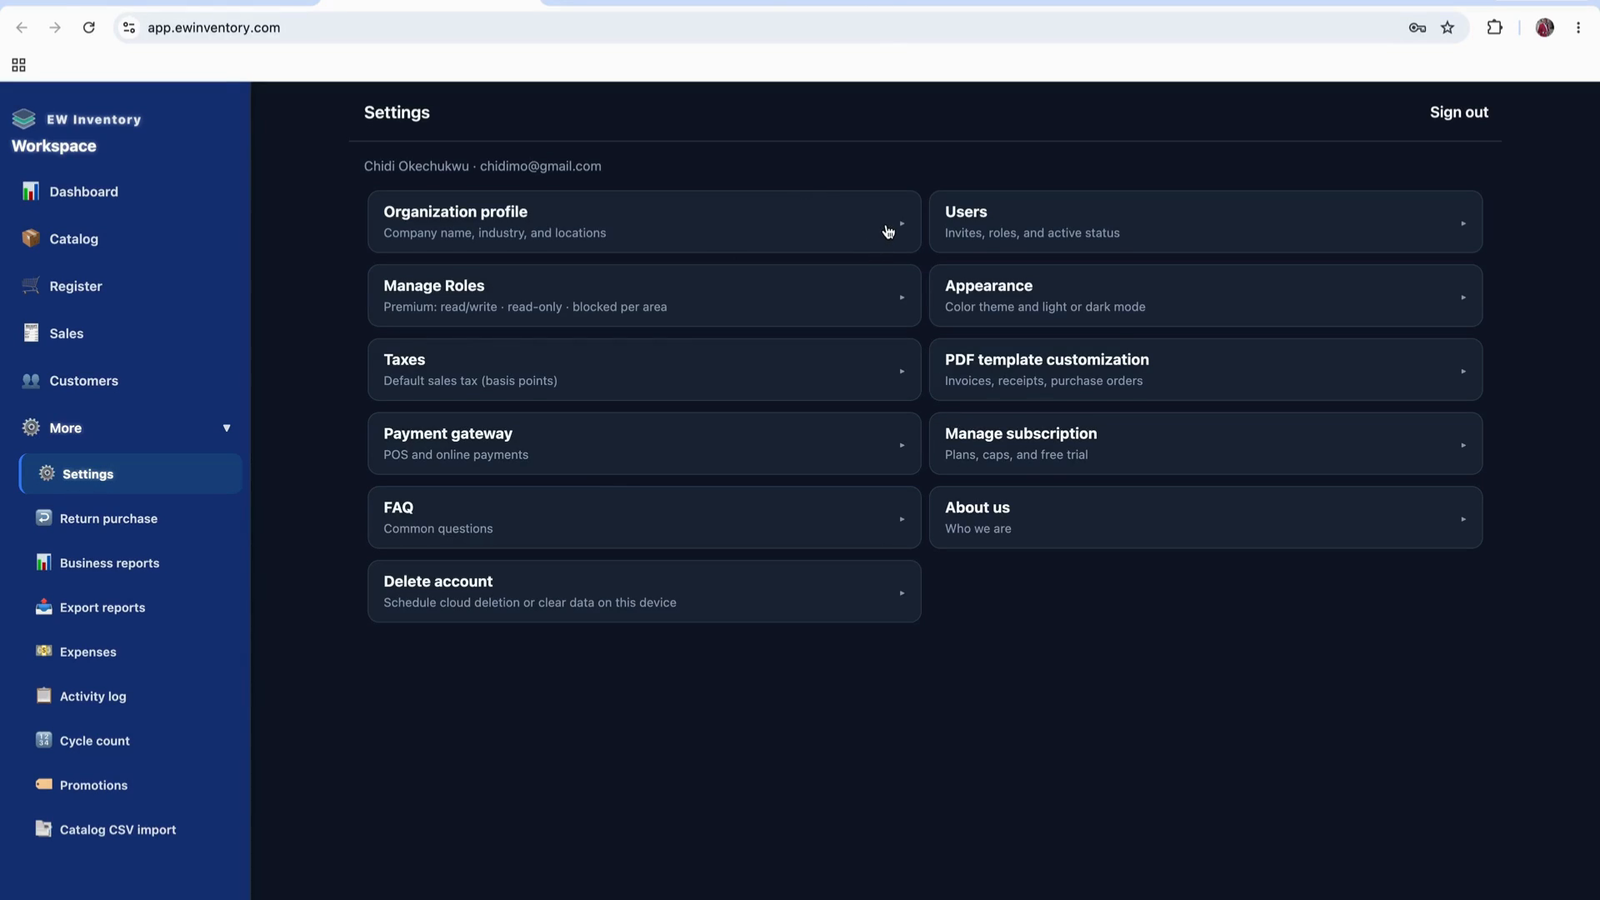
Under Settings, you will find:
In Organization Profile, configure your organization information as explained earlier (company details, branding, etc.).

Use the Users section to invite team members into your organization so they can participate in sales and record-keeping.
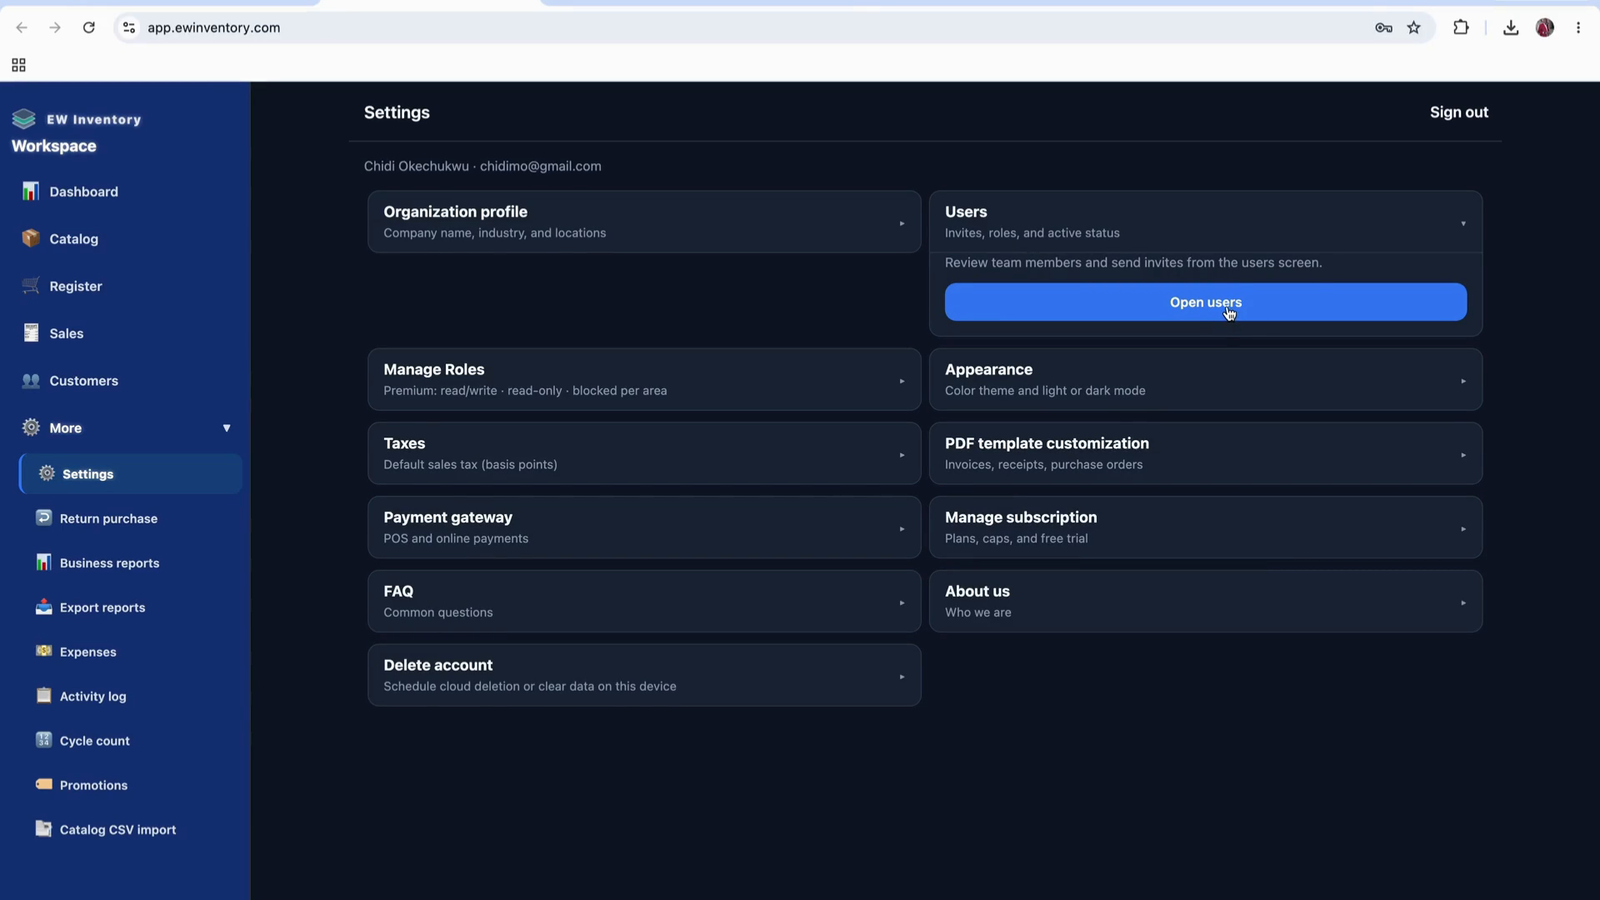
Click to add a user, then send them an invite. Users should not sign into the app without first receiving an invite.
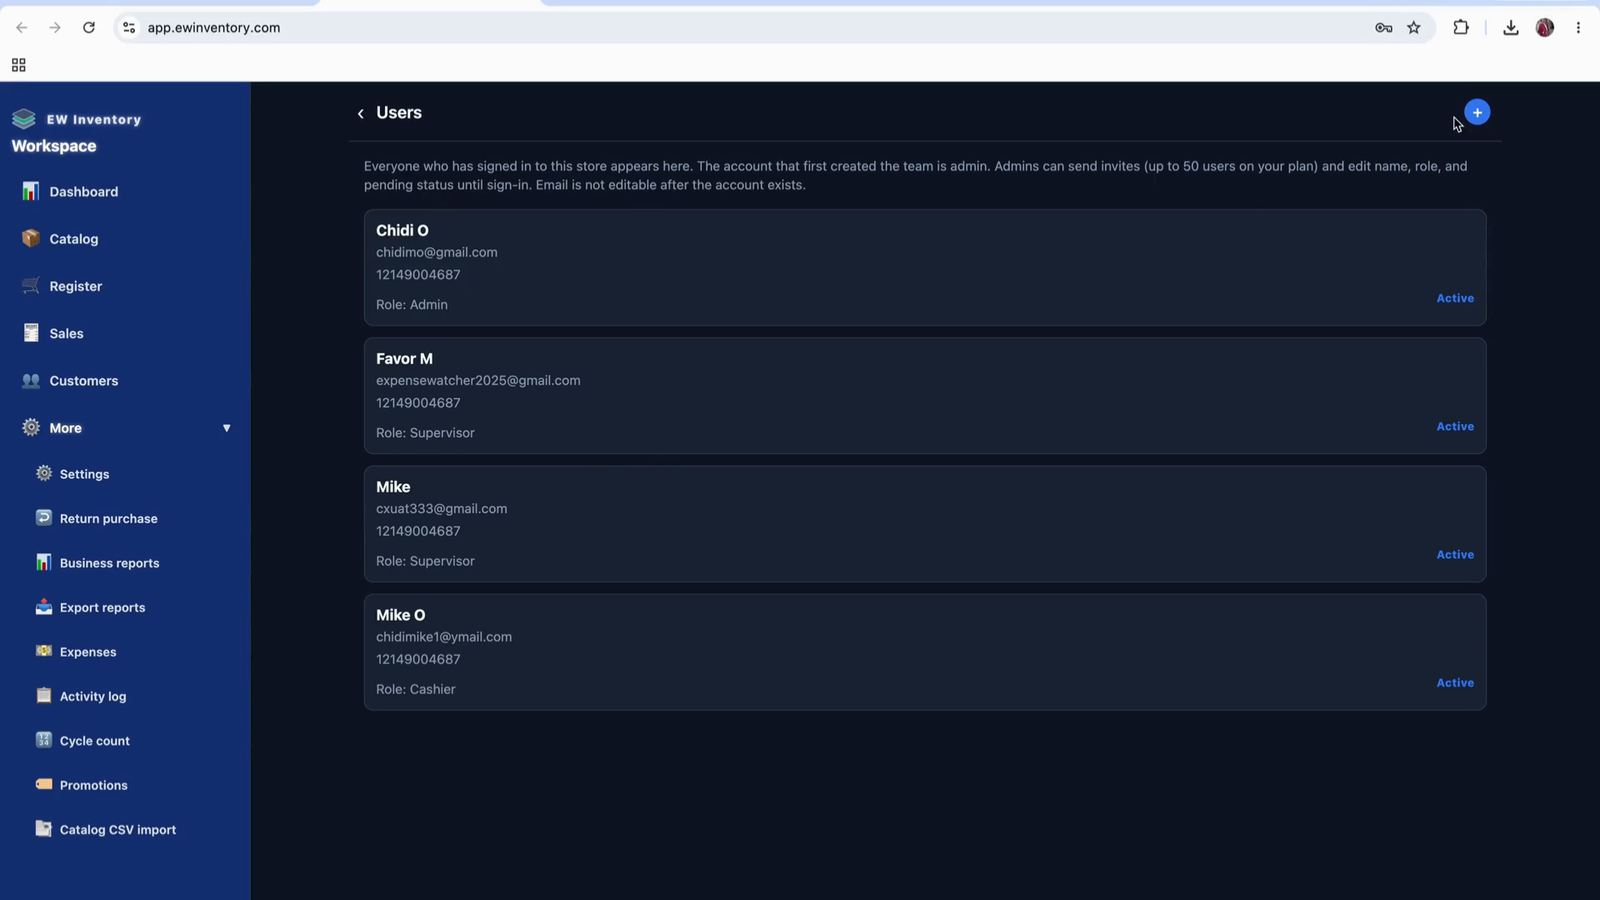
Create the user profile (name, email), and assign a role such as Manager or Cashier.
You can also create and use custom roles to control access to sensitive information. This lets you restrict certain data to admins or specific user groups.
Send the invitation to complete the user setup.
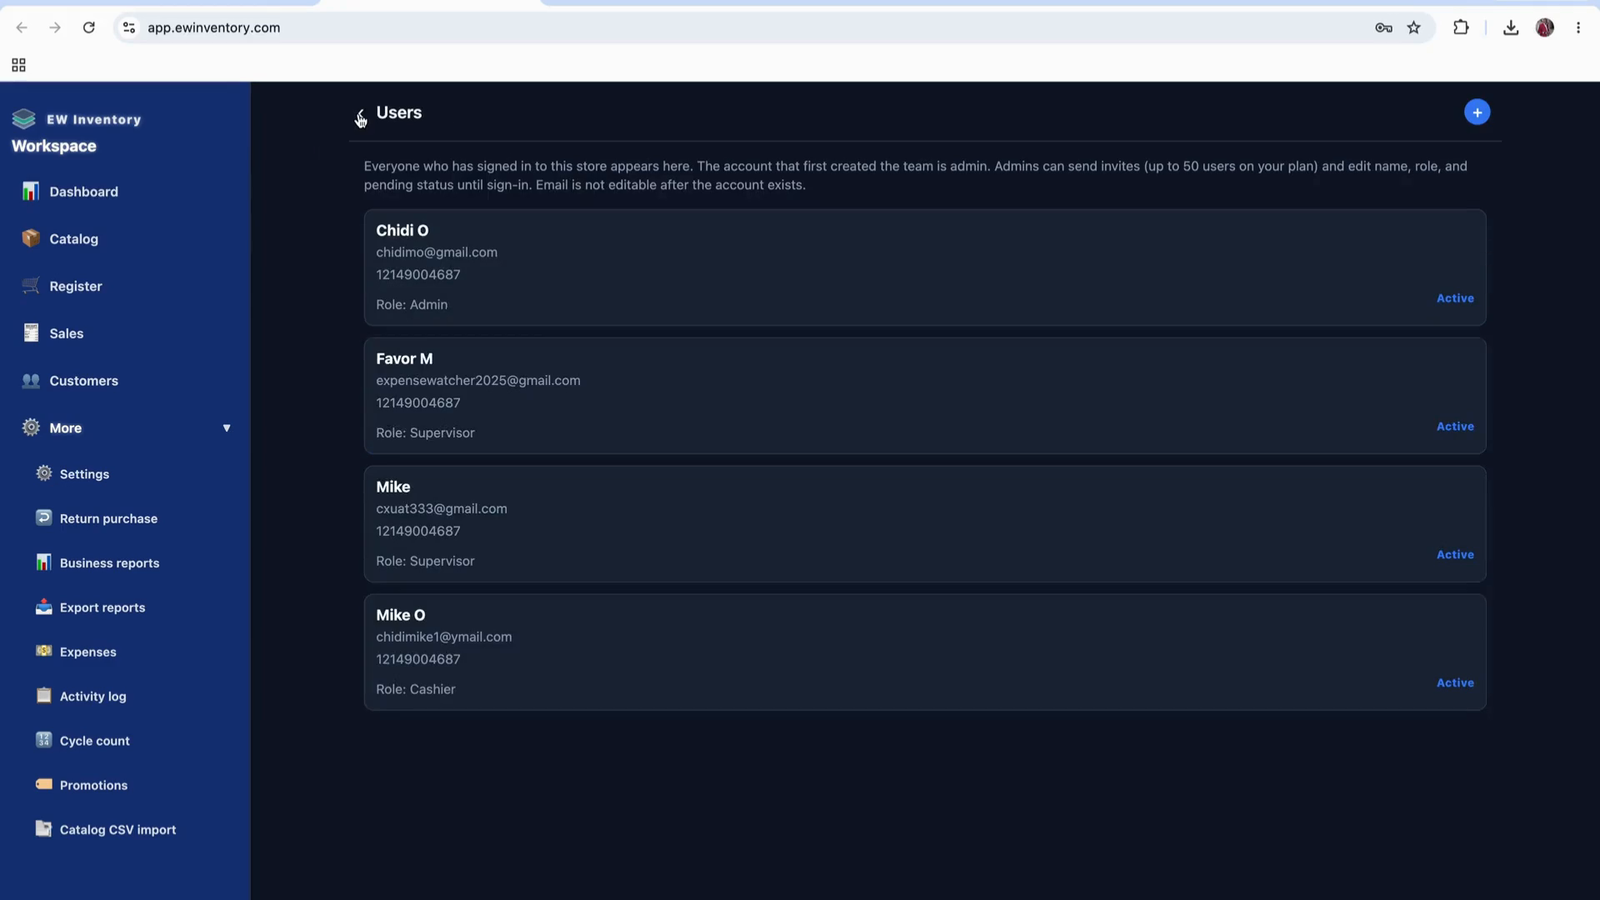
You can then view and manage all users in the user list.

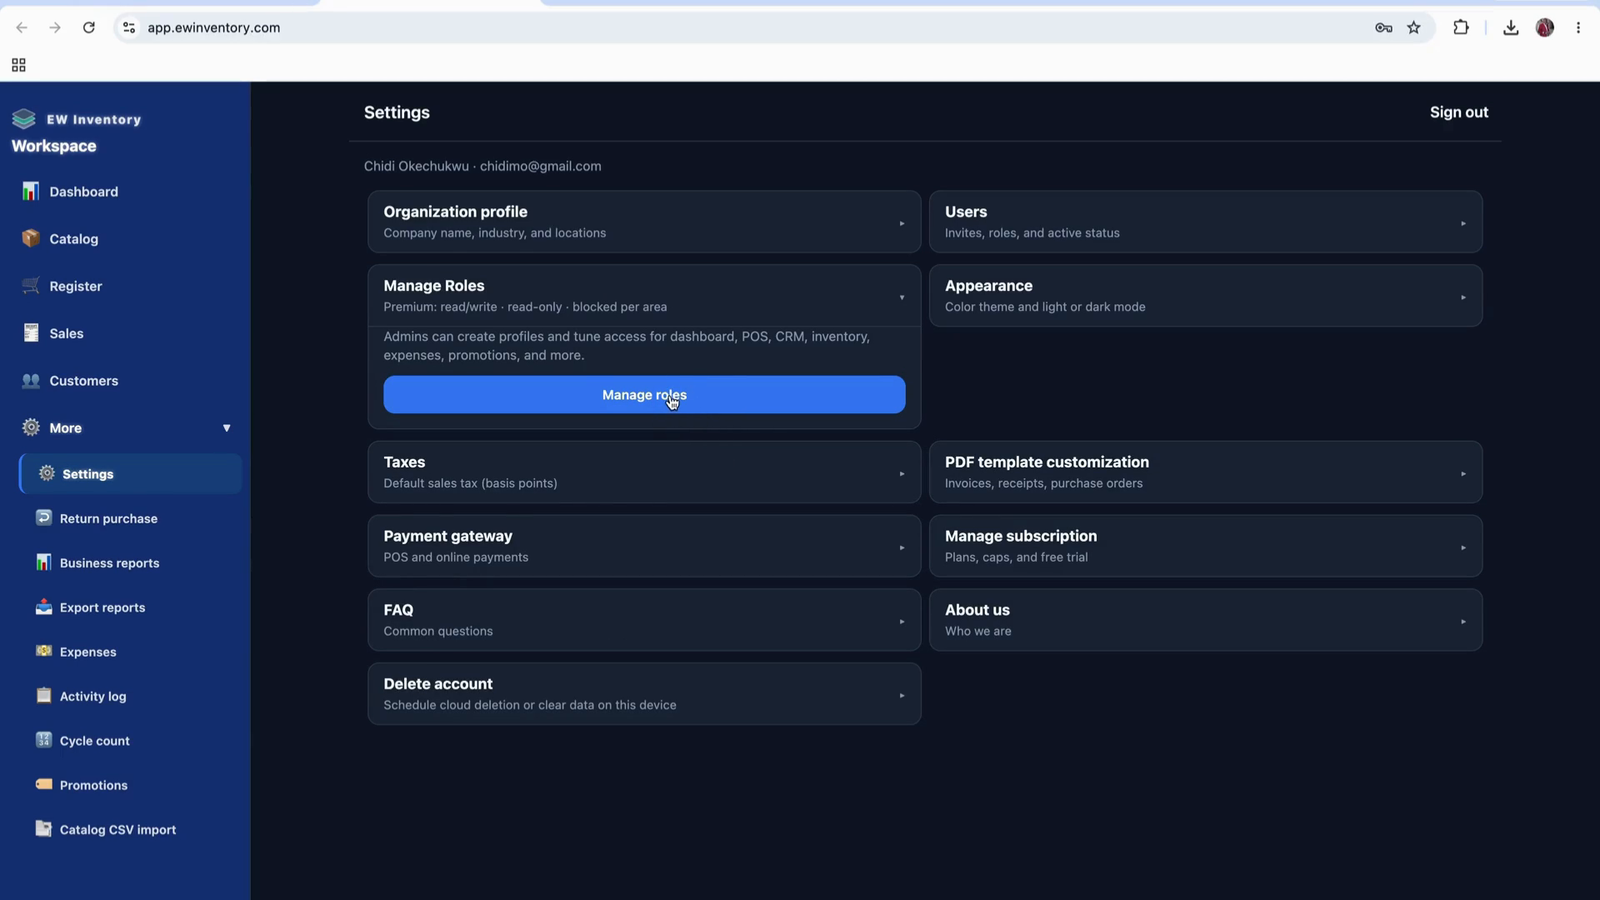
Open the Manage Role section to configure user roles.

This is where you manage user roles and define what each role can access.
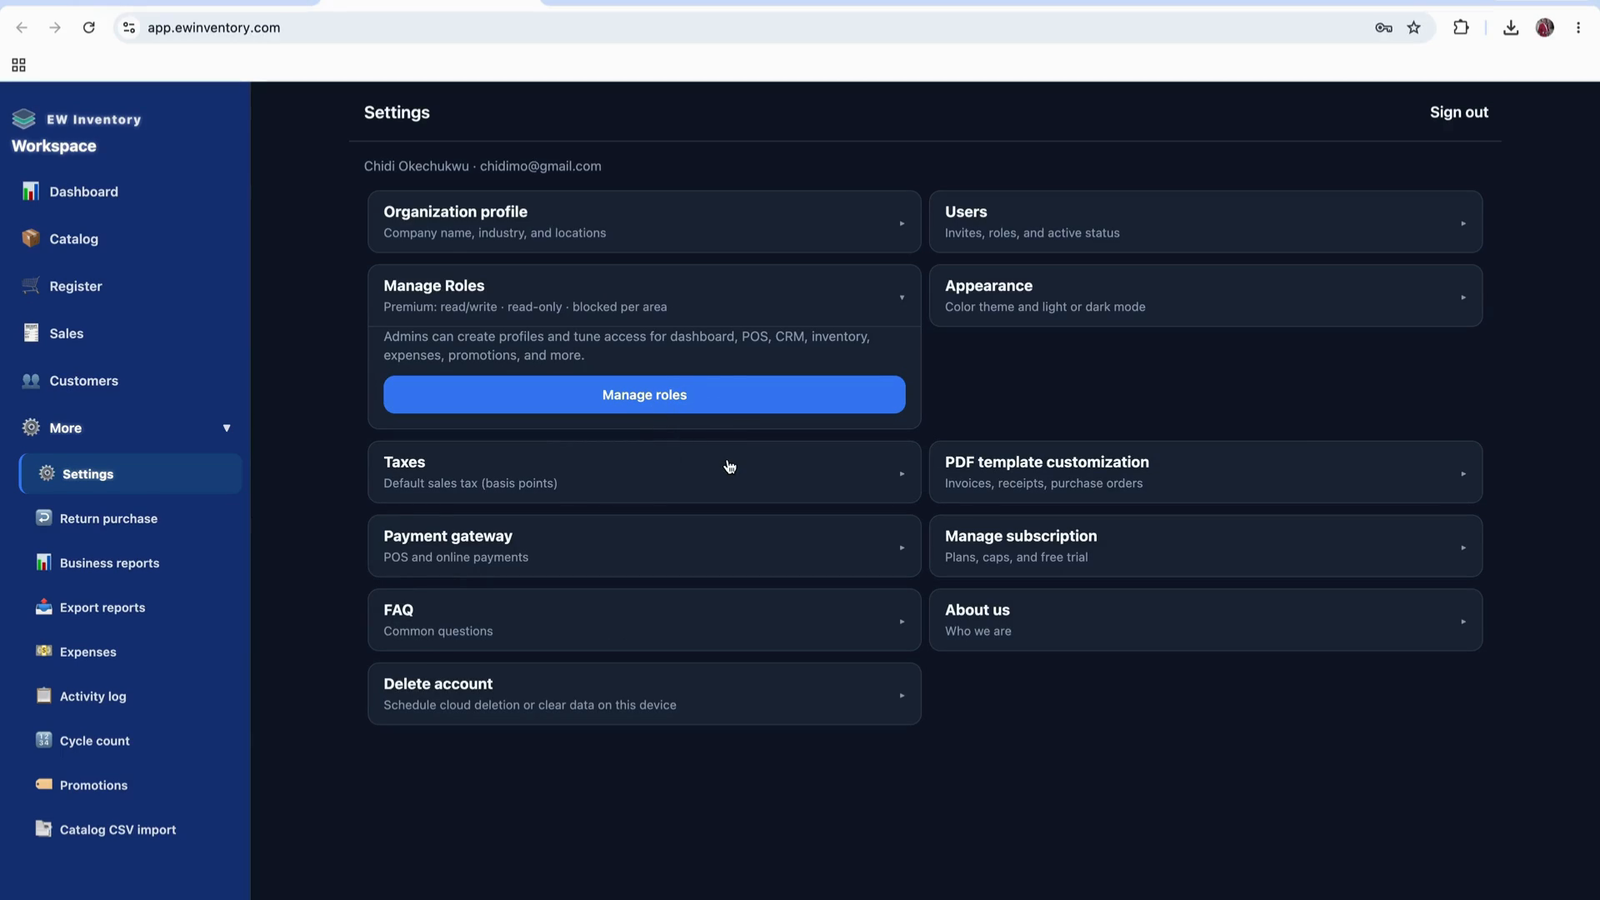
Click on Manage Role to see existing roles.
You can create a new role or edit an existing role.

When creating a new role:
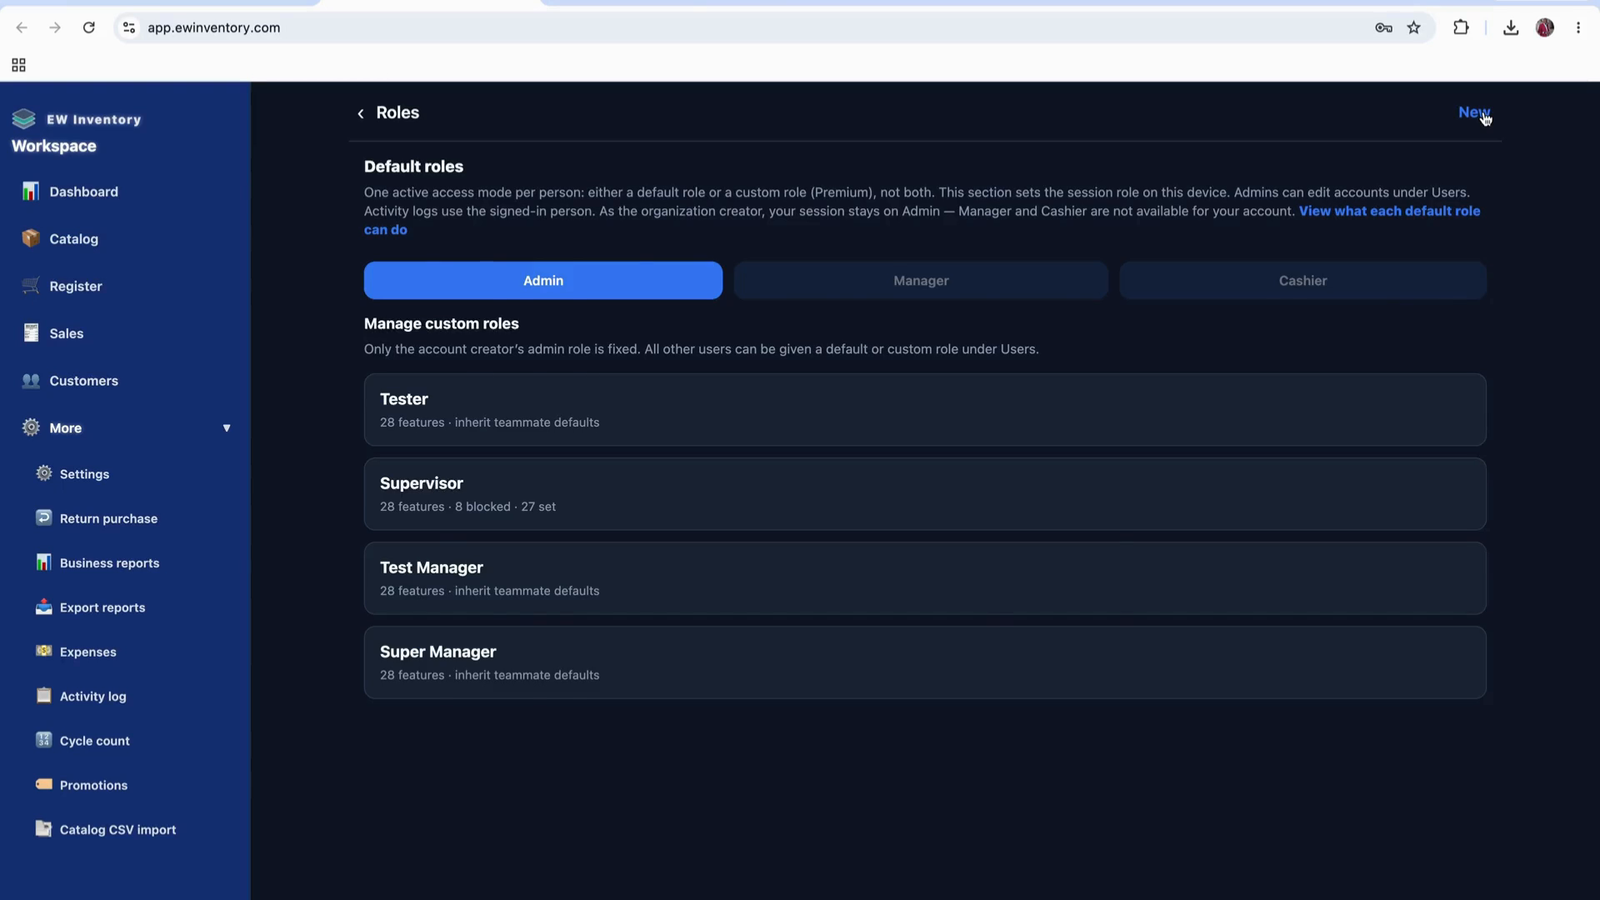
Configure all required permissions for each module to match how you want different users to interact with the app.
Run business reports, export data for bookkeeping, manage expenses, process returns, cycle counts, and review the activity log.
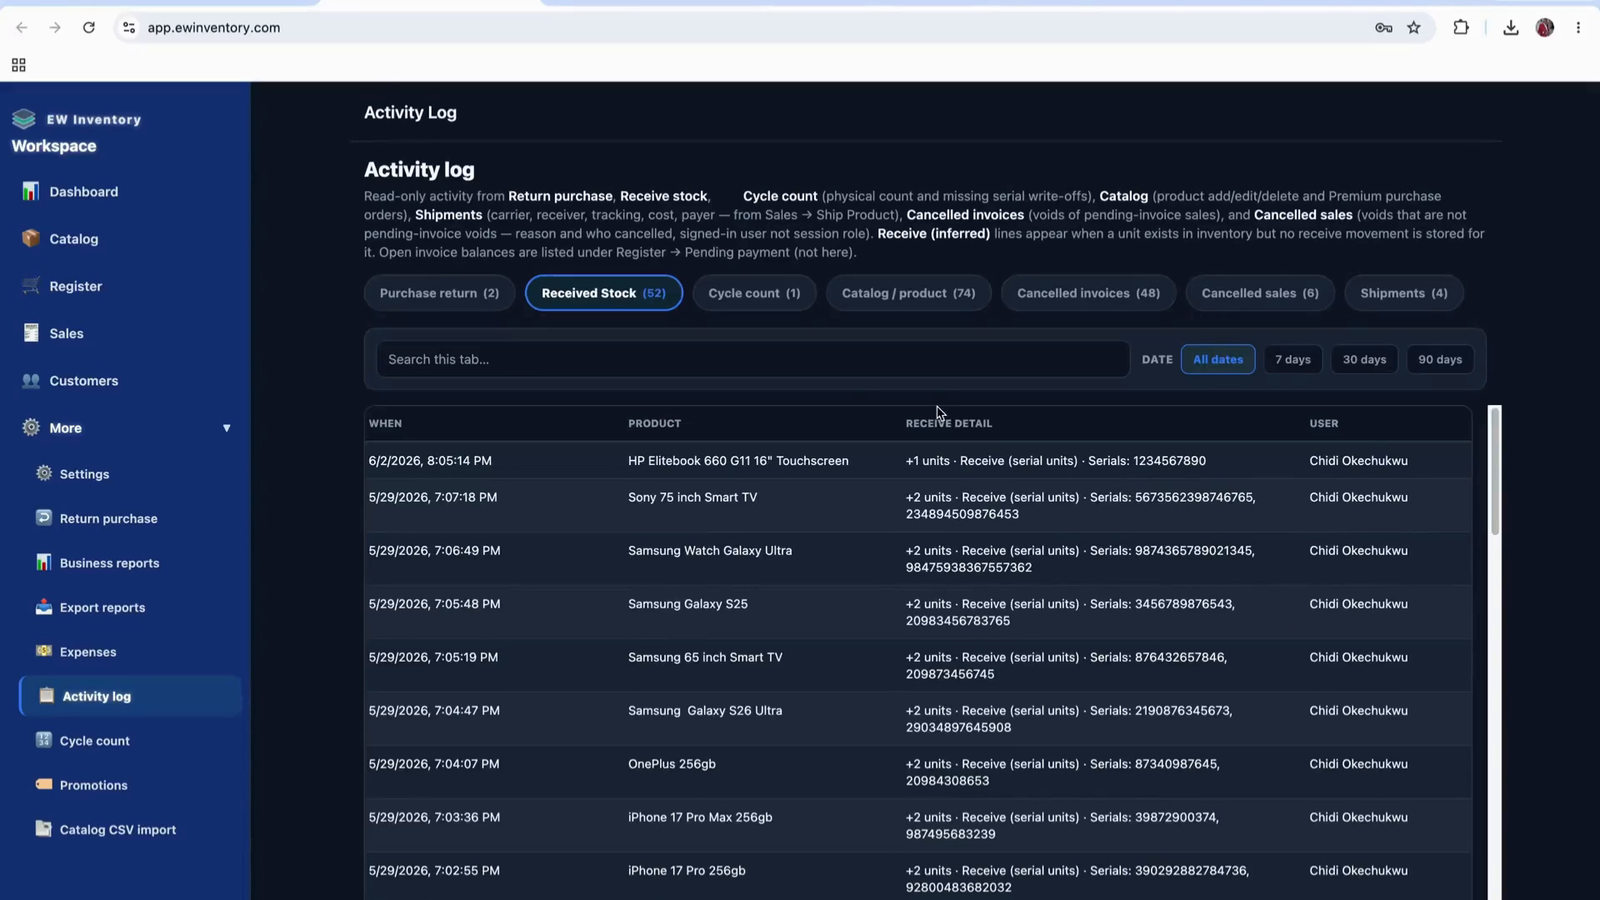
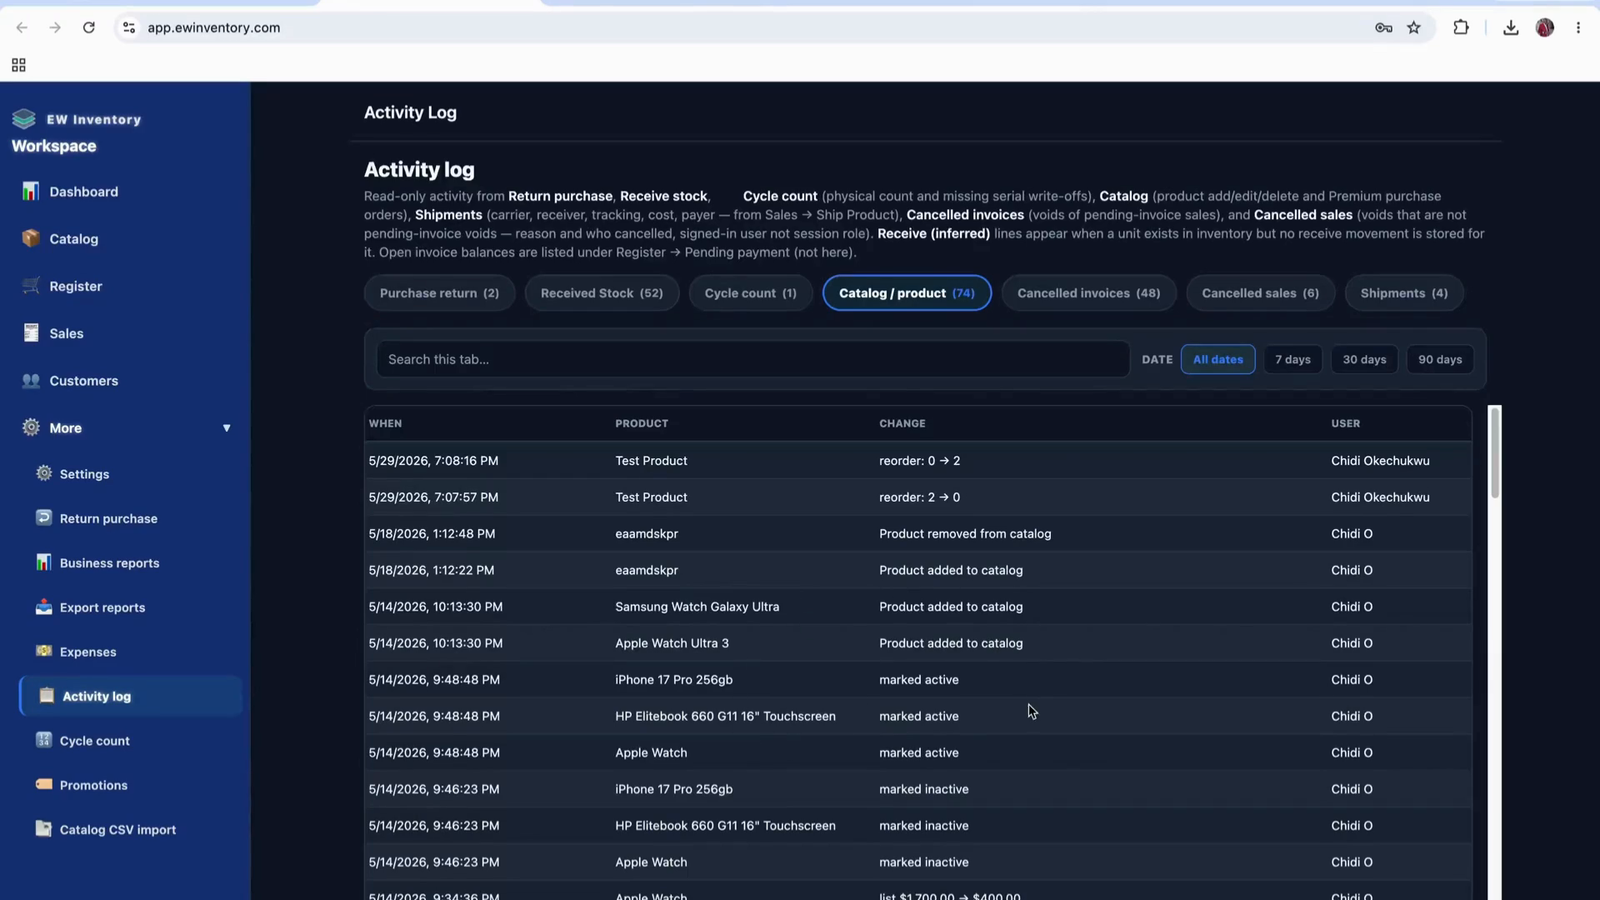
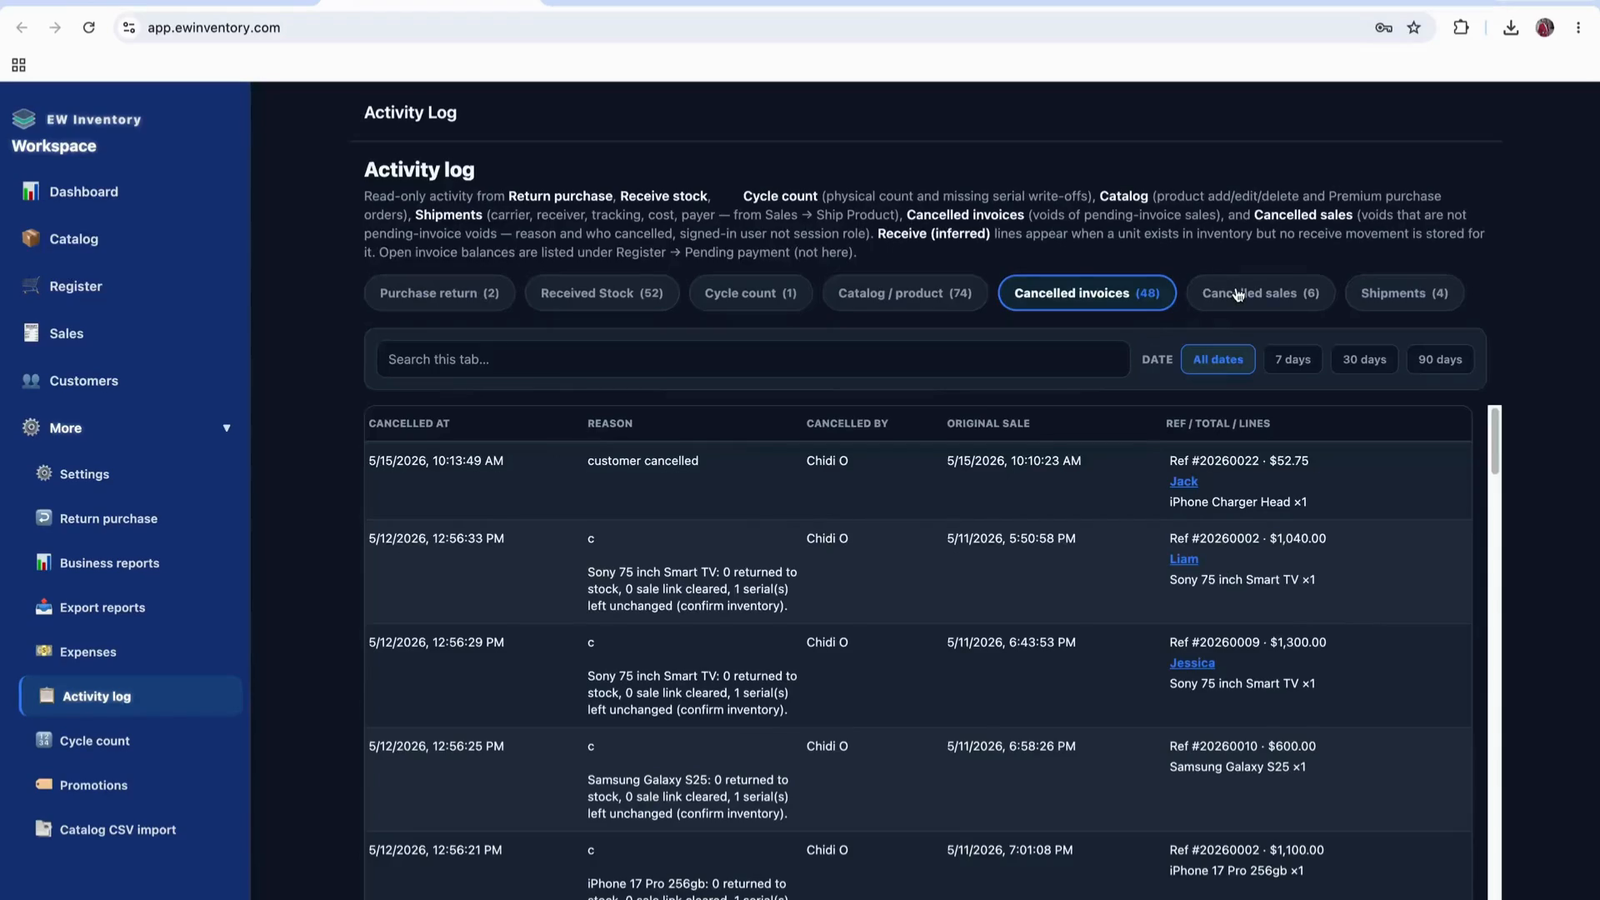
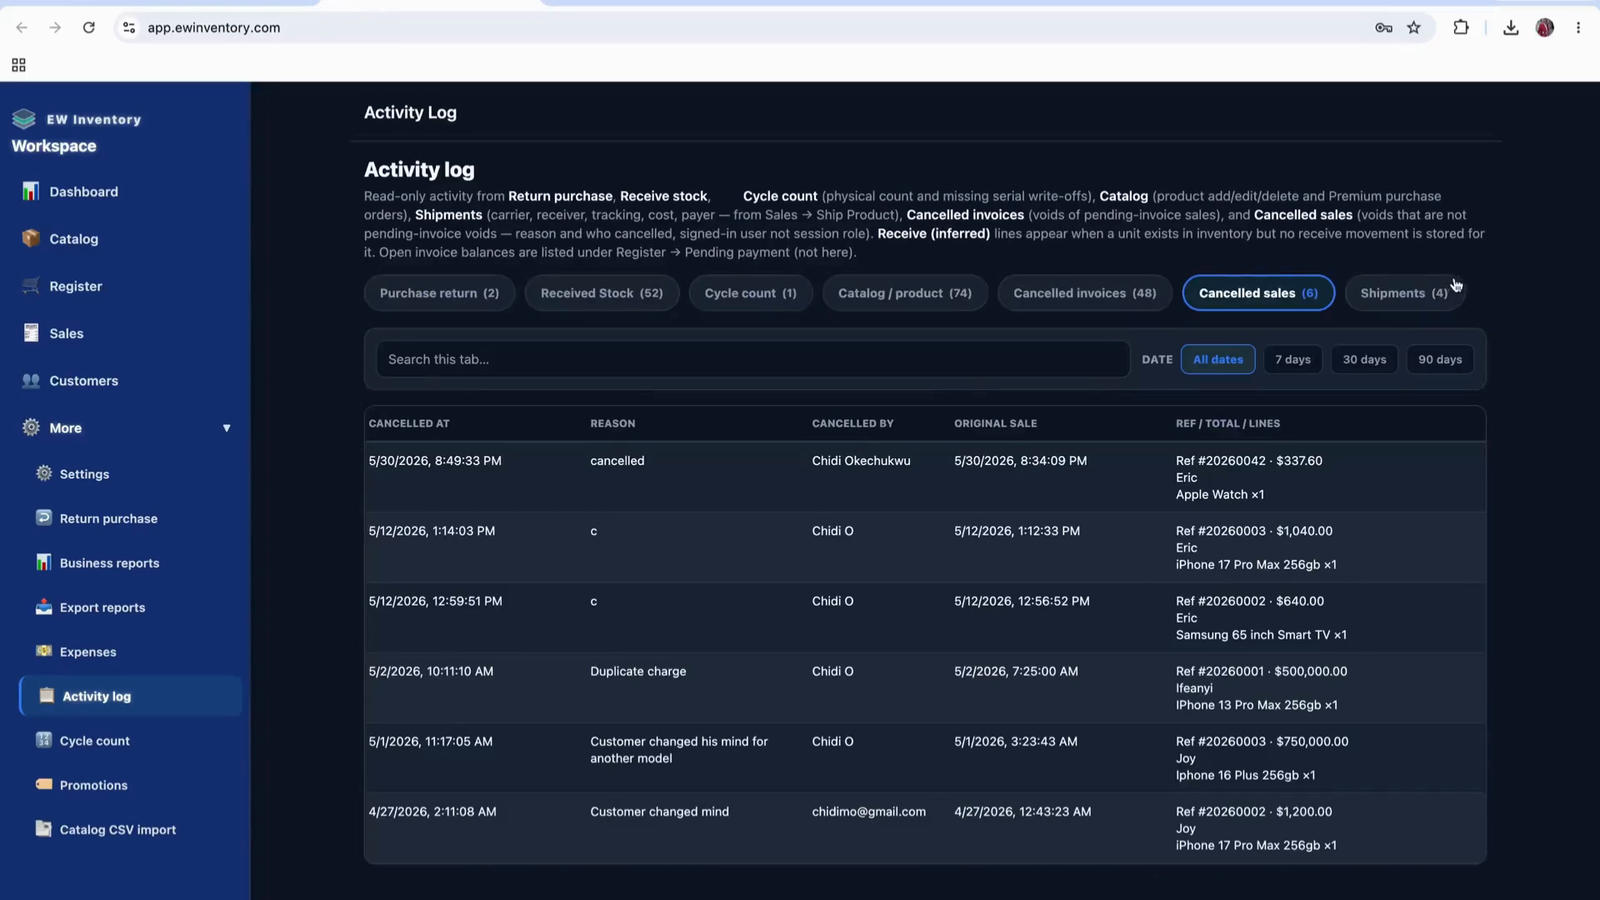
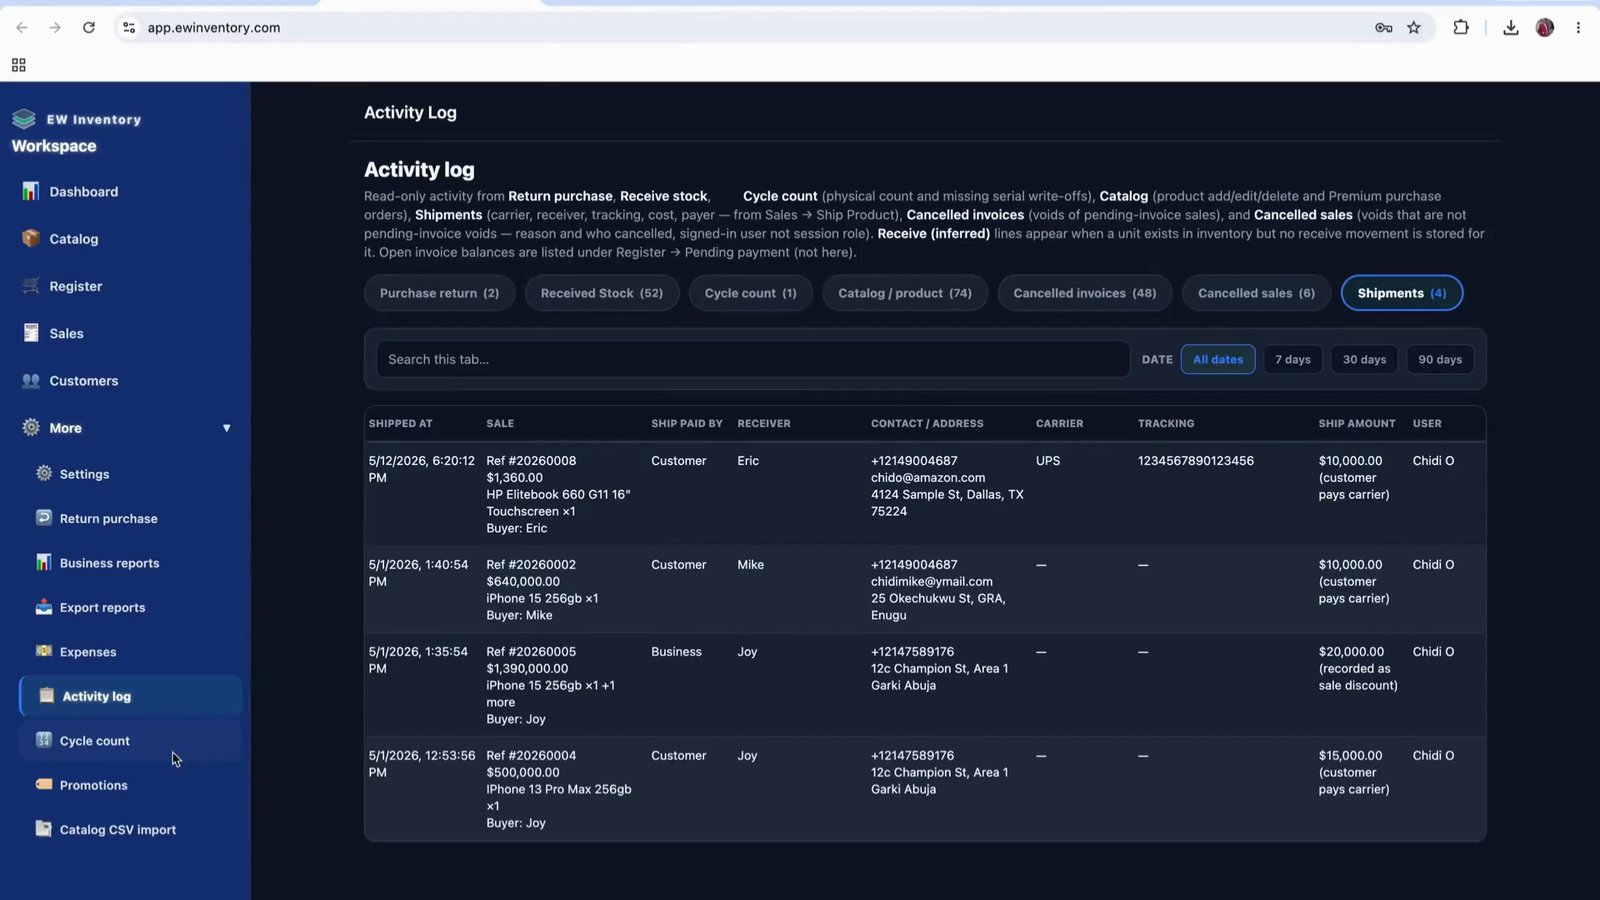
The Activity Log page provides managers and administrators with a centralized view of all key actions performed in the app. It records events such as purchase returns, stock receipts, cycle counts, product and catalog updates, invoice and sales cancellations, shipments, promotions, and CSV imports, helping you track user activity and maintain accurate inventory and transaction records.
The Activity Log page is available exclusively to managers/admins. Use this page to review all activities performed in the app, including changes to inventory, products, orders, and promotions.
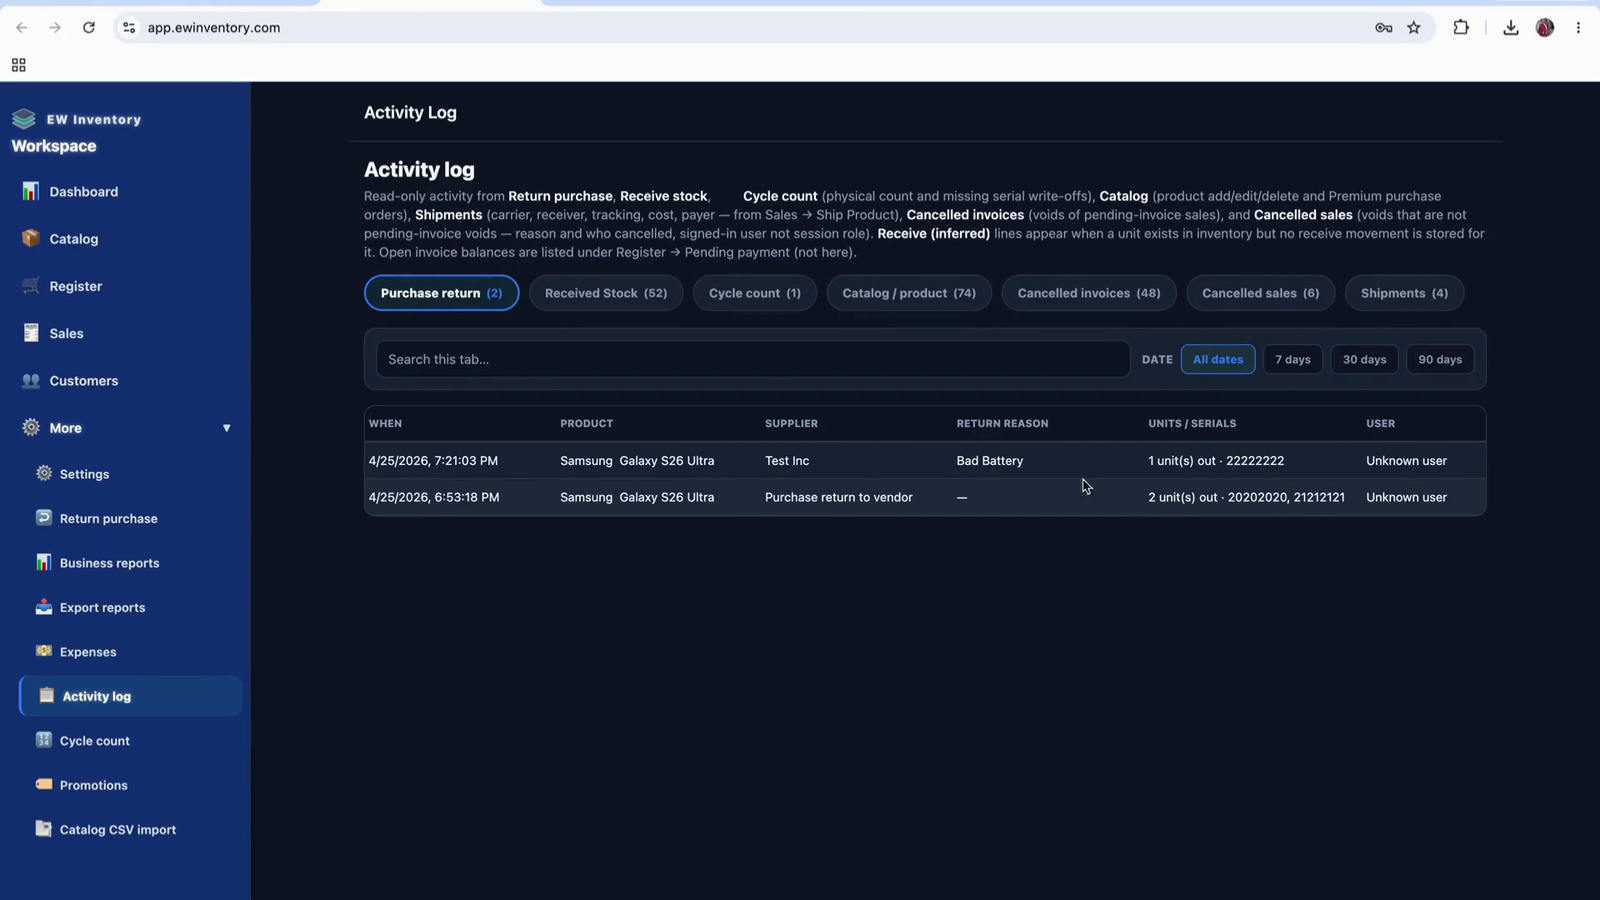
Use the Activity Log to:
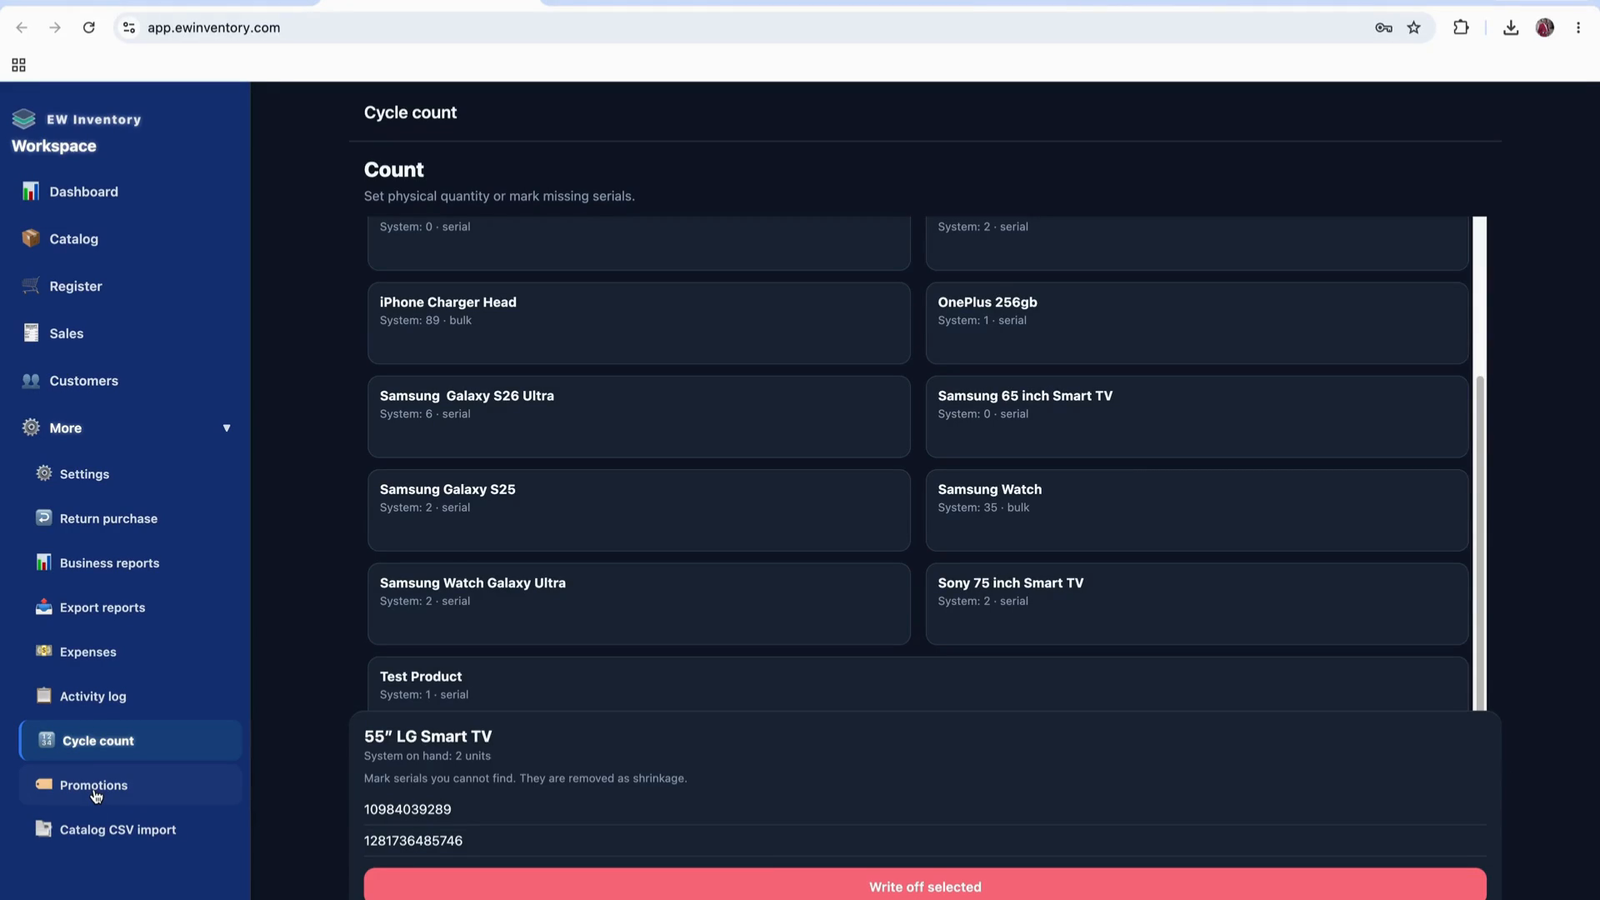
In the Cycle Count section, you can track:

In the Products and Catalogs section, you can:
Use the Activity Log to:
In the Shipments section, you can:
Use the Cycle Counts section to:
Within the Activity Log, you can also:
After reviewing the Activity Log sections (returns, stock, cycle counts, products, catalogs, cancellations, shipments, promotions, and imports), you will have a complete picture of how the app is being used and how inventory and transactions are managed.